#9 of 10 Things
All New Lightroom Users Should Know
- Post by Parker: 30 Years experience!
- No Comments


Table of Contents
Yes, it’s that time of the week again. Time for #9 out of 10 things you should know about Lightroom.
I’m talking about things you should know before you even open Lightroom! Lightroom is best known for its ability to help you edit your images.
Yet, Lightroom is more powerful than that – which you may already know if you read the first 8.
In case you missed them, here are the other 8…
#1 of 10 things all Lightroom users should know
#2 of 10 things all Lightroom users should know
#3 of 10 things all Lightroom users should know
#4 of 10 things all Lightroom users should know
#5 of 10 things all Lightroom users should know
#6 of 10 things all Lightroom users should know
#7 of 10 things all Lightroom users should know
#8 of 10 things all Lightroom users should know
In fact, not knowing these 10 “things” can affect your editing productivity. Which brings us to number 9.
Get this wrong, and you’ve wasted all your time.
Drum roll, please….
Number 9 Is All About Color
Without accurate color, you mine as well just edit blindfolded.
Color is a CRUCIAL part of your editing workflow.
Imagine editing 100,567 photos (o.k, maybe over a couple of years), and you realize that your color settings are incorrect.
OMG! Your heart skips a beat, and you wonder…
Do I have to re-edit all 100,567 photos? Possibly. That’s up to you.
Wait!
Before we get into Lightroom, we have some color settings on your camera we need to discuss first.
Although, this post couldn’t possibly cover every specific type of camera, let’s just keep it simple.
Most prosumer (and all pro cameras) should allow you to select your color profile; sRGB or Adobe RGB.
Didn’t know you had a choice? Or maybe you don’t know which one to choose? Sigh…
Again, camera settings are beyond the scope of this post.
For, now just stick with sRGB.
We can change this once we are in Lightroom (providing you shoot in RAW and not JPG).
Which is why we started with your camera first.
You should also set the Picture Control (as described, in the Menu, for Nikon users).
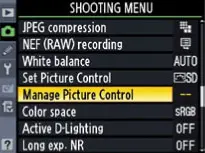
Nikon users have; Standard, Neutral and Vivid.
If you’re a Canon user, please provide your options in the comments (please and thank you).
You may also have the option to customize the settings for your personal preference. Make your choices and save.
Another thing we have to discuss before opening Lightroom is…
Your Monitor
My monitor?
Yes, your monitor.
Your monitor can bring your editing productivity to a halt! Let’s talk about what that could be and fix it before we even edit our first photo.
Sorry, I know color is not a hot topic, and I’ll try not to put you to sleep.
Ready? Cool, let’s do it…
Chances are, what you see on your monitor is not what you’re going to see when you make a print. There are a ton of factors that can affect what you see; the age of your monitor, type of monitor, ambient light, color profile, and more.
If your monitor is not in sync (not the band – haha!) with your output device, then you’re wasting your time editing!
That is why “Color” is crucial.
Let’s first talk about ambient light. Under what kind of light are you editing your photos…
Ambient Light
Natural light & at what time of day?
Is it morning, afternoon, or night?
What time of year?
Winter, Spring, Summer, or Fall?
Is it cloudy, and how much?
Is it partly cloudy, thunderstorm, or is it sunny?
What type of artificial light is in your office?
Fluorescent, halogen, incandescent, or a combination of more than one?
Each type of light has its own color temperature.
Even the time of year (and time of day) will have different quality of light and a different temperature.
So, why is this important? Well, that natural or artificial light is being cast onto your monitor.
Which is going to affect what you see.
Have you ever edited a photo, then you come back to it the next day or the following month and wonder what you were thinking?
It could be the light was different from one day to the next.
Even the intensity of the light could make you see something different; a bright amount of light (like the sun), on your monitor, will show shadow and highlight details differently than if you edited in the dark.
O.k., we can’t move the sun or maybe even change the type of artificial light.
Now what? Here are a couple of options to fix it…
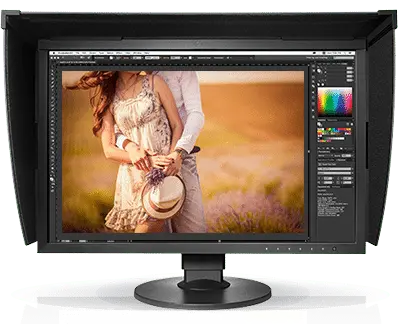
A Monitor Hood?
Choose a different monitor with a “hood.” My personal choice – Eizo.
If that’s out of your price range, then consider changing your artificial light to daylight balanced bulbs.
Oh, and make sure to close the shutters too.
Another option is to do visual checks with actual printed photos and compare them to your monitor.
If the print looks good, then you’re all set.
Just make sure the ambient light is consistent at all times of the day.
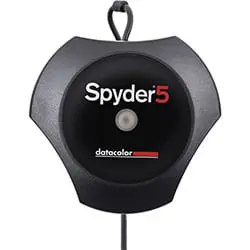
Color Calibrate Your Monitor!
Doing this will ensure that your monitor is displaying the proper color, contrast, and brightness.
Although you can eyeball it, with the preference settings on your monitor, it’s best to purchase a device for precise and accurate results.
My favorite is… the Spyder.
Work on Color Management
This gets a bit tricky. The amount of info related to this topic is beyond the scope of this post.
Just know that depending on your input or output device, you’ll need to set up a color profile for it.
You can save your ICC profile for each type of output device you may use.
For example, different pro labs, home printer, color press, etc.. (I go into more detail here).
Hey! We Can Now Open Lightroom
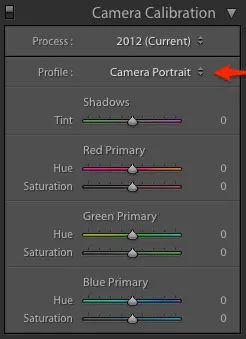
Let me now introduce you to the Camera Calibration panel.
This is one of the most overlooked panels in all of Lightroom.
In this panel, is where you set your color and contrast settings for your RAW images.
Ever wonder why your RAW images look different in Lightroom vs. your camera’s LCD? Let’s find out why…
Go to Profile and click on the word next to it – you’ll get a drop-down menu of different profiles (if you shot in RAW).
These profiles are dependent on the type of camera you’re using.
By default, Adobe Standard is selected, and this is why your photos look different in Lightroom.
These profiles render color and the tone curve for your image based on the profile selected.
Therefore, each profile will render your image differently.
Try It Out
Select each of the different profiles to see the new rendition.
For me, I use the Camera Portrait (Nikon) as my profile of choice.
Every time I import new photos (from that specific camera – Lightroom knows the serial number), that camera profile is selected by default.
To set a specific profile as your default, select the one you want to use and then follow these steps…
- Hold down your alt or option key
- Click on the button (bottom of Camera Calibration panel) – “Set Default.”
- You’ll get a warning. Read it. Agree? Then, click – Update to Current Settings.
This will not update your entire catalog of images.
You’ll need to create a Lightroom preset and apply it to all photos (if you want).
Remember, every time you input new images, that profile will be applied as the default.
Have more than one camera?
You’ll need to set that profile, as the default, for every camera.
One last thing on the Camera Calibration panel.
In case your wondering about all those sliders…
They are there to allow you to customize and create your own camera profile.
Does a specific camera over saturate a particular color?
This sometimes happens from one sensor to another (maybe you got a bad batch of sensors).
Or maybe you want a more vivid and over-saturated blue color?
Adjust and save as your default.
I hope you enjoyed today’s edition of “color”!
This post doesn’t even come close to touching the surface of color.
No worries ,though.
This post is a good starting point, and your journey on color is one you’ll learn more of as you begin to hone your craft.
Have an awesome day!


