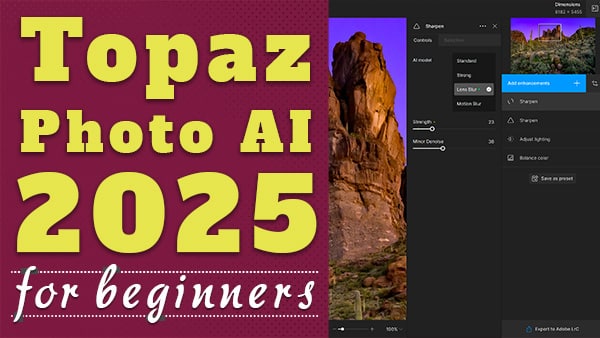
Topaz Photo AI 3 Complete Guide for Beginners
Subscribe
In this Topaz Photo AI version three complete guide, you'll learn everything you need to know to maximize its potential, including, but not limited to, this list right here.

I've also added timestamps to the description for your convenience.

If you stay till the end, I'll share some pro tips on customizing Topaz Photo AI to meet your specific needs, which will help speed up your workflow.

Alright, if you're ready, let's do it.
Getting Started with Topaz Photo AI
So Topaz Photo AI can be used as a standalone app or as a plugin in Photoshop, Lightroom, Affinity Photo, and many others.

As a standalone, you can drag and drop your images on the interface or browse for the file by clicking anywhere on the interface.

You also have access to recent files on the right side, and once it opens the file, you'll get the Topaz Photo AI editing interface.

And we'll go over all of this in just a moment.

So, using Topaz Photo AI as a plugin in your favorite editing software is easy.

I'll show you how to access it in Lightroom Classic, and I’ve included a link to documentation and instructions for accessing it in other software in the description below.

However, it works exactly the same once you open an image or multiple images from your editing app.

So, let's get some images into Topaz Photo AI, and I'll share some pro tips on how to use it.

If you don’t have Topaz Photo AI yet, you can download a free trial via the affiliate link in the description below.

And I appreciate everyone who has used my affiliate link.
Open Images in Topaz Photo AI
There are two ways to work with images in Topaz Photo AI, either using the original RAW file or converting your images to TIFF or JPG.

Now, there are advantages to each file format.

Let's review those so you can get the highest-quality image possible.

To work with your RAW files, go to file, plug-in extras, and select Process with Topaz Photo AI. This will open a preview of your RAW file.

After you've applied the edits, you'll export them back into your editing app of choice. Topaz Photo AI will create a new TIFF file, not a RAW file, during export.

In previous versions, it was exported as a DNG file, which is another RAW file format. Hopefully, they will bring that back soon.

Until then, I'm not a big fan of the current RAW workflow because it doesn't give me the best results.

Instead, I recommend selecting one or more images, right-clicking, choosing Edit In, and then selecting Topaz Photo AI.
the Topaz Photo AI Interface
Ok, now, before you can edit your file… Topaz Photo AI needs to analyze it, and it will automagically apply any AI edits it recommends to improve your photo.
Once you open an image or click on another image in the panel, the process status will appear on the right.
So for this one, it’s recommending…
So, here’s the list of items it’s analyzing, and if you’re like me and shoot mostly wildlife and landscapes, we don’t need Topaz Photo AI to detect faces.
So, I’ll show you how to turn that off later to speed up your workflow.
the AutoPilot
The process of analyzing your image is known as AutoPilot in Topaz Photo AI, and it’s the brain of the app.
So, the technology that Topaz Photo AI uses will determine how much noise to remove, how much to sharpen, and improve your image overall with other AI editing tools.
For example, if it detects that your photo is very small or a low-resolution file, it will automagically upscale it. We’ll talk more about upscaling in a moment.
Now, Autopilot is going to begin working on the first image in your stack, but once you click on another image, it will start analyzing that one.
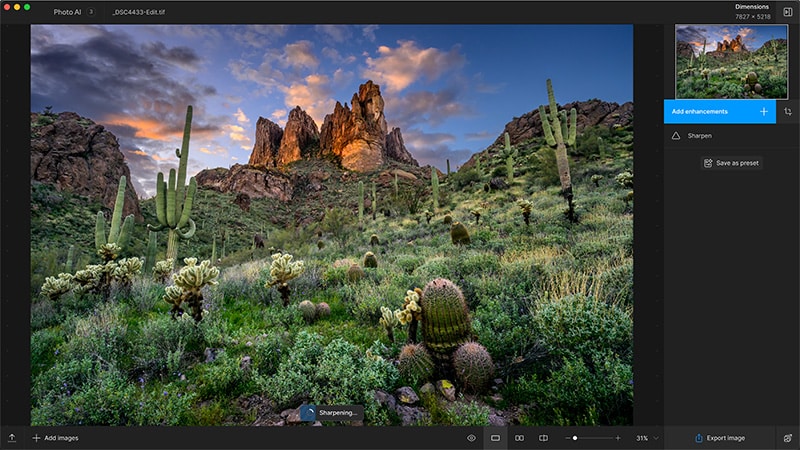
the Crop Tool
Ok, before we get into customizing the edit settings and adding other types of edits, you may want or need to crop your image.
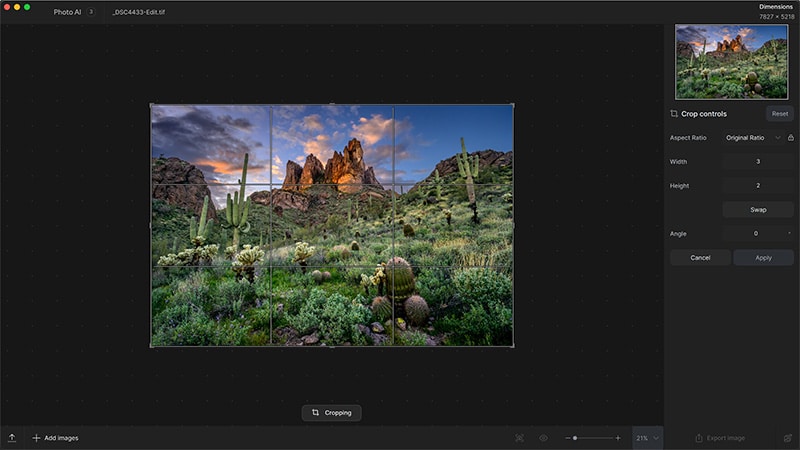
You can do that by clicking on this icon next to this blue button, which brings up the Crop interface. Let’s quickly review your options.
You can select from premade Aspect Ratios or click Custom and type in your ratio with the Width and Height.
Clicking Swap will convert from a horizontal to a vertical crop and vice versa.
The angle allows you to type in a specific number to rotate it.
Or, if you come over to the crop overlay and hover your mouse on one of the outside four corners, you can click and rotate that way.
You can also click and drag a corner or side to crop as needed, and these lines and boxes represent the Rule of Thirds to help you create a stronger composition.
For this image, which I cropped in Lightroom first, I placed the eye on this point, which creates a stronger composition.
And if you click on your photo and drag it, you can reposition it as needed.
Hit the Apply button, and Topaz Photo AI will crop your image and take you back to the editing interface.
Ok, I’m going to go back in and reset that.
the Topaz Photo AI Editing Tools
This is the moment you’ve been waiting for. It’s time to review all of the editing tools in Topaz Photo AI to create better images.

If your right panel is empty and no edits are automagically applied, click this green button to activate Autopilot.

Or, click this blue Add Enhancements button to get a menu of all your editing tools.
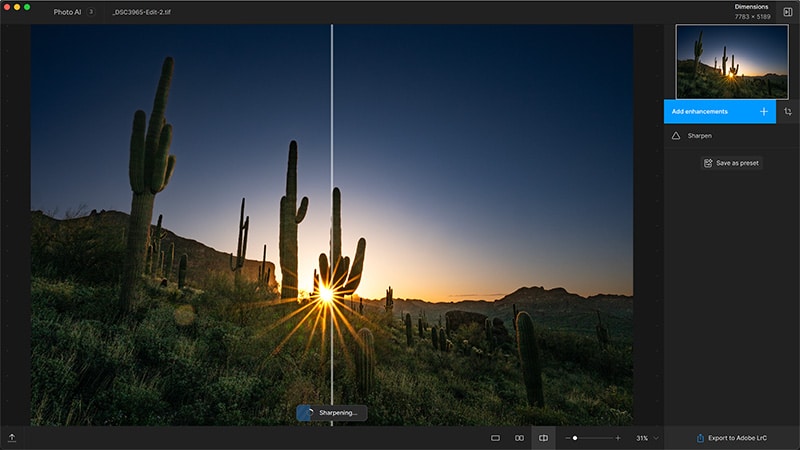
the Denoise Tool
First, let’s review Denoise with this image I created with ISO 25,600.

When you hover over an AI module, a little pop-up menu will explain the tool and give you a tip.

This one says that Denoise does a better job with RAW files. However, I haven’t seen much difference with my Nikon z8 files.

If your experience differs, let us know in the comments, and please list your camera, make, and model.

So this will remove digital noise from your images; as you can see, it does a fantastic job.

So, we have three AI models within Denoise: Normal, Strong, and Extreme. Each is designed according to how much noise you need to remove.

This is part of why I prefer Topaz Photo AI over the AI noise reduction in Lightroom.

Topaz gives us more control and precision over the strength, as well as Minor Deblur and Original Detail, which both give us a way to fine-tune the results to maximize the quality of our images.

Autopilot is recommending the Strong AI model, which is surprising due to the amount of noise. You would think it would use extreme at ISO 25,000+

In a previous version, the tooltip showed generic recommendations for each of the three AI models.

So, take those recommendations with a grain of salt and adjust your settings to create the best result.

Now, so you know, there are two types of digital noise: color and luminance.

Color noise is represented by different color specs or pixels. It’s the easiest and least destructive type of noise.

Luminance noise, on the other hand, is more problematic. Removing the noise can make your image softer or blurrier.

This is due to the process of removing luminance noise, which typically blurs the pixels together or smooths them out to reduce that type of noise.

This is why we have Minor Deblur, which makes the image sharper and recovers some of the “Original Details” that might have been lost in the process.

Most of the time, I find the Autopilot settings are pretty good from the start.

But, sometimes, I find the settings too aggressive for my taste and will slightly lower the strength.

So, adjust these settings as needed until you’re happy with the result.

Once you remove the digital noise, you can sharpen your image if needed.
the Sharpen Tool
Let’s add the Sharpen AI enhancement.

There are four different AI models, and each will apply the sharpening and Amount slightly differently depending on the situation you need for that image.

For example, if you miss the focus point, like I did of my daughter, you can use Lens Blur to sharpen the image, and it will help create a larger depth-of-field in the process.

So, I think the focus point for this portrait was on her nose, and her eye is slightly out-of-focus.

However, with Lens Blur, I was able to fix it. How cool is that? I love it!

So, Lens Blur is why I fell in love with Topaz Photo AI. I thought this image was going to end up in the trash, but as you can see, Topaz saved it.

Here’s another image I thought was destined for the trash when I created it.

This wild horse was running through the New Mexico desert, and I wasn’t prepared for the encounter.

That's why there’s so much Motion Blur since the shutter speed was only 1/125th of a second.

The Motion Blur AI model automagically fixes it.

Its eyes, head, neck, mane, and other image parts are now sharper.

However, if we scroll down, the results are not as good.

But here’s the thing: I like the motion blur in this part of the image because it adds to the story.

Ok, so yes, Topaz Photo AI can fix images that Lightroom can’t, and we haven’t even gone over the best part yet.

With a mask, you can target your AI edits to specific parts of an image.
the Masking Tool
So, check this out: Clicking on the Selection tab reveals the Masking tools, which allow you to precisely place the edits where you want them.

Now, if you don’t see any edits being applied to your image, regardless of how strong or intense your settings are, that could be due to the Auto Selection being set to “None.”

But look at all these other options that you can target. So, let’s go ahead and select our Subject.

So, it did a pretty good job, and you’ll notice it’s not perfect. Part of the foot wasn’t selected, and some of the sky or background was.

So, now you can use the brush to add to or remove from the red overlay or the selection.

There are three types of brushes to choose from, and I find the Regular Brush to be the easiest and most accurate.

So, adjust your size as needed and paint over the area where you want to add or remove from your selection.

Let’s use a big brush to remove everything but the head, neck, and mane.

Also, adjust the brush's feathering to create a nice transition from one side to the other, or lower it if you want a harder edge.

Okay, once your Mask is set up correctly, click on the control tab, and the preview will update with only the edits applied to the Masked area.

How cool is that? I love it!

You can also create a Mask for any of the other editing tools.

So, check this out. I created this image at ISO 8000, and although it does a really good job of removing the digital noise, I find it’s too aggressive for the Snapping Turtle since it removes some of its detail.

So, if I adjust the strength, I can regain some of those details. But now, it’s not aggressive enough for the background.

So, I can target the Snapping Turtle and then apply the amount of noise reduction I want. Let’s just say that the Autopilot settings are perfect.

But now, I can’t return here and target just the background.

However, you can click on Add Enhancements again, add another instance of Denoise, select the background, and choose your new noise reduction settings to get the desired results.

So, think of the possibilities for removing noise and/or sharpening different parts of your image.
the Lighting + Balance Tool
Next, we have Lighting and Balance Color, which will allow you to increase or decrease the brightness of your image or change its White Balance.

However, I recommend making your exposure and color adjustments in Lightroom or your editing app before bringing them into Topaz Photo AI.

You’re most likely going to get better results in Lightroom vs adjusting them with these tools.
the Face Recovery Tool
I previously mentioned that AutoPilot will auto-upscale your image if it detects a low-res file.

You can see this in action with this image I created around 35 years ago.

I shot this on film and scanned it to create this digital file, which is only 1200 x 1800 pixels long.

So, it's definitely a low-res file. Since it’s a portrait, AutoPilot has also activated the Face Recovery feature. There’s only one slider to tweak the improvement of the face or faces…

…if you have multiple, like this one, that has 11.

So, it looks like Topaz Photo AI found them all. However, the infant is greyed out.

So, AutoPilot is unsure if this is a face, and clicking on the edge will activate Face Recovery for that infant.
the Upscale Tool
Now, you don’t need a low-res file to upscale an image.

Let’s say you want to increase the size of an image. Just add that enhancement, and then you can upscale from 2x to Max, which is 6x.

You can also type in a specific size for the Width and Height here, or 3-5, in this box.

But keep in mind that if you’re already using a high-res file—for example, this image is a 45-megapixel file… —the Max, when you click on it, will max out at these settings here, which is a little more than 500 megapixels.

So, the AI Upscale is going to generate new pixels when upscaling your image intelligently.

And it’s pretty impressive with high-res and low-res files.
the Preserve Text Tool
Alright, next, we have an image here with some text.

If you need to upscale, that text may become blurry, or if it's very small from the start, you may want to make it sharper.

Either way, you can use Preserve the Text by adding the Enhancement. Then, to activate the tool, you need to tell Topaz Photo AI where the text is in your image since it cannot auto-detect it at this time.

So, go into the Selections tab, select the Add To option, adjust the brush size if needed, and then paint over the text you want to enhance.

The Mask then lets Topaz Photo AI know where the text is within the image.

Then, going back to Controls will activate the Enhancement and then adjust the Strength as needed.
the Remove Tool
Now, personally, I do all my retouching in Lightroom and/or Photoshop before I bring my images into Topaz Photo AI.

However, sometimes I miss something and can quickly remove it with Remove Enhancement.

So, again, we are going to paint over the object we want to remove, then click on the Remove Selection button, and Topaz Photo AI will do its magic. Hopefully.

Well, it didn’t get rid of the sign the first time, so I might have to try this a couple more times to get rid of it.

However, I know in Photoshop, it’s a lot quicker, easier, and more accurate.

So, hopefully, in the future, the Remove tool will become more powerful with each new update.
Re-Arrange Modules
Another hidden feature can give you more precision and control over your edits.

And that is the ability to click on an Enhancement and rearrange the order of the Enhancements.

According to the Topaz developers, this will alter how each enhancement is processed and can alter the results. I haven’t seen this for myself, so if you find this useful let us know in the comments below.
Presets in Topaz Photo AI
Another powerful feature that can boost your productivity is the ability to create a preset of enhancements.

By clicking on the “Save As Preset,” you can save all the edits you’ve applied.

After you give the preset a name and save it, it will appear at the top of the Enhancement tools menu.
Export Your Images
Once you have all your edits done, we need to export your files back into your editing app of choice, and you'll do that with this little button down here.
Customize Topaz Photo AI
But before you do that, let me show you how to customize Topaz Photo AI for a faster workflow.

Go to Topaz Photo AI and select preferences, or it might be called Settings. You can alter the default settings based on your personal needs.

So let's say you shoot wildlife and landscapes and don't need Autopilot to analyze the image for faces.

Well, just come over here and select none.

It'll still show up in the list over here, but it won't take the time to locate those faces, and you'll notice that Autopilot will be faster once you have that turned off.

And then you can come in here and make other adjustments as well.

For example, in Denoise, I want the Autopilot to automagically make a suggestion based on any amount of noise from low and above.

Or you can do medium and high and above or severe only.

Then autopilot will only suggest Denoise when it recognizes a severe amount of digital noise, like ISO 25,000 or higher.

Then, you can choose which model strength is the default because you may have noticed… let’s say after editing X amount of photos, that “Normal” works most of the time, which it does for me.

Under Sharpen, because I use Lens Blur most of the time, I set that as the default with a Normal Model Strength.

Make sure to click apply to save those settings.

And one more thing for future updates on Topaz Photo AI three and above, a blue button will appear in the top right, letting you know if one or more new updates are available, and clicking on it will auto-update Topaz Photo AI.

To learn about new Topaz Photo AI features click here for the full playlist.