How To Increase Sales With Photography Proofs
Imagine averaging $800 in reprint sales for every event. Would you want to know how it’s done?
Hint: I did this with the subject of this article. But, along the way, I got lazy, and my reprint sales went to zero!
I’m about to share my success and mistakes. Learn from them so you can grow your photography business!
Table of Contents
Proofing is an essential tool for pro photographers to display photos to clients. Plus, photo proofs can provide clients a convenient way to make final image choices from their shoot.
In essence, photo proofs are a means to an end, sales! But the delivery and quality of them can increase or decrease profits. You’ll need to take this into consideration since your choice has consequences.
If you’ve recently launched a
photography business, you might not be familiar with the term “photo proofs.”
No worries. You’re in the right place! You’ll discover what a proof is and the different delivery methods.
Plus, I’ve included some pro tips based on my 30 years of experience as a portrait and wedding photographer for increasing profits!
If you’re ready, let’s do it!
What Are Photography Proofs?
Photo proofs are images that give your client a glimpse into the pictures you created for them. They also have minimal editing and should always include a watermark.
The essence of a proof is to provide clients a sense of what their prints will look like before placing an order.
This does not mean the proof is the final edit! Just the opposite.
Once a client has made their selections, you’ll process the images to apply your signature edit and retouch as needed.
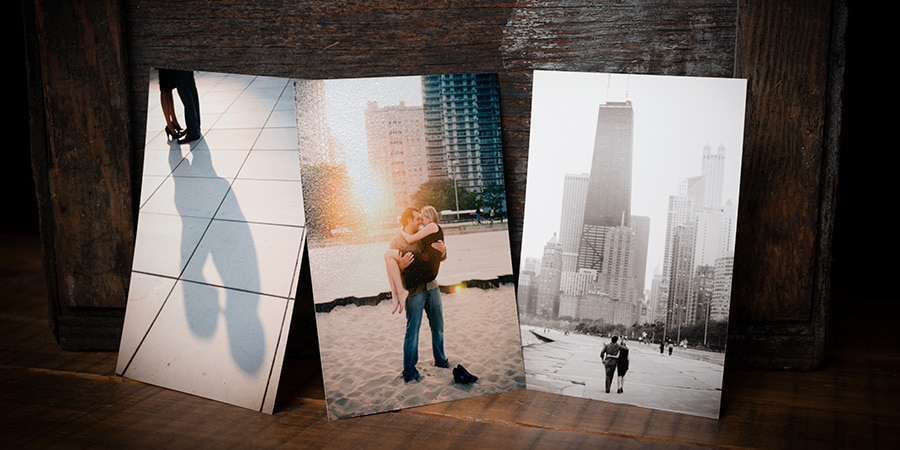
4×6 proofs with a Pebble texture.
Why Photography Proofs?
In our digital age, things got out of whack at some point. What do I mean by that? Quick story…
Back in the mid to late ’90s, there was no such thing as a digital camera. Other pro photographers and I only had one choice; printing proofs.
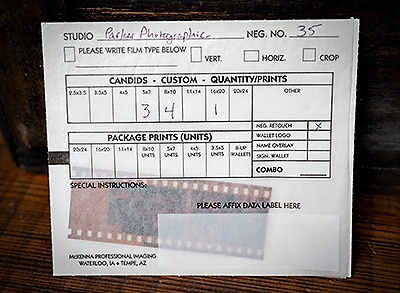
We’d go through the “sales” consultation, take their order, look for the negatives, attach them to a card, and send them off to the pro lab for printing (and retouching).
In 2001, I picked up my first digital camera, a Fuji S2, for weddings.
The post-event (and portrait session) consultations resumed as usual. Except, digital files were sent to the lab.
A few years later, a “convenient” service was born; online proof galleries. “Ingenious,” I thought since I lived in Ontario, Canada, and 97% of my weddings were in Michigan.
After the first wedding season, with online proofing galleries, I noticed a definitive pattern occurring. Reprint sales dropped from an average of $800 per wedding to $300! Multiply that by 30 weddings, and that was a severe drop in income.
To counter this, I increased my packages to make up for the loss. All was fine for a couple of years. Then, the unthinkable started to happen. Photographers began giving away the “negatives” (digital files in this case)!!!
It never occurred to me since giving away the negatives in the decade before wasn’t even considered. Once you give the camera files away, you can kiss reprint sales goodbye!
After fighting this trend after a few years, I caved. But, I surrendered on my terms. The digital files were only handed over when their wedding album was delivered. This still gave me some control over the sales process.
Back in the day, I had to ship out the negatives to the lab for printing.
Yes, I could have offered paper prints too. However, the thought of traveling across the border daily was enough to consider an alternative.
If I could work from home or have a studio close by for in-person consultations, I’d incorporate them again.
How Do You Deliver Your Proofs?
Your choice of proof delivery can make your life easier and that of your client. Your choice can also affect your bottom line. Delivery can be provided in two primary forms; digital and tangible.
We’ll explore the difference between each option so you can decide what’s best for you.
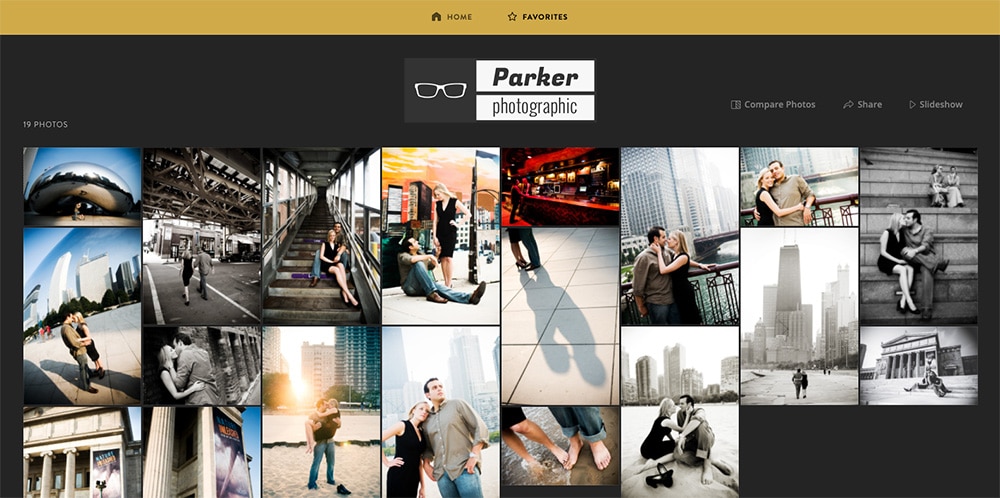
ShootProof has emerged as the front-runner for online proofing galleries.
Digital
When it comes to digital proofs, you have a few different viewing options. Each has its own advantages and disadvantages.
01
You can upload your images to an online gallery hosted by a third-party. This is an entirely hands-off approach and is the most convenient for your client.
In my experience, sales tend to be their lowest with an online gallery. You have no control of when a client will order or the ability to offer additional products, like frames, protective finishing, etc.
One option to overcome clients taking too long to order is issuing a deadline. A hard deadline also!
In other words, stay true to the deadline and remove the online gallery once the date expires.
Pro Tip
Before the deadline, inform your clients what the deadline is and the consequences of not ordering prior.
Friendly email reminders can go out a few times before that date. It wouldn’t hurt to call your client too.
02
Hosting your digital images on your own website is similar to the first option. However, the main advantage of this is getting more “eyeballs” to your site.
Family and friends may wish to view the images too. So, having more people visit your website creates a frenzy of new inquiries!
An online gallery on my website was my preferred choice. It definitely helped grow my wedding photography business!
The downside is you’re responsible for technical issues.
03
Having your clients view your digital photos in person gives you the most control and the opportunity to increase sales.
Although you can use Lightroom as a mechanism for showing the digital images, you may want to invest in pro studio software.
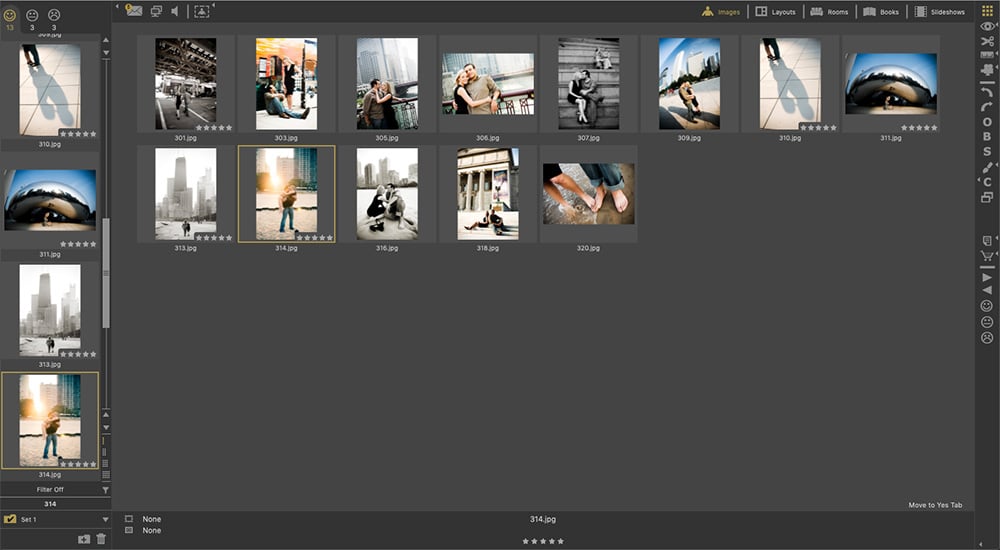
Time Exposure proofing software for reviewing and selecting photos. It also offers tools for streamlining the sales process and increasing profit. A 30-day free trial is available to give it a test run.
The tool of choice for professionals is the Time Exposure software from ProSelect.
Time Exposure has built-in ordering tools, it’s packed with ready-to-use resources, will assist in increasing sales with drag & drop tools, and more.
Of the three, this is the most expensive. It’s also going to be extra time-consuming for you and your client.
However, think of it as an investment that will pay dividends with increased profits.
Tangible
There’s something about holding a print in your hands. How the paper feels as your fingers glide over it gives your client an experience that can’t be achieved digitally.
You can show what the final print will look like with their chosen finish and texture. It’s tangible.

As for the size of the proof prints, 4×6 are the industry standard. Presentations are everything too. Pulling the prints out of an envelope and placing them across the table isn’t the way to go.
Invest in a binder that can hold each print individually. Prints can then be taken out for the customer to hold when they fall in love with one.
For maximizing income, I’d recommend paper proofs and using the ProSelect software to aid in the sales process.
Here’s my photo consultation process for a photo session…
- I ask clients to pick out their favorite 3-5 images.
- The proof prints are pulled out of the binder and handed to the client.
- The binder gets put away in a drawer!
- With ProSelect, the client and I go through all the photos again to mark those images as their favorites. And to reject the others for final confirmation. The second time through is much quicker.
- I’ll then go through their favorites and use the software’s pro tools to offer large wall prints, canvas gallery wraps, desk prints, and other add-ons to increase profits.

Adding a white or black border to your proofs provides an extra element of style.
One other thing about paper proofs, I wouldn’t recommend skimping on print quality either.
I’d also recommend having sample prints of the different finishes and textures available.
It’s easier to see and feel a textured print vs. explaining or showing digitally.
My pro lab of choice for the last 15+ years is WHCC. Although they’re based out of the U.S., they ship internationally too.

Pebble Texture
Non-uniform texture provides an upscale appearance. Pictured below is the Pebble texture on a Lustre print.
Linen Texture
Differentiate your prints with our most popular texture, a classic linen look. Pictured below is the Linen texture on a Lustre print.
How Many Proofs Should You Deliver?
How many you deliver to your client is dependent on the type of client. As a wedding photographer, I typically give 500 – 800 proofs. As a portrait photographer, I’ll provide 15 – 30! Even then, that might be too many.
Are you delivering more or less than those numbers to your client?
Why You Should Shoot Fewer Photos
As the hired pro photographer, it’s our job to make our clients look their best. And to capture the moments as required.
If you offer multiple almost identical images, you overwhelm your client, which leads to indecision. If the expression hasn’t changed, narrow it down to one or two at the most.
After all, chances are your client will not order a print of each of the repetitive images.
For weddings, my average number of (delivered) proofs 500.
For portraits, the average was 20.
Now What?
My pro photography career started back in 1990. It wasn’t until 2001 when I finally reached profitability. I made a lot of mistakes up to that point.
If you’d like to learn from my mistakes and be successful quicker, leave a comment below about what’s holding you back.
Or, better yet, join me (and thousands of other photographers) to learn more about photography and growing a business.
You can also learn more about my (profitable) photographic journey, here.
Like this article? If so, please share!


