The first thing we have to do before we can edit our images, is we need to open them. I know, duh!
But, did you know there are 7 different ways to open images in Photoshop? Oh, and here are some ways to close images in Photoshop.
Truth be told, there are actually 8 different ways. We’ll cover them all in this “opening images in Photoshop” guide.
Ready? Awesome! Let’s do it…
First, let’s set up our software to open our images in Photoshop. If Photoshop is not the default setting, then some of the tips may not work.
Table of Contents
Before We Get Started
First, let’s set up our operating system to make Photoshop the default software to open our images.
Here’s why…
…if Photoshop is not the default setting, then one of the options, to open images, may not work. Here are the instructions for making your images auto-open in Photoshop by default…
Mac: Select any image and press Command + I. This will open the Info dialog box. Inside, look for “Open with:” and click on the arrow to expand the option.
The default software to open the file based on the file extension (.jpg, .png, .gif, etc.) will be visible in the drop-down window.
To switch the default to Photoshop, click on the drop-down menu, locate it, and select your version of Photoshop. This will auto-update to the most recent version of Photoshop… when you update.
Now, click on the “Change All” button to use Photoshop to open all documents with the same file extension.
You’ll need to do this for each different file type you’ll use in Photoshop; .jpg, .png, .gif, etc..
Windows: Start by opening any folder and right-click any image and select “Choose default program.” Then, click on the Photoshop icon and click the “OK” button.
If you don’t see Photoshop, you may need to scroll down to find it. You’ll need to do this for each different file type you’ll use in Photoshop; .jpg, .png, .gif, etc..

Photo by Dominika Roseclay. “My eyes may be closed but, my mind is open to endless possibilities. Or at least learning 7 different ways to “open” photos in Photoshop.”

Photo by Breaking Pics.

Photo by Renato Abati. Polaroid cameras are “old-school.”
Option 1: Open With Photoshop... Old-School
This is an old-school option you’ve probably used in other software like Microsoft Word or Pages.
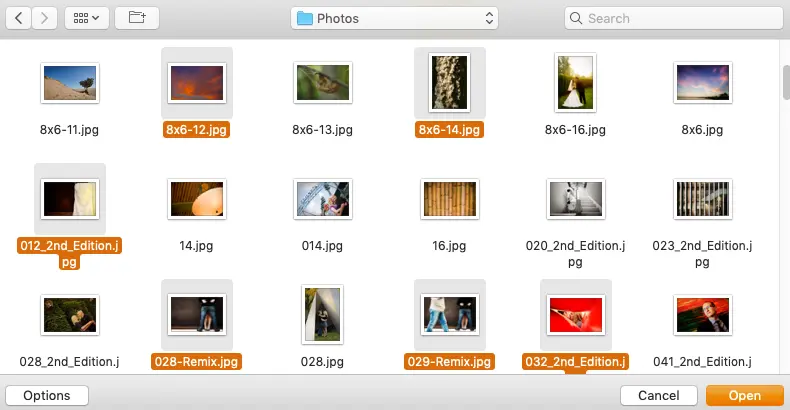
Go up to your menu, under File, and select “Open.” From here, the Finder window will open if you’re on a Mac. Or the File Explorer will open if you’re on a PC.
Either way, you’ll need to navigate to the location of your photo(s). Then, you can select one or multiple files to open.
There are a few different ways to select more than one file at a time: use your shift or command/control key or click and drag your mouse around the photos you want to select.
Click the Open button (bottom right), and your files will open in Photoshop.
If you selected multiple files, Photoshop will open each photo in individual tabs.
To switch between photos, just click on another tab. How to close images.
Also…
…if you prefer to work with keyboard shortcuts…
- Mac: Command + O
- Win: Control + O
Option 2: My Favorite Method
My favorite method for opening images in Photoshop is to find them, either in the File Explorer (Win) or Finder (Mac), and select and drag them to the Photoshop interface!
Same results as Option 1. However, we can skip going to the menu or using keyboard shortcuts.
Try it. Open up the File Explorer or Finder and select 1 or more images. Click and drag the files to Photoshop.
Boom! Images are now open in Photoshop.
How cool is that!

Photo by Snapwire. Love, this method to open images in Photoshop!

Double love this technique.
Option 3: No, This Is My Favorite
Ok, so, this option is very similar to Option 2. Except, instead of using our operating systems folder window, we’re going to use Bridge instead.
If you have Bridge installed, find a folder of images and drag them to the Photoshop interface.
Different method. Same results.
Option 4: Actually, This Is My Favorite
Next up is another easy way to open files into Photoshop without having to do so directly from Photoshop.
This method works in both Adobe Bridge and via your File Explorer or Finder.
Find an image and double click on it… presto! Your file opens automatically in Photoshop…
…that is, as long as your system is set up to open a specific file format into your software of choice: Photoshop.
If this didn’t work for you… click here.

Photo by Johannes Plenio. Home is where the heart is.
Option 5: Never Mind. This One Rules
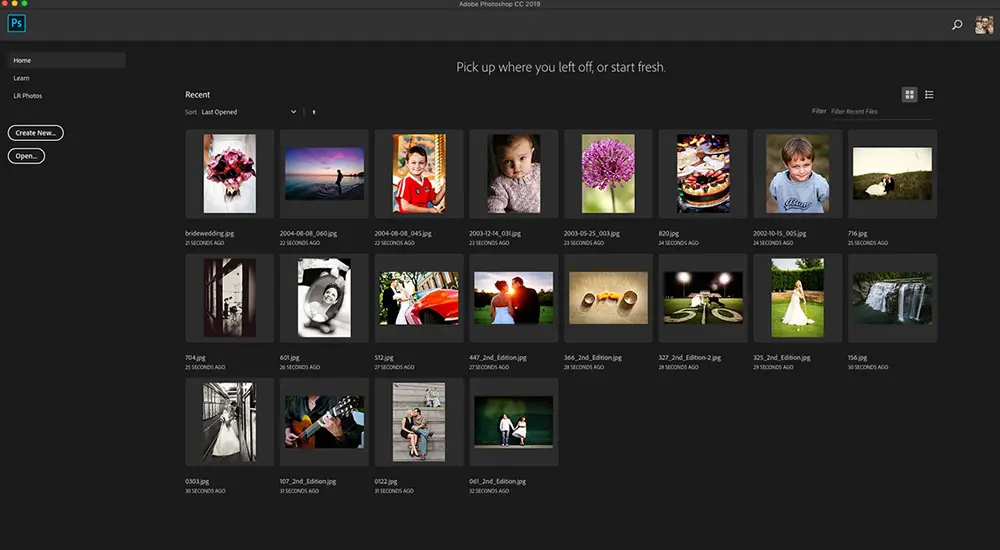
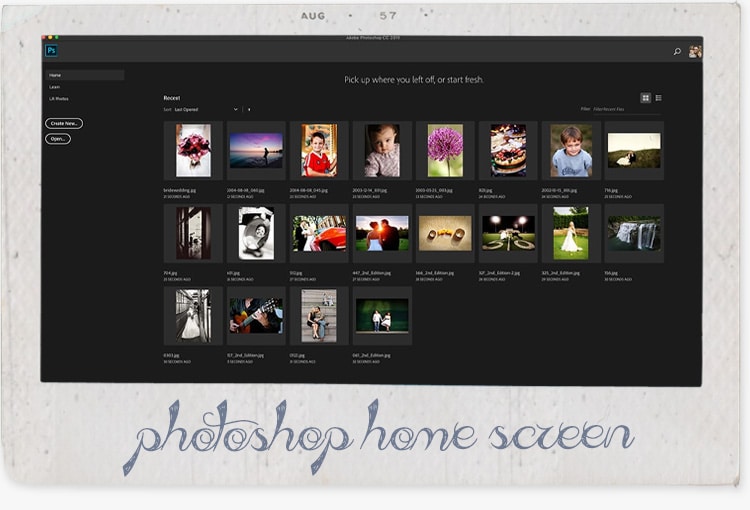
The previous 4 methods were the main options we had prior to 2017. In 2017, Photoshop introduced a new feature called: the Home Screen.
The Home Screen is an interface that opens before to the Photoshop workspace. Once activated (it is by default), it will give you 3 options for opening images into Photoshop.
We’ll cover one option here and the other 2 in Options 6 and 7.
Click image to enlarge.
Recent
This is what I love about the Home Screen. It lists the 20 most recent files you used and displays them on the interface for easy access.
The recent files can be sorted from newest to oldest or vice versa.
Anyway, just click on the thumbnail of the image you want to open and… well, it opens in the Photoshop workspace!
I love it!
Option 6: Too Easy
Take a closer look at the Home Screen. What do you see? To the left, you’ll find a big ‘ole “Open” button.
Guess what happens when you click on it? Try it.

Click to enlarge.
Option 7: Rarely Used
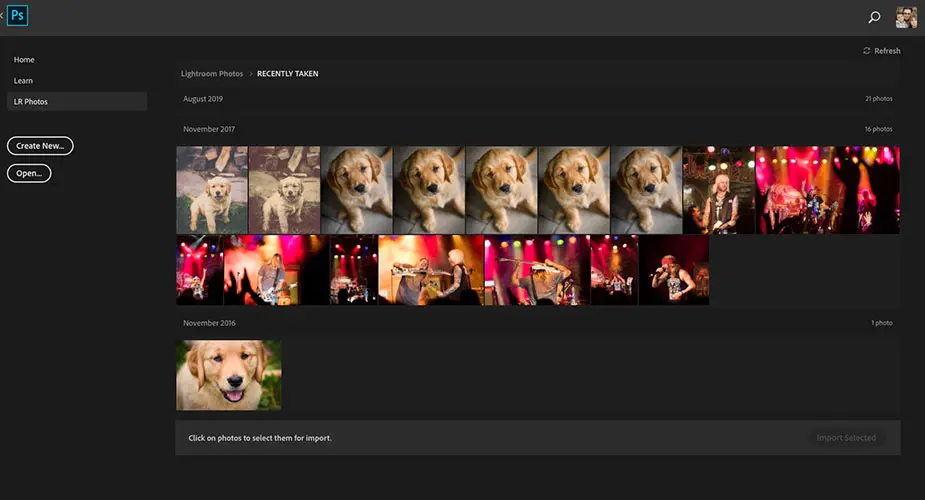
Our final way to open images in Photoshop is one that I never use. And it depends on whether or not if you use Lightroom (which I do).
In the top left of the Home Screen interface, you’ll find 3 links: Home, Learn, and LR Photos…. click on LR Photos.
If you’ve uploaded files to the Adobe cloud, via Lightroom CC (not classic), Photoshop will sync with your account and display your photos.
Clicking on an image, in the top panel, will open the file into the Photoshop workspace.
If you have albums as I do, then clicking on one will open it up and show the files within. Open as before.
Bonus!
How to switch to the Home Screen while you’re working on a file that is already open.
This is another one of my favorite features of the Home Screen. First, open an image in Photoshop. Whichever method you prefer.
Now, let’s say you need to open another image for your current project. You now know 7 different ways to do so. Which one will you choose?
Well, what if the file you need to open is one of the 20 most recent files? Wouldn’t it be easier to just open from the Home Screen vs. searching your hard drive for it?
I think it is. If you agree, here’s how…
Ok, your image is open, and you can’t see the Home Screen. No worries.
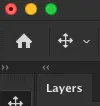
Navigate to the top left of your Photoshop interface. Locate the home icon and click on it.
Boom! You’re back in the Home Screen. Click on the photo you need to open. Boom! You’re back in the Photoshop interface and have 2 files open.
How awesome is that! I love it!
Do you know of any other ways to open images? Maybe I missed one or two?
Or maybe there’s a new feature that was released after this article was published (and I haven’t updated this open images in Photoshop guide).
If so, leave a comment below to let me know another way to open images in Photoshop.


