What Is a Lightroom Catalog & Why It’s Essential For Lightroom Classic

The Lightroom catalog, for Lightroom Classic, is one of the most confusing aspects of Lightroom. Wouldn’t you agree?
Today, we are going to demystify the Lightroom catalog. Once you’re done with this article, you’ll know what a Lightroom catalog is, it’s benefits, limitations, and more.
You’ll even learn how many catalogs you should have! If you’re ready to learn all about the Lightroom catalog, let’s get started!
Table of Contents
What Is Lightroom Classic?
In its purest form Lightroom Classic is nothing more than an image processing and photo management app. It was designed specifically for use by photographers. And it was created to help you streamline your workflow by allowing you to easily organize, edit, and share your photos.
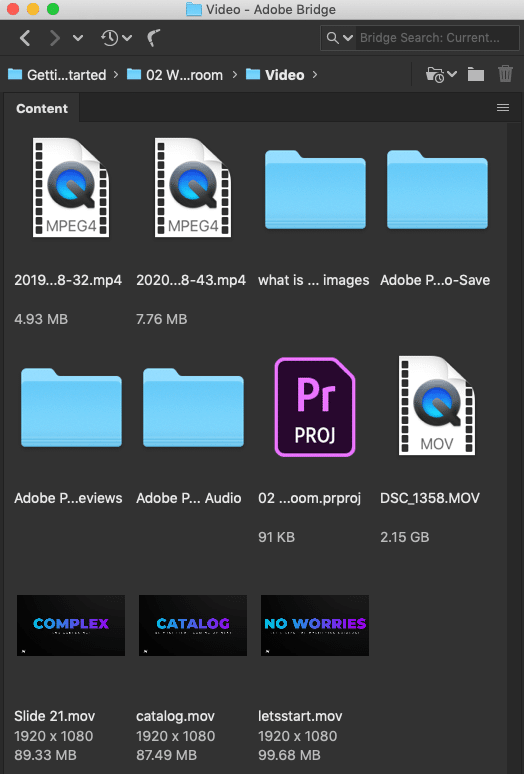
Adobe Bridge is a file browser. It allows you to “browse”, view, access, etc.. any type of document type on your hard drive.
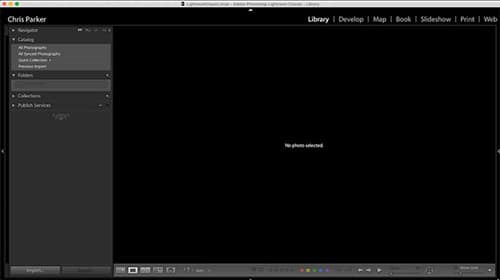
After creating your first catalog the interface is blank. Plus, there isn’t any way to “browse” for photos or documents on your hard drive. Before you can start using Lightroom you must first import your photos.
File Browser?
How does a catalog compare to a file browser? Let’s make a quick comparison to find out.
In your operating system, you have a method for viewing photos, documents, and applications. This is known as a file browser. It allows you to navigate to different parts of your hard drive to locate all kinds of documents;
- Word or Page documents
- Numbers or Excel docs
- RAW & JPEG files
- RAW & JPEG files
- And any other type of file type you may use
Once those photos are imported, you can then organize and post process them.
This means that Lightroom Classic is not a file browser. In essence, a catalog is a database. Anything you do to your files, within Lightroom, is stored in the catalog.
Understanding that the catalog is a database is only half the battle. There are three more essential elements of the catalog you need to know about. Let’s discover what they are.
Lightroom Catalog Essentials Part 1
Next, you need to know what kind of image processing software Lightroom is. This information is the foundation for how Lightroom Classic and the catalog work.
Two Types of Editing Software
There are two main types of editing software. One would be considered “destructive” editing, and the other would be regarded as “non-destructive” editing.
To fully understand the differences between the two, you’ll need to complete 2 exercises. So, grab an image and make a copy of it!

This image is extremely overexposed and was saved as a JPEG. No matter how much I try this image can not be fixed.
Destructive Editing
Open up the image in your favorite pixel-based editing software. Like; Photoshop, GIMP, or something else that will allow you to create a layer.
- Let's say the image is underexposed, and you wish to increase the exposure. Any tool that allows you to brighten your image will do; Curves, Levels, Exposure, etc..
- Increase it to its maximum.
- Save the file, with a different name, as a JPEG file.
- Close the file and re-open.
This is known as “Destructive Editing.” The pixels were directly affected by your edit, and you’re stuck with those changes… forever!
Non-Destructive Editing
Now, let’s practice non-destructive editing and compare it to the previous edit. Open the copy of the same image again.
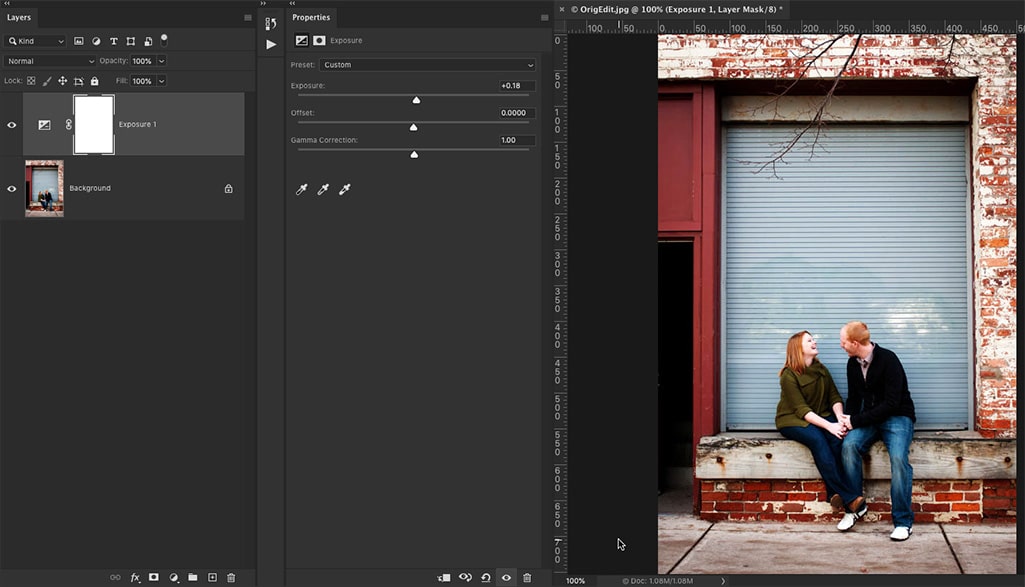
An Exposure adjustment layer was added to process the photo. Click to enlarge. In the layer panel you’ll see two layers: the Background layer is the original image and above it is the adjustment layer.
Photoshop
In Photoshop, we have what is known as adjustment layers. These adjustment layers allow you to add editing tools as layers. Let’s try it.
- Go to: Layer > New Adjustment Layer > Exposure
- Click o.k. and increase the exposure to the right
This time save it as a PSD, close it, and then re-open. Since you saved it as a PSD, the original image layer and your “exposure” layer are both there. Now, you can access the exposure adjustment layer and adjust as needed.
Or you can turn it off. Or delete it, and you’ll be left with the original image layer. How cool is that! That is known as non-destructive editing.
Lightroom
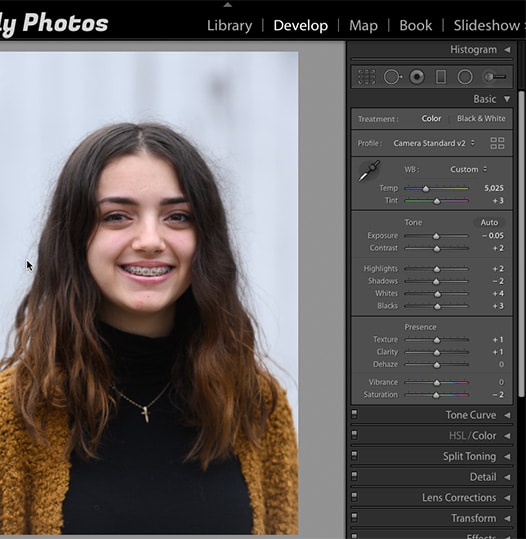
Now, import that same photo into Lightroom (if it isn’t already). Head on over to the Develop Module and adjust the exposure to the right. Since we can’t save new photos in Lightroom, let’s quit Lightroom (and restart) for demonstration purposes.
Go back to the Develop Module, and you’ll be able to adjust the exposure to fix it. Or you can reset it back to the original by double-clicking on “Exposure.” So, Lightroom is non-destructive editing software! In a way, your Lightroom edits kind of work like an adjustment layer; it’s not altering the pixels directly.
Why Does This Matter?
Part 1 is the building block for the next two. So, the “why” will become more apparent as you continue your Lightroom catalog journey…
Lightroom Catalog Essentials Part 2
Previously, we established that Lightroom edits are non-destructive. But, now you might be wondering how Lightroom can work non-destructively without layers. Let’s find out…
Previews?
If Lightroom isn’t directly applying edits to the pixels of your photos and it’s not using layers, then how exactly are the edits being applied?
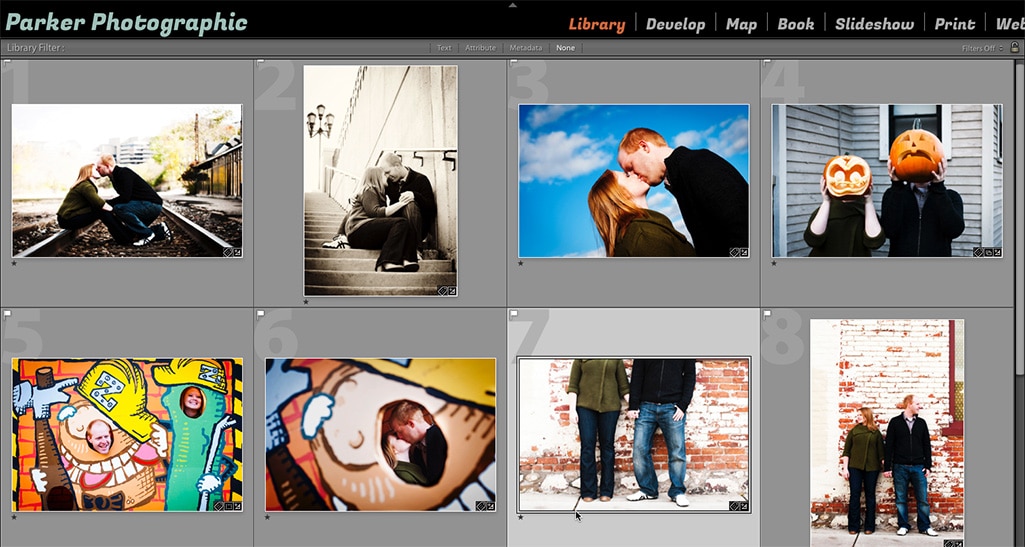
In Lightroom, the thumbnails are “previews” or copies of the original photos.
When you import your photos, you’re not importing the actual photos! Instead, Lightroom is creating a preview or a copy of the original. The preview gives you a visual representation of the original. It’s similar to the preview created by your camera.
It’s also worth noting that the previews are much smaller in size compared to your original. My RAW photos are around 20MB. But, the previews are about 100 – 500 kilobytes. It all depends on the size of your original RAW. Either way, it’s considerably smaller versus the original.
the Database
O.k., now picture this. These previews are stored in the catalog or database. The catalog provides tools for organizing and editing your photos… non-destructively. So any edits you apply in Lightroom are stored as a record or as metadata information.
Depending on your preference settings, that data can be stored as a separate file next to your original. Those files are known as an XMP (document).
An XMP is like using layers in Photoshop. It’s separate from the original. So, we have our image layer in Lightroom, which is the preview, and then we have the XMP as another layer.

An old-school data-base. Image by: Anastasia Shuraeva
Lightroom reads that editing information (from the XMP) and shows you what the edits look like via your preview.
XMP Deep Dive
Let’s take a closer look at data inside an XMP. Download this XMP and open in a text-based program (or check out the photos below).
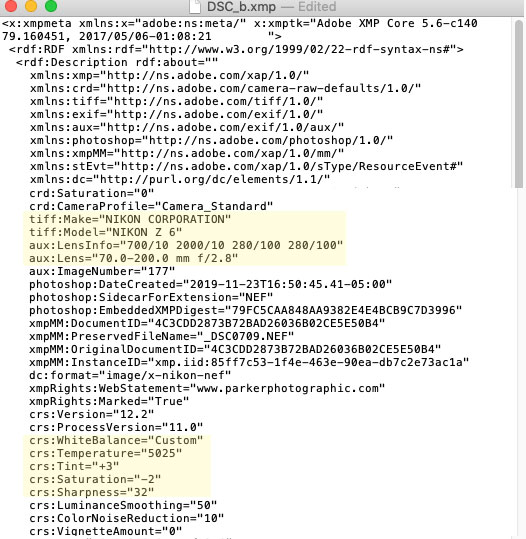
In addition to editing data, it also contains metadata that was created by your camera. At the top, you’ll see the camera make & model, exposure settings (aperture, shutter speed, and ISO), and more.
As you scroll down, you’ll see the edits I applied to this image. You’ll notice the WB is set to custom, the exact Kelvin Temperature used, and other adjustments for the tonal range. If you scroll even further, you’ll see different adjustment settings for the Tone Curve, Split Toning, Effects, and more. The XMP is your “layer” for Lightroom!
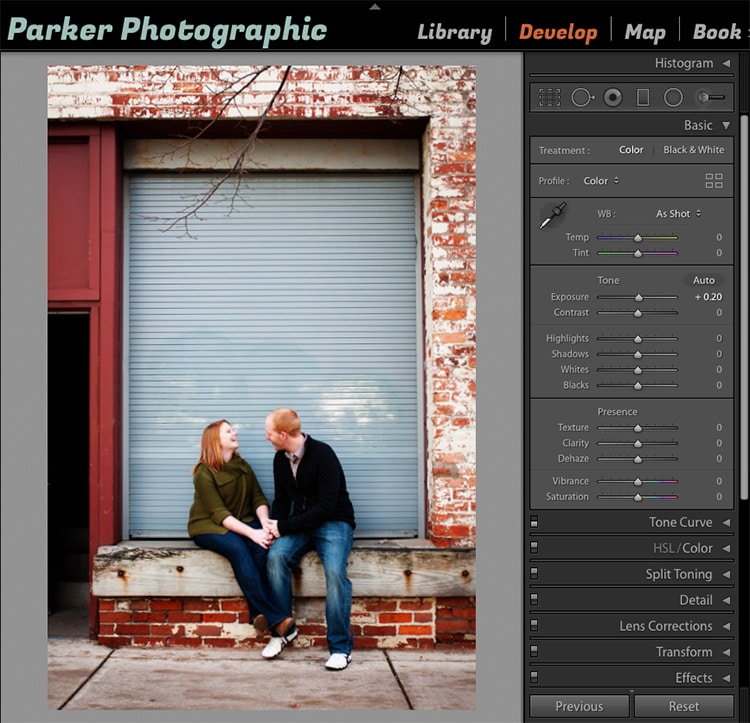
Click the photos above to enlarge. The XMP (on the left) shows the editing data saved from the photo on the right. The right image shows the edits applied in the Develop module… which matches the XMP. Plus, additional metadata is saved in the XMP too. The XMP data shows the camera make & model, lens used, and more.
Note: the XMP image above has been truncated to show the data. To see all of it download the XMP from the link above.
Why Is This Important?
Well, for your sanity if for nothing else. Let me explain.
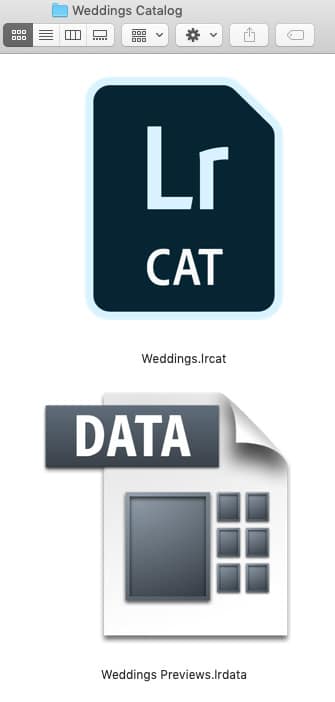
O.k., so, the “preview” of your image and the metadata is also stored in your Lightroom catalog. Let’s take a look at one of my Lightroom catalogs. Inside of the folder where my cat. is stored, you’ll see two files.
The first is the actual catalog and has the name of “weddings.” The other is called: Weddings Preview. That “preview” contains your image previews AND your editing data (plus any additional metadata you added in Lightroom). Guess what happens if that preview data becomes corrupted?
Yep, cue the migraine headache! Why? You’re going to have to re-edit all those photos from scratch! Oh, and you’ll have to add back all the keywords, ratings, labels, and more too.
The solution to never losing your metadata and even your photos are to have a backup system. Not just for your catalog but your entire hard drive too. Check this out: Step-by-step Lightroom Workflow for Backing Up Your Photos.

This photo and the cover image by Andrea Piacquadio.
Missing Files In Lightroom
Although losing your metadata can be painful, there’s something else that can cause headaches too. And that is when Lightroom says your photo(s) and or folders are missing.
If this happens, you’ll be unable to edit your photos. Unless, of course, you’ve created Smart Previews. Missing photos or folders occur when you rename them outside of Lightroom or move them to another location. Let’s troubleshoot this issue…
Lightroom Catalog Essentials Part 3
You now know that Lightroom is a database, and it’s not importing the original files. This is important to understand when you want to share your edited photos with the world. Especially when the original is “missing!” And here’s why…
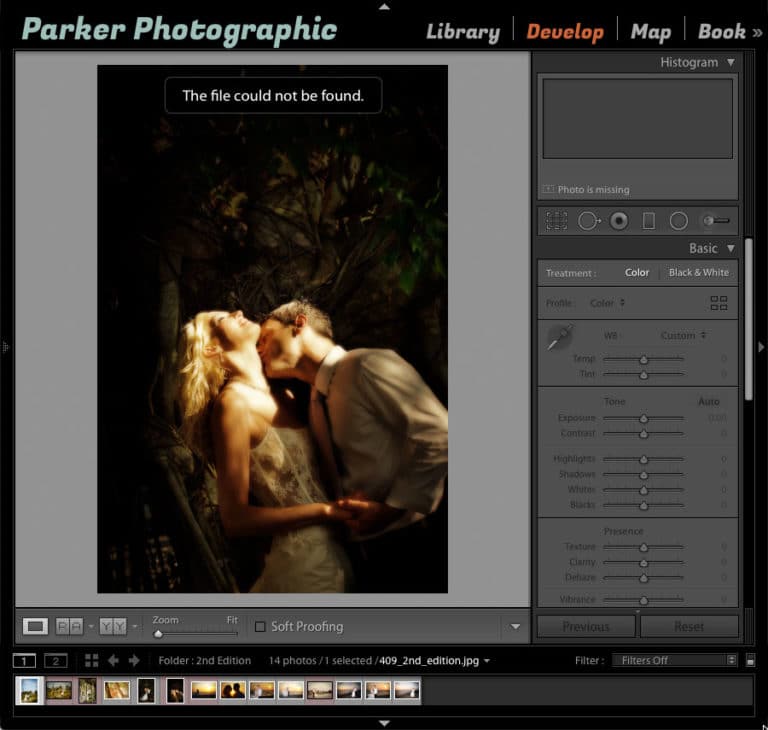
The link to the original photo has been broken. Since the “File could not be found” we are unable to process or export it. The editing sliders (and the Histogram) are greyed out when the photo is “missing”.
An exclamation point (top right of thumbnail) indicates the link to the original photo has been broken. A question mark reveals the link to the folder had been broken.
Original vs. "Preview"
To share your finished edits, Lightroom requires access to the original to provide a usable file. This requires saving the image with those edits. But, in Lightroom, you can’t save a new file. Instead, you have to export it out of Lightroom.
O.k., so here is where things can go wrong with the catalog if Lightroom can’t find the original.
- You will not be able to process it
- You will not be able to export it
If the photo was missing and you could export, then the image size would be too small… since you’re “exporting the preview” and not the original. In essence, the photo would be unusable since it would be extremely pixelated.
Therefore, Lightroom needs to apply your edits with the original to create a new one… on export. But, if you rename the photo outside of Lightroom or move it to another location, Lightroom will not be able to locate and use the original. This occurs because the link between your catalog and the original is broken.
You’ll need to re-establish the link between the original and your catalog to continue working on that image. And to be able to export it as well.
How to know if your photo is missing
There are two different visual cues, within Lightroom, that informs you if the link has been broken.
- For photos, you'll see an exclamation point in the top right of the thumbnail in the Library Module. Or in the Develop Module, a message will appear over the image stating: "The file could not be found."
- For folders, you'll see a question mark over the folder icon.
How to fix the "missing" photo + folder
To re-establish the broken link for your photos:
- Click on the exclamation point > click the Locate button > Find the file.
- If you renamed your image, Lightroom will ask you to confirm that this is the correct photo.
To re-establish the broken link for your folder(s):
- Right-click on the missing folder and choose “Find Missing Folder”
- Find the folder and click “choose”
Most often asked question, students ask about catalogs is...
How many catalogs should I have? Great question. Let’s discover the answer…
How Many Catalogs Should You Have?
Should you have 1 lightroom catalog for all your photos? Or should you have multiple Lightroom catalogs for different categories?
Well, it really depends, and it’s not an easy question to answer. It all depends on your own personal needs. There are advantages and disadvantages to each.
One Lightroom Catalog?
Let’s say you have all your photos in a single catalog. This is going to make it easy for you to search, locate, and process those photos since they are in a single database. Plus, it’s easier to manage 1 vs. multiple.
But the downside to having a single catalog is the eventual size of it. According to Adobe, they say the size of your database will not affect the speed of Lightroom.
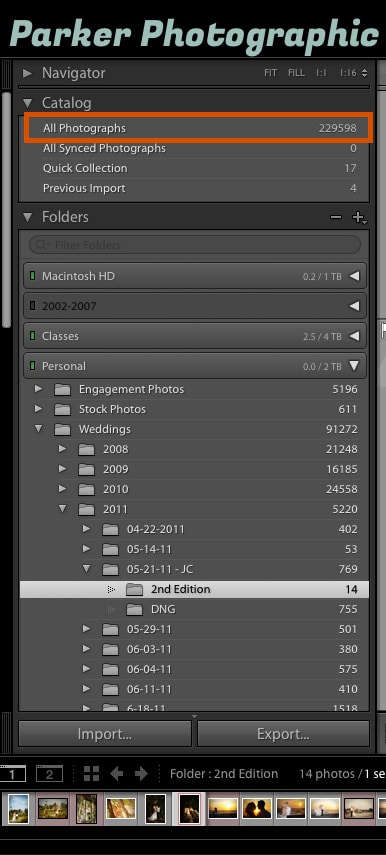
And that’s what I’ve experienced. In fact, my current catalog has 229,598 photos. Some photographers have reported a slowdown as their database size grows. But this can be due to other factors not related to Lightroom itself.
For example, depending on how old your computer is, the amount of RAM you have, the type of hard drive, and the amount of space left on your hard drive. All of those things can actually slow down your use of Lightroom Classic.
One way to try and improve the overall speed…
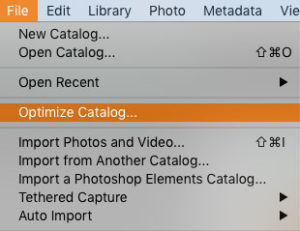
Let’s say your catalog includes, I don’t know, let’s say twenty thousand photos or more, and you start to see a slow down as you begin to use Lightroom. Well, you can optimize your catalog to improve the overall speed.
Jump into Lightroom, and I’ll show you how. Go to the menu, under file, select “optimize catalog,” and then Lightroom will do its magic to optimize your catalog. This is going to help improve the speed of Lightroom just a little bit or maybe not at all. It all depends on how much it has to optimize if anything.
That didn’t work. Now what?
If optimizing doesn’t do the trick, then I recommend checking your computer resources. You may need to add more RAM, maybe create some more space on your hard drive, or perhaps you need to buy a better, faster drive.
And the best hard drives to get are SSD drives. So maybe that’s something you need to look into. Or perhaps even a faster computer in general. If your resources are limited and you’re unable to afford a new computer or upgrades, then it might be best to use more than one catalog.

Waiting for Lightroom to process your commands can be frustrating. It might be time to create more than one catalog.
Multiple Catalogs?
You could create a new catalog for every new event or category that you shoot. And that’s what I do. I shoot portraits and weddings. Each category has its own database. But I also have a catalog for my family photos!
For my Lightroom wedding catalog, I even break it down even more by creating a database for each year that I shoot… 2008, 2009, 2010, etc.. Then all the wedding events I shoot for that year go into that particular catalog.
But, I also have a master wedding database that I’ve merged every year into a single, well, “master” database. It’s a complex system that works for my workflow. So you have to discover out what works for you. That being said, at this point, you’re not going to know how many catalogs will work best for you.
That’s fine. I recommend starting with a single catalog for now. Then, as your experience with Lightroom grows, along with your database, you can always create new catalogs later on.
Or if you’re shooting a lot already and know you want to create different categories, then create as many as you’d like. Try it out, and you might discover it works for you.
If it doesn’t that’s o.k. because you can go back and merge all your catalogs into one catalog. Here’s how…
How to merge multiple catalogs into one
Open up the catalog you want to use as the master database and then go to:
File > select “Import from Another Catalog”> locate and select the catalog.
Lightroom will then begin merging the data of the photos you selected with the open catalog. It’s going to transfer over everything. All your edits, collections, smart collections, and any other information about that database will now be in your new catalog.
If you have more than one additional catalog, go ahead and do the same thing for the others to merge all of them into one.
Now What?
The next step in your Lightroom journey is building on the basics with our: 7 Step Lightroom for Beginners guide. This a perfect place to start for new Lightroom artists!


