I dropped my new K&F Concept 2-in-1 filter off a cliff...
is it still usable?
Subscribe
Why am I eating a ham and cheese sandwich in an outhouse? Stay tuned to find out.
So I recently dropped my Nikon Z8 + 20mm prime lens and the CPL plus ND two-in-one filter over a cliff.
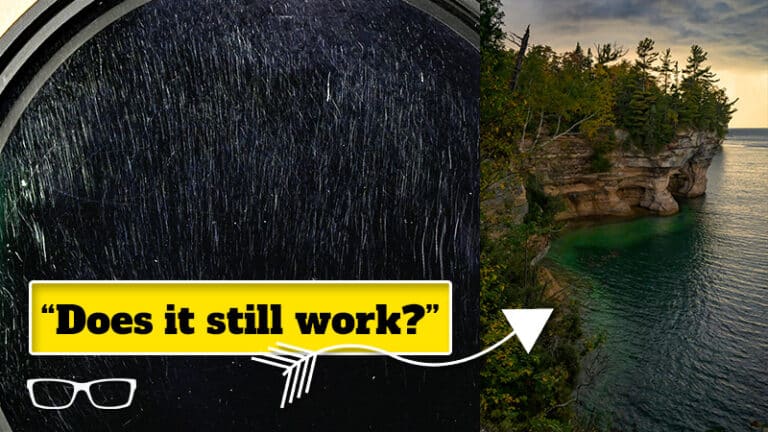
But as you can see, the filter survived.
There are no cracks, no dents, except you can’t see hundreds and hundreds of little teeny tiny scratches across the surface where it was embedded in some wet, moist soil.
So today, I want you to come with me out into the great outdoors to test out this filter and create some epic images along this 10-mile trek to see if this filter will still work and if it will degrade the image due to the scratches.
First Trail
My main destination is about three miles away, maybe two or a half miles away.
I don’t know.
I don’t have a GPS system with me.
There is no cellular data out here. Still, I’m noticing a shift in the landscape, whereas before, it was very steep climbs with many rocks, dense trees, forests, etc.
And things are starting to spread out a little bit.
So it’s gonna be interesting to see if I can find any type of images along the way to that final destination where I wanted to shoot primarily landscapes.
Still, there might be some woodland type of shots that I can shoot out here as well.
Initially, when I had planned this trip, it was to get some fall colors.
This is the first week in October. I’m in the upper peninsula of Michigan, and we would be at peak colors this time of year.
However, as you can see, it’s mostly green right now. So I won’t get those fall colors, but I expect some epic landscape opportunities just ahead.
The other thing I want to mention before we get to that location or the following location is that the more I spend outdoors, the happier I am.
I think what I want to do in the future is more of these videos where I am exploring the great outdoors and sharing what I see and why I am shooting, what I’m shooting, the composition of light, and things like that.
Chipmunks
It just stirred up a bunch of chipmunks because they were chattering pretty loudly back and forth a couple minutes ago, and I was able to create a couple of woodland-type images that I will share at the end.
I promised I would walk you through the composition, but I’ll do that when I show you the images. I’m currently on a tight deadline right now.
The sun is setting in about four hours, and I want to get there a couple of hours ahead of time to get set up and get the compositions I want during sunset.
I will speed it up here and get to that final destination.
First Location
So I finally made it to one of the locations I wanted to shoot at and test out the filter, but it doesn’t look like Mother Nature wants to play nice.
Today, we have a massive cloud with lightning, thunder, and rain off into the distance.
I wonder if that’s coming this way.
The wind is blowing out, so hopefully, it doesn’t come.
If it does, I’m screwed. I can’t make it out before getting wet.
That being said, check out this location. How epic is that? I love it. So, I’m going to get a couple shots here.
I won’t have time to walk through what I’m shooting, composition, etc.
We’ll save that till the end, and I’ll let you know whether or not the CPL & ND filter works when it’s scratched.
I hope to leave here alive to share that information with you.
Good News + Bad News
Ladies and gentlemen, I have some good news, and I have some bad news.
The good news is I just created a couple of epic landscape images. I can’t wait to share those with you if I get out of here alive because the bad news is Mother Nature is coming for me fast.
It’s only five o’clock in the afternoon, and it’s getting super dark another two and a half hours before sunset.
And I’m still determining if I will return to the car in the next two hours without getting wet.
I must find shelter, but seeing in the wilderness will take much work.
So wish me luck.
It’s Raining
So it looks like Mother Nature won this round.
I didn’t get the sunset photo that I wanted.
Still, I did create a couple of epic images before she came pouring down and a couple of not-so-great photos. I did brave it out inside of a semi-enclosed outhouse.
However, the stench was too much to handle.
I would rather brave Mother Nature and her reign than sit there and smell that for the next three to four hours or however long it’s gonna take her to unleash her wrath.
And once I get back to the truck and back home, I’m gonna dry off, and I’m gonna share those epic images with you and share whether or not you can use a CPL + ND filter with scratches on it.
Talk soon.
Image Reviews
I have made it back alive and dry, and I didn’t melt like Mama said I would because that was so sweet.
I was gonna melt in the rain. Just kidding. Anyway, I have six images here that I wanna share with you.
We’re gonna go over some compositional tips real quick, and then I’m going to answer the question we’ve all been waiting for.
Does a scratched CPL plus ND filter ruin your images? Is it going to degrade your images?
So let’s find out.
So, this is one of the woodland images I created on the way to the final destination.
It could be a better photo, but it’s okay. I like it.
And that’s because of the compositional techniques that I applied to this particular image: these converging lines from the trail that direct our viewer into the rest of the image.
We also have some luminance contrast between the trail here, which is much darker than the background here and is much brighter, which also grabs our attention.
Here are a couple things that could make this image better. Mist, fog, or someone or something at the end of the trail, like a person or maybe a deer or moose or something, to add additional interest to the image.
But overall, it’s an okay image. Alright, here’s one of the first shots I created with the scratched CPL plus ND filter.
Now, the composition is okay. It could be better, and it could be more balanced.
If I place a line down the middle here, you can see it’s much heavier on the left than on the right.
But other than that, I’ve utilized the foreground as a frame and a leading line into the rest of the image.
And then our eyes naturally gravitate to the background here because these clouds are very deep, dark blue, and we can see a storm coming.
It gives you an indication of the weather at this time of day and what I was facing.
Now again, just like the previous image, it would be nice to have another subject over here, like maybe a boat or something out here, a kayak, cruise ship, or something to add into this area here to balance it out just a little bit and that would make this particular image that much better.
But I like including the foregrounds like this to indicate what’s on the other side or what’s on the cliffs over here.
And we can see that better in this image here. I really love this location.
This was a bit further than this location, so the clouds rolled in even more than in that previous image.
But I like utilizing foreground elements like this to indicate what the cliffs are made of, which is sandstone.
And you can see right here we have some sand down here. So it gives you a glimpse into what’s on the other side, plus the type of trees.
Now, this tree had fallen.
Unfortunately, I had seen this particular image with this tree alive and well before I went.
So I was disappointed to see that it had fallen over, but it gives us a bit more of a foreground interest.
And then we have another tree over here that kind of frames or balances out this image better than the other one.
If we put a line down the middle here, we now see that it’s much more balanced than that previous image.
I’m curious how much I like this image because I find these leaves and branches distracting from the rest of the scene.
We bounced back and forth between the left and right sides.
So, I like to make things simpler.
So, we have a particular subject to focus on, which I did in this specific image.
So all I did was I was back here about four or five feet away from the edge.
I just moved up to the edge right here.
I put my tripod right about here, allowing me to bypass that foreground sandy area and the tree to make a more straightforward image.
And I like this image a lot better, but I also like this one.
So let me know in the comments which one you like better, the tree or without the tree.
I like this one because it is more straightforward, but we also have these strong diagonal lines coming in and converging at this point.
We also have them here a little bit, but these two diagonal lines are much more potent than this shorter one over here.
Now, as far as the foreground element, it’s plain, but the water’s color creates interest in the foreground.
So, this is the foreground, the middle ground. And then, of course, the background is the clouds.
So, we have depth in the image, which helps with this particular composition and this one. Now the color is excellent. I like this color.
Now, I didn’t manipulate the colors by changing the hue to get this green color that’s the natural color because the water is so shallow.
The color of the elements underwater and the blue water creates this greenish aqua type of color.
I did enhance it slightly with saturation and vibrance to make it more prominent, as well as some dodging and burning to make it a little bit brighter than it was at the time of capture.
Now, this last image here is my favorite.
Again, if we put a line down the middle, we can see that it could be more balanced.
Actually, I need to put that on the correct layer here.
So I’m gonna put a line right down the middle so it’s heavier on this side than this.
Not every image has to be perfectly balanced, but I like a little symmetry in my image.
And again, I like to make them cleaner and simpler by eliminating elements that aren’t helping the overall image.
In this case, the trees here distract from the primary subject, which is these cliffs right here or this cliff right here and these trees.
And I like the character of the sandstone cliffs right here.
And then our water here again is really shallow.
So what I did is, again, I moved closer to get in a bit tighter on the primary subject here, which is right here.
So that is the primary subject.
We have some leading lines with the elements under the water and the cliff’s edge that help direct our viewers into the rest of the image to the primary subject.
And we do have depth in here because we have our foreground elements here, our middle ground, and then our background again, so we have that depth.
Now, I do like the contrast and the colors in the storm clouds that are starting to dissipate at this point in time.
And we have this little glow from the sun coming through.
And I really love this image.
I took over a thousand images from this trip, and this is my favorite one again.
Let me know which one you like better, trees or no trees.
The answer is no in terms of whether the scratched filter degraded any of these images.
I zoomed in 100, 200, and 400% and saw no degradation from the scratched filter.
I will continue using it and don’t need to get rid of it until some significant heavy scratches become visible on my images.
Until then, I’m gonna continue using it.
If you are new to CPL and ND filters or are still determining what they are, they can improve your images.
To learn more about them, I created this video tutorial explaining what they are and how they can improve your images.
Thanks for watching, and have an awesome day.