#8 of 10 Things
All New Lightroom Users Should Know
- Post by Parker: 30 Years experience!
- No Comments
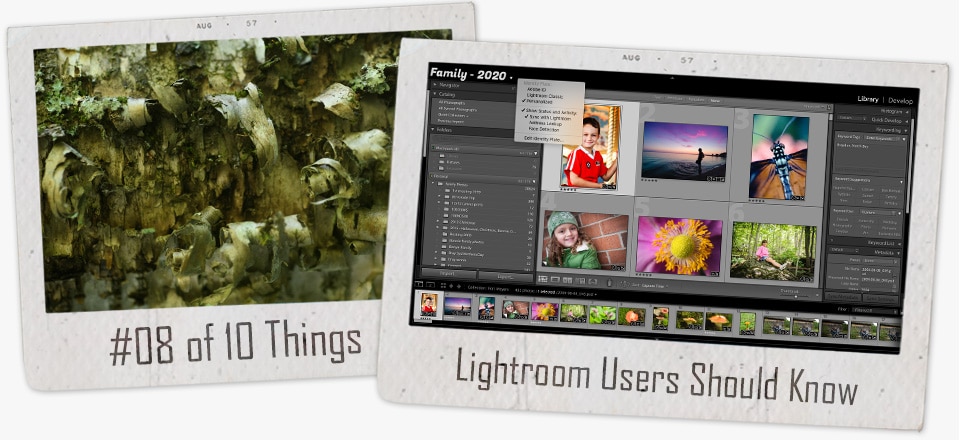

Table of Contents
Hello everyone. Glad you’re back!
Lots of new Lightroom tips today. And it’s time to get a little personal. Kinda.
So, grab a coffee, some popcorn, or whatever you need, and let’s get started…
Customizing the Layout of Lightroom!
In a nutshell, today’s installment is about customizing the layout of Lightroom for your “personal” workflow.
Yes, it’s all about your workflow again.
Anything you can do to systemize and make it easier/faster to do something in Lightroom is worth talking about.
Even the layout of Lightroom.
Plus, all those panels and Modules can be intimidating if you’re new to Lightroom.
And, you may find that you’re not using them all.
To hide or not to hide panels? Show or hide links? Show or hide inner-panels, tools, and more, oh my!
Let’s start at the top.
7 Modules
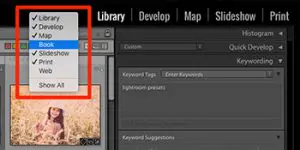
There are a total of 7 modules within Lightroom (in this order – top right); Library, Develop, Map, Book, Slideshow, Print, and the Web Module.
But what if you don’t use all the modules?
Well, hide them. For instance, I never use the Book or Web Module.
Right-click in the upper right panel and de-select any Module you wish to hide.
Presto! All gone and less clutter.
Want them back? Right-click and re-select.
Actually, we can right-click on a lot of stuff for additional options/features.
Try It
Right-click on the inner-panels to show/hide specific inner-panels. Solo Mode is pretty awesome. Select and give it a go… Er, click on a new inner-panel and watch what happens.
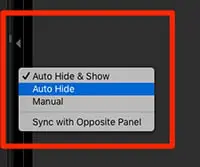
Right-click on the little arrow (of the outer panel)…
…and that will show or hide it. Plus, my favorite option is -> Auto Hide & Show.
Try it.
When you do, then place your mouse over the arrow, and the panel will become visible.
Navigate away from the panel, and it “auto” hides. Neat, eh?
Right-click on your background to change the color.
Right-click on your Identity Plate for more visualization options (and features).
Oh… select “Edit Identity Plate” and you can change it to custom text or your logo, and you can also change the fonts (and colors) of the “Module” text.
Plus, much more! Check it out.
F Keys
You can also use your “F” keys to customize Lightroom’s layout…
- F5 to show or hide the top Navigation panel
- F6 to show or hide the Film Strip
- F7 to show or hide the Left Outer Panel
- F8 to show or hide the Right Outer Panel
This little tip is invaluable for additional monitor real estate.
Press the letter “T” to show/hide the Toolbar.
Since we are on the Toolbar… click on the little arrow, all the way to the right, to show/hide additional tools.
Pretty cool, if I do say so myself.
More Shortcuts
Here are a few more shortcuts for changing your layout…
Press the Tab key on your keyboard, and it will hide BOTH the left and right outer panels.
Press Shift-Tab, and it hides the top and bottom outer panels, at the same time.
Okay, there you have it.
A bunch of tips and different ways to customize your Lightroom layout.
Small but powerful ways to personalize your workflow.
How so?
Well, I like to edit an image as big as possible.
If all these extra panels are in my way, then I have to “squint” to see the teeny-tiny-microscopic image.
In that case, I’m zooming in and out, in and out, all the time. And it’s slowing me down.
Uggghhh!
In that case…
Option number 1; customize your layout.
Option number 2; use a gigantic 72” monitor.
Well, maybe not that big. I do like my 27” iMac though (and I still hide my panels).
Did I miss anything? Do you have any additional tips you’d like to share?
If so, let us know in the comments section below.


