7 Key Ingredients For Light In Photography
The most essential element in all of photography is light. In fact, without it, you couldn’t create a photo!
This lighting guide is the core foundation you need to know to master lighting in photography.
In this lighting guide, you’ll discover the four characteristics of light and the three behaviors of light. These seven core concepts will give you a head start in your journey as a photographic artist.
If you are ready to learn the wonderful and magical world of light, let’s get started.
Table of Contents
Light IS Photography?
Do you know the true meaning of “photography”?
Get ready to have your mind blown. I hope you’re sitting down and ready. Here it is…
According to Wikipedia, the word photography was created from Greek roots…
- φωτός (phōtos)
- genitive of φῶς (phōs), "light"
- and γραφή (graphé) "representation using lines" or "drawing"
So, photography is the art of drawing (or painting) with light.
How cool is that!
She’s taking “seeing” to a whole new level! Photo by Gabriel Santos.
Learn To See the Light & Then Paint With It
We take light for granted. It’s all around us, and we see it constantly. But, I would like you to take a moment and just look around you to consciously “see” the light.
Where is the light coming from, and in what direction?
Is the light soft or harsh?
What color is the light?
How bright is the light?
As you consciously look at the light, you will begin to notice the four characteristics of it. It also behaves (or interacts) in three distinct ways within our environment too.
As you learn to see how the characteristics of light alter your image, you’ll then be able to paint with it to fulfill your creative vision. Knowing how light behaves will give you a better understanding of the science of light.
Oh, and yes, both will help you become a better photographer!
The Four Characteristics of Light
In the last section, you did a quick exercise to look at the light around you.
Those questions I asked you included the four characteristics of light.
You are now going to take a deep dive into these four characteristics to help you better “see” the light.
ONE.
the Color of Light
Next time you go for a walk what color is the light? Photo by Eric Villalobos.
The color of the light changes continuously throughout the day. This can be seen more so during sunrise or sunset. At those times, the color tends to be much warmer and saturated with blues, oranges, purple’s, and more.
But, during the middle of the day, you’ll notice the color is more subdued and white to blue.
Under the shade of a tree, the color changes again, and you’ll notice that it will be bluer.
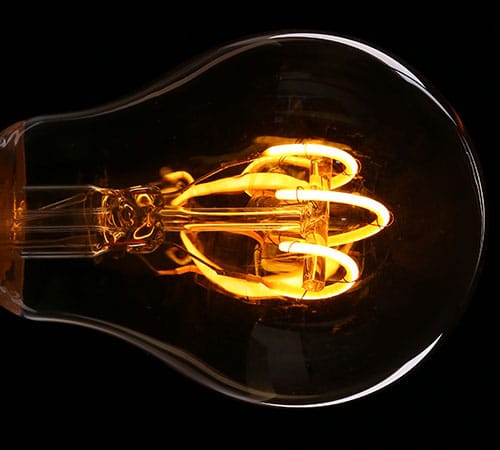
If you take a look at the artificial lighting in your home or office, the color is different again. A lamp will tend to be more yellow to orange. Fluorescent lighting is more green to blue.
So the question is, why are all these different sources of light emitting a different color?
That’s a great question, and let’s explore why that is.
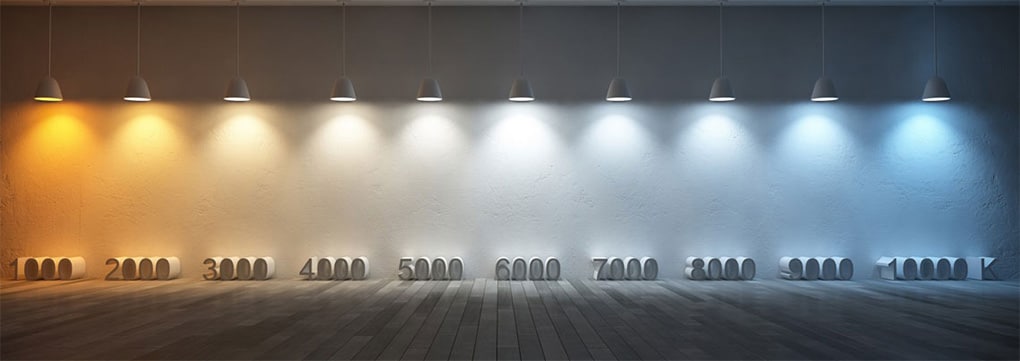
This represents the Kelvin Scale. The color of light ranges from 1,000 degrees to 10K.
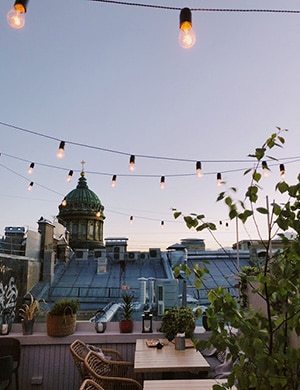
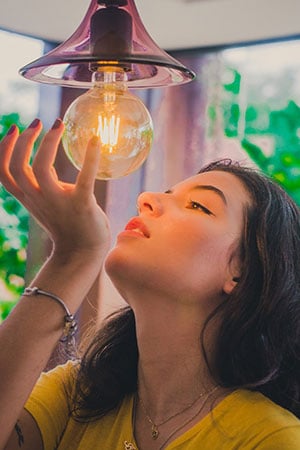
Mixed lighting. Notice the color of the light from the bulb vs. the natural light.
"See" the color of light.
The colors that are being emitted are being done so at different temperature levels. Light itself can be measured in what is known as a Kelvin temperature.
Kelvin temperature is a color scale that represents, well, the temperature of light.
On a bright sunny day (in the middle of the afternoon), the Kelvin temperature is around 5500 degrees, and the color is white.
But, when the sun sets, the color temperature will be closer to a Kelvin of 1000 – 3000. Depending on the time of the setting sun.
A table lamp is on the lower end of the Kelvin scale as well. This is why it tends to be more yellow.
Unless, of course, you purchased a bulb that is “white balanced.” In that case, it is going to be closer to the color during the middle of the day (white).
Capture the color of light to shape your stories.
So why is the color of light vital to you as a photographer?
Well, the color you capture can help you tell a story based on the mood a specific color portrays.
White & yellow represents warmth, fun, and happiness.
Blues and greens could represent cold, sad, and sick.
Yellow can portray sickness too.
You wouldn’t want to take a portrait of somebody and use light that’s going to paint them with blues, greens, or even too much yellow.
One, it’s going to make their skin-tones look unnatural
Two, it’s going to make that person look unhealthy
TWO.
the Quality of Light
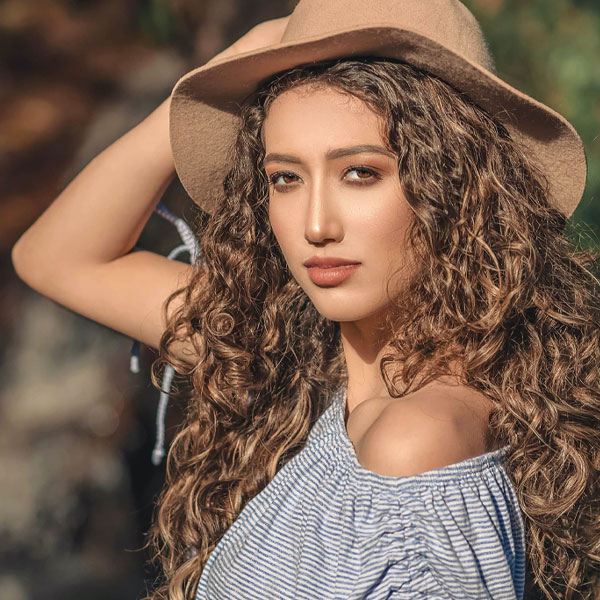
Look under the chin of both images and notice the difference in the shadows. One is softer than the other. Click to enlarge.
Photos by Renato Anati.
There are two properties in regards to the quality of light. Soft light or hard light. The quality of it is a direct result of the intensity of the light.
"See" the quality of light.
The quality of light can be seen in the highlights and shadows of everything around us. As well as in the images that we create.
In regards to highlights, the quality of light is considered to be hard light when those highlights are brighter. If they’re less intense, then it’s considered to be a soft light.
The quality can be better seen in the shadows. Take a look at both images to the left. What do you see?
The shadows in the first image have a harder edge and are more defined vs. the second photo.
Change the quality of light.
One of the easiest ways to make your light softer is by diffusing it. As the sun hides behind a cloud, it instantly becomes softer. As soon as the sun peeks around that cloud, it becomes more intense or harder.
If you’re using artificial lighting, you can cover it with a diffuser to make it softer. Another option for creating soft light is to bring the light source closer.
If you want to create hard light, then move the light source away from your subject. The further the distance, the harder it becomes.
Use the quality of light to tell a story.
The quality of your light can mean different things based on whether you’re using hard or soft light.
- Hard lighting can represent strength or chaos
- Soft lighting could represent elegance or surreal
THREE.
the Intensity of Light
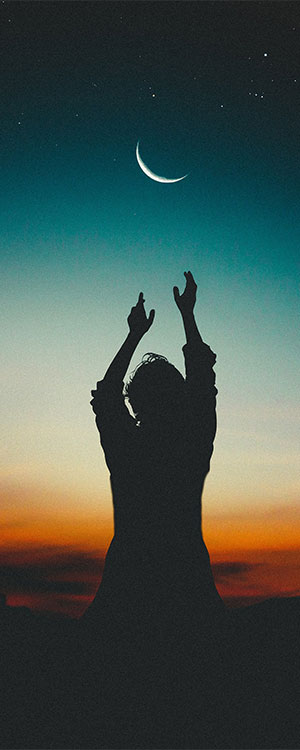
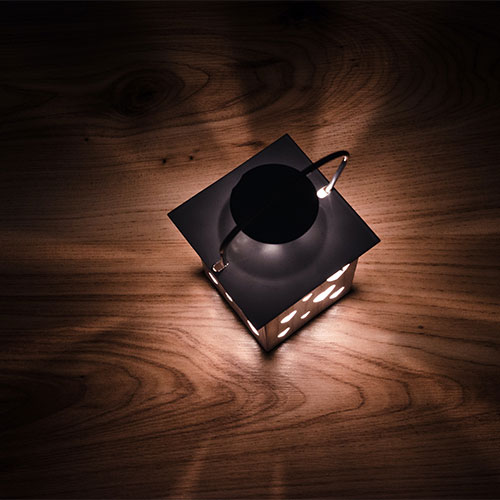
Photo by luizclas.
The intensity of light refers to how bright or dim it is. The strength is related to the quality of light as well. Intense lighting is harsher. Whereas less severe can be softer.
Although the light from the sun is constant, it can be more or less intense, depending on the time of day.
"See" the intensity of light.
At noon, the sun is at its brightest. As the sun begins to set, it’s not as intense. Once the sun has set and the stars come out, we have a new light source.
However, the intensity of the stars is much lower versus the sun at any time of day. Then, if we look at the light being reflected off the moon, it’s much more intense than the stars.
So the question is, how can you adjust the intensity of light for your photographs? Let’s find out.
Change the intensity of light.
When it comes to ambient light in photography, we are limited in how we can adjust that intensity. We either have to wait for the time of day to change, use reflectors to increase the strength, or use diffusers to lower it.
With artificial lighting, we have more control over the intensity of the light. You can decrease it by moving the light source closer to your subject. Or to increase it, move the light source away from your subject.
Use the intensity of light to tell a story.
Using the intensity of light can also help you tell a story based on its strength.
- Intense lighting can be used for portraying strength or chaos
- Less severe light can represent something to be soft, elegant, or surreal
Intense lighting can also be used for specific types of photography.
- Low-key photography is used with less intense lighting
- High-key photography uses more intense lighting
FOUR.
the Direction of Light
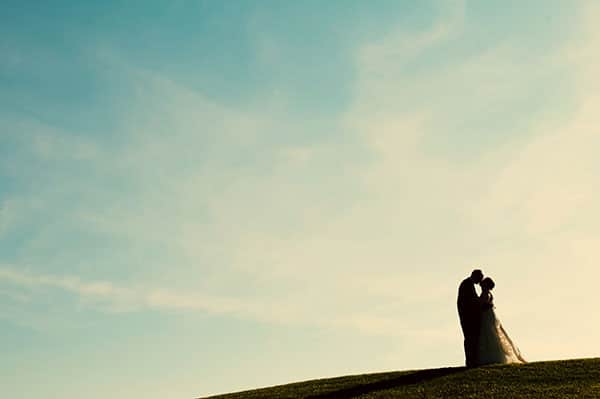
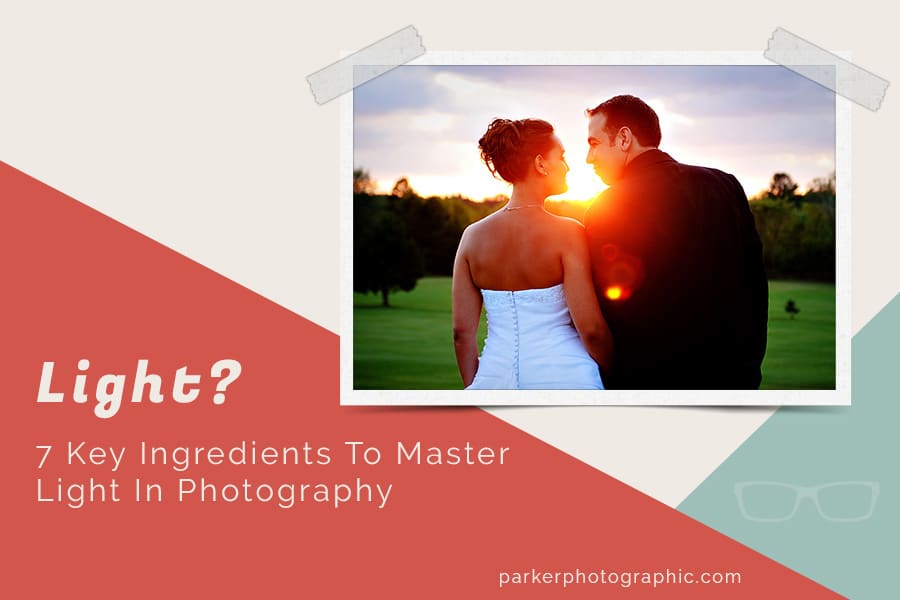
Backlighting and sometimes side lighting (in this image) are perfect for creating silhouettes. For this image, I exposed for the sun which created the silhouette.
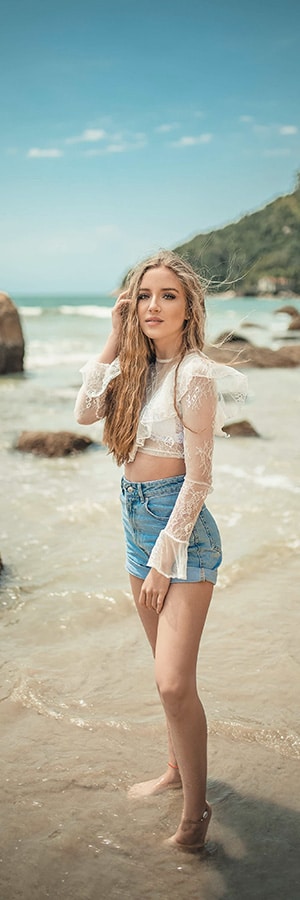
Side lighting can be tricky with outdoor portraits. It all depends on your vision for the shot. Photo by Renato Anati.
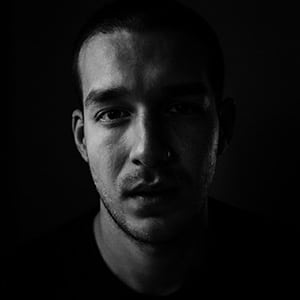
Side lighting can also be bold, strong, or dramatic. Photo by Máximo.
The direction of light is our fourth characteristic that you have to consider to create the type of image that you want.
In essence, there are four basic lighting concepts in photography in regards to the direction of lighting.
- Side lighting
- Backlighting
- Front lighting
- Overhead lighting
These four basic options can dramatically change the appearance of the subject in your photograph. This is due to the direction of light transforming the shadows on your subjects.
Shadows by themselves can tell a story of what it is you’re photographing and is directly affected by the direction of the light.
"See" the direction of light.
In outdoor photography, your primary light source is the sun. And of course, the sun is mostly overhead.
However, depending on the time of day, the direction of that light can come from different angles, which can illuminate your scene differently. This, in turn, changes the shapes and sizes of the shadows.
When the sun is low, you’ll notice that the shadows are longer versus shadows during the middle of the day.
Change the direction of light.
When it comes to the sun, we can’t change the direction of that light source.
But, if we are photographing people, we can move them in a way to change the direction from which they’re being lit. The same is true of any other object that can be moved. At least in regards to the front, side, and backlighting.
When using artificial light, you have more control over the direction of it. The use of light stands, boom arms, and more can help you change the angle and direction of it based on your creative vision.
Use the direction of light to support a story.
Being aware of the direction of light can help you shape and tell stories about your particular photo.
- Top lighting for portraits can create a mysterious or bold type of look
- Side lighting can be dramatic
- Front lighting is flat and reveals the subject in detail
- Backlighting can be ethereal or surreal and can hide details
These are general rules, of course. It all depends on a variety of factors including but not limited to: additional lighting, fill light, exposure settings, and more.
Do You Know the 3 Behaviors of Light?
Now that you know the four characteristics of light, it’s now time to learn the three behaviors of it. These behaviors are part of the 7 key ingredients to understanding and mastering lighting in photography.
ONE.
the Reflection of Light
Water is a specular reflection.

The eyes are specular reflections. Take a closer look at the eyes and you’ll see people being reflected.
The rest of the face are diffused reflections.
Click to enlarge.
As you may or may not know, everything around us is reflecting light. When the light is being reflected off of a surface that allows us to see everything in our world.
Then the different colored wavelengths reflect back the colors of those objects.
Things can also change based on the type of surface of that particular object. A textured surface is going to reflect light differently versus a smooth surface.
Specular Reflections
When you have a smooth surface like a mirror, metal, or even water, that type of reflection is known as a specular reflection. A mirror reflects 99.9% of the light, and what you see is yourself or whatever is in front of it.
If you look at other similar types of surfaces, like tire rims, water, your eyes, you’ll see a reflection of yourself more or less depending on the surface.
But on some level, all objects reflect light, which is why we can… that’s right… see them.
Diffused Reflections
When light strikes a surface that is irregular like paper or skin or something rough like a stone, you get a diffused reflection.
So what happens is when that light strikes that surface, it will be scattered in all different directions.
In most cases, objects that do not have a specular reflection are then considered diffused reflections.
Although most objects have a combination of both a smooth and a rough surface.
And we can definitely see that in this photo.
Here we have the specular reflection in the eyes, and then pretty much the rest of the face is a diffused reflection.
So when the light strikes your pet, you can get both a specular and diffused reflection. It all depends on the surface itself.
TWO.
the Absorption of Light
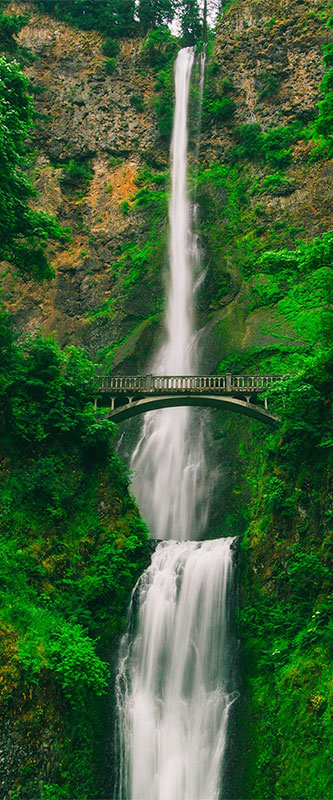
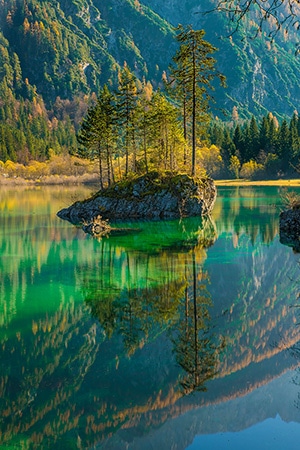
Behind the water we can see some foliage which “transmits” the color through it.
Surfaces will reflect a certain amount of light, as demonstrated previously. Any light that is not reflected is instead absorbed by the surface. Which brings us to our second behavior… absorption.
Every object basically absorbs some wavelengths of light and reflects others. And as you know, that’s how we’re able to see the objects and the colors of those objects.
So the amount of light reflected or absorbed by something will affect the way that object looks in terms of brightness levels.
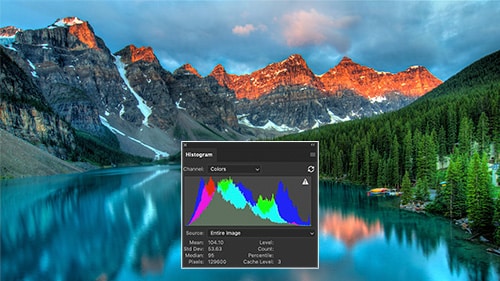
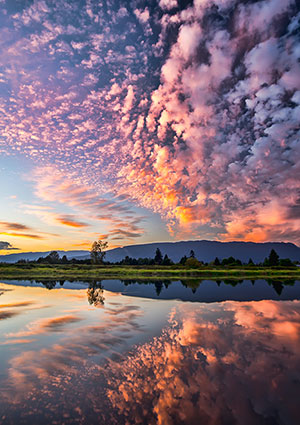
In the image of our waterfall here, we can see that we have a lot of tonal ranges from whites to dark.
The brighter areas like the falling water are reflecting the most light. The darker areas of the image are absorbing more of the light and making them appear darker.
Absorption will also impact how you see different colors when the light is absorbed by the surface.
Wavelengths (the color) of light are absorbed by a surface. Anything that reflects back is the color of the object.
THREE.
the Transmission of Light
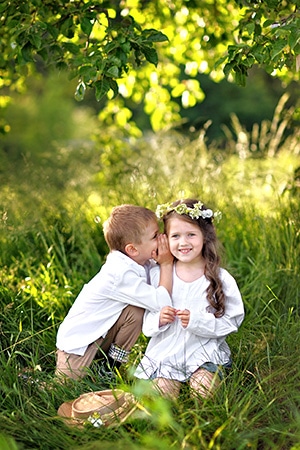
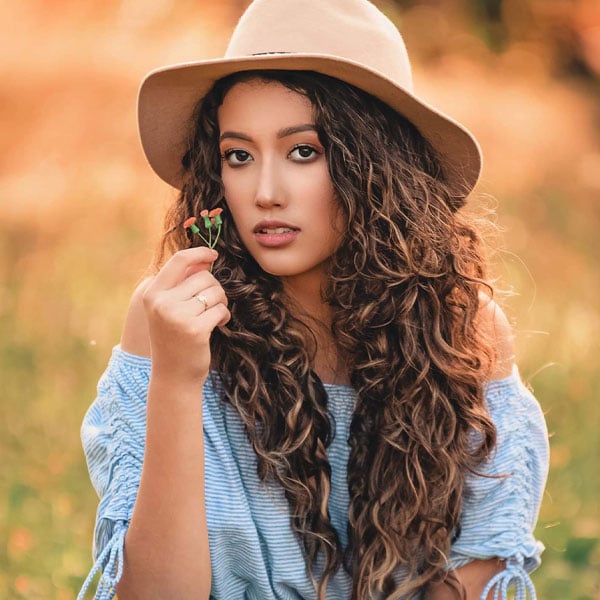
Here the light is being transmitted through the trees. You’ll need to be careful for situations like this. Otherwise, the color of the leaves will dominate the skin-tones. Fixed in post-production.
Our third behavior is transmission. Transmission of light is when it hits the surface and passes through it.
For example, when it passes through a window that is transmission in action.
Diffused Transmission
There’s also another type of transmission called diffused transmission, which is similar to a diffused reflection in that the light will be scattered.
But the difference is it doesn’t scatter until it passes through the surface. You can see this when sunlight passes through a cloud.
Also, as the light transmits through an object, the color of the light will change based on the color (s) of the object.
You can see this when you place a person under a tree with bright sunlight. The color of the sun is white at hi-noon. But, as it transmits through the leaves it takes on the color of the leaves.
Lighting For Photography Is a Journey
Now that you know the four characteristics and the three behaviors of light, you have the key ingredients for photography lighting. But the journey doesn’t end here. In fact, mastering light is a lifetime endeavor.
The next step is to learn how to control light based on your creative vision for a particular shot with photo equipment, like:
- Reflectors
- Skims
- Speed-lights
- Strobes
- And more
What's Next?
Here are some more articles to help you create exceptional photos:
What is Aperture in photography?
What is Shutter Speed in photography?
What is White Balance?
7 key ingredients for light in photography