What Is White Balance? Discover Its 2 Core Elements - Accurate + Creative Powers
In photography, White Balance (WB) is one of the most overlooked camera settings.
This is a mistake, in my opinion, because the white balance is another means of expressing yourself creatively and for storytelling. Plus, there’s an ugly side to white balance, too, when misused. Hint: auto white balance is not 100% accurate.
Today, you’re going to discover the two components of white balance; Accurate + Creative.
If you’re ready to learn all about what the white balance is and how to use it creatively… let’s get started. Oh, and I’m going to let you in on a little known secret that will blow your mind!
Table of Contents
The Color of Light
Before you can fully appreciate white balance, we must first explore the color of light. It can have a profound outcome on your images. Besides, as you will soon learn, white balance is all about the color of light!
Not all light is created equal. The color of light from one source to another will have a different color.
Even the same light source can change colors in different conditions… cloudy vs. sunny, for example! Plus, the same light source can change colors over a period of time.
A perfect example of color changing over
time is sunlight.
Around early afternoon the sun emits a tone that is closer to white. But, at sunset (or sunrise), the color is more yellow to orange.
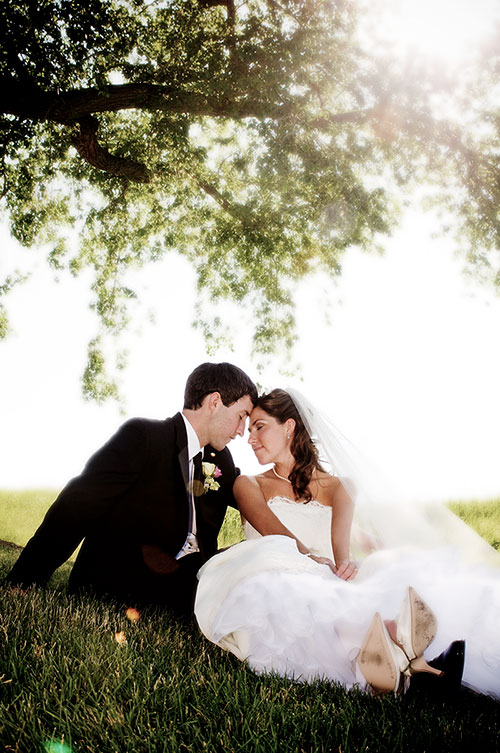
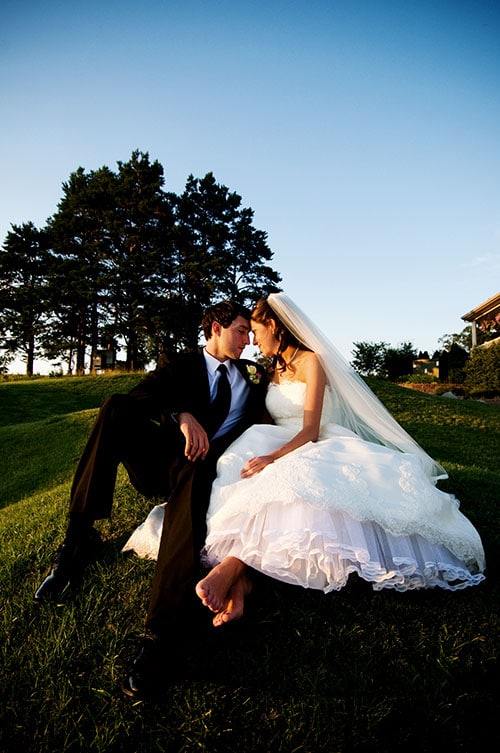
Check out the images below as examples of this color change. Note how the color of skin tones is warmer in one vs the other.
What Can You Do With the Color of Light?
The color of light can help tell a story, make skin look natural or unnatural, affect the mood or feeling of the image, and much more.
Therefore, based on your creative vision for the shot, you must tell your camera what color the light should be. That is if you want natural-looking skin tones, want to add a creative flair, or whatever your heart desires. When you do, you’re “balancing” the light!
Oh, and I would argue that you’re becoming a true photographic artist when you consciously choose your white balance.
The image was taken with a white balance that was too warm. Skin tones look unnatural.
Adjusting the white balance in Lightroom resulted in a more pleasing color. Now the skin looks natural.
What Is White Balance?
White balance in photography is about altering the color of the light source to match the white color you see in person, so it’s rendered pure white.
Otherwise, the white or grays (highlights and shadows) will have a color cast. This color cast can be detrimental to your image. Or it can be pleasing to the eye and even artistic.
If the whites in your scene appear yellow or blue, they will be pure white after properly white balancing.
Although you can do this in post-processing, it doesn’t always work. Therefore it’s still best to do your white balance editing in-camera as much as possible.
Choosing your colors (or picking the white balance) is part of the equation for creating exceptional photos. The others include aperture, ISO, shutter speed, and composition.
What Should You Do About Color Casts?
There will be times when you’ll want the greys to be neutral or “white” balanced. Therefore, you’ll adjust the white balance to remove these color casts to render white pure white and black pure black. To alter whites’ to be pure white, you need to add the opposite color being emitted to balance the image.
Other times a color cast will be necessary to the creative vision of the shot. Or to capture the color of light at a specific time of day. For example, at sunset, if you were to strip the color cast from the setting sun, it would look unnatural.
Then again, if you’re shooting portraits at sunset, the overwhelming color cast can make skin tones look too orange. In that case, you may want to dial back the color cast.

The colors of the sunset are accurate to nature when you select the correct white balance.

For this image, the white balance used makes the sunset colors look unappealing… fake.
How To Choose the Correct White Balance
The white balance itself is not a specific color choice. Instead, it’s a tool to adjust the color of light. For example, if the image is too warm, you can use the white balance options to make it cooler.
You have three options when it comes to adjusting the white balance.
- The first option is to let your camera make the creative decisions for you by using Auto White Balance (AWB)… not always accurate.
- Another option is to use pre-made white balance presets based on the lighting conditions.
- The third option is to set the exact white balance for a specific light source.
We’ll go into each of these in more detail soon. First, let’s take a deeper dive into the color ranges different lights emit.
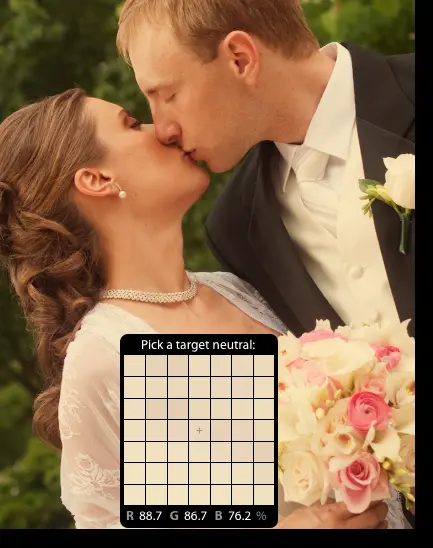
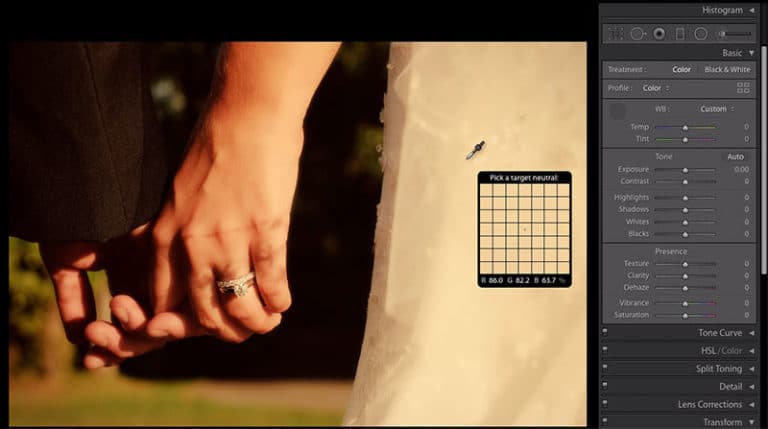
Click to enlarge. The fourth option is to fix it in your editing software of choice. The brides dress and the grooms shirt/tie should be pure white. The white balance tool in Lightroom shows that they are not “white” balanced. The Red is at 88, Green is 86, and Blue is 76%. When all three color channels are equal or close to equal then the whites have been balanced!
Kelvin Temperature?
Kelvin is a friend of mine. I’d recommend you two become friends too. Doing so will forever change how you shoot.
So, what is Kelvin? Glad you asked…
Kelvin is a scientific measurement of the color temperature of light when an element (black metal in particular) is heated. The Kelvin temperature is donated by the letter “K.” For instance, white in Kelvin is 5500K (a.k.a. daylight balanced).
Kelvin assists photographers by helping you visualize the color temperature of different light sources. Plus, these colors are assigned a Kelvin number for easy reference.
This is done by plotting familiar light sources you’ll encounter as a photographer along with the corresponding Kelvin color temperature.
Check out the Kelvin scale below (above on mobile). The light sources and lighting situations produce a color range from orange to blue. If your creative vision is to remove these color tints, you have to do what?

This is a Kelvin scale with a variety of lighting conditions that correspond with the color temp. Flash and or strobe lighting is around 5400K and is equal to daylight at certain times of the day.
That’s right… “white” balance the image.
According to the Kelvin scale, if you take a photograph on an overcast day, the color temperature of light tends to be more blue than white. If you’re shooting portraits and ignore this color tint at the time of capture, the skin tones will look unnatural.
Then, you’ll have to spend time fixing it in post-production.
To fix it, you’ll select a white balance option that will counter the tint and make the grays neutral (for pure whites’ and blacks’).
Kelvin is the “pure” color of the light. White balancing is adjusting that color temperature so that whites stay pure.
This Is Going To Blow Your Mind!
Some of you may have already noticed this and are confused by it. What am I referring too?
Take a close look at the Kelvin scale again. It shows yellow colors on the left and blue on the right.
Now, take a look at the white balance tool in your editing software. Chances are it’s in reverse of the Kelvin scale!
The same situation applies to your camera. If you choose a Kelvin of 2500K, your image will have a strong blue tint! 7500K will be orange.
Why is it the opposite of the Kelvin scale?
Remember, Kelvin is the color temperature emitted by the source. White balance is the process of “balancing” the color.
Let’s say you have lighting that is emitting a lot of blue. On the Kelvin scale, blue is on the right. To eliminate this color tint, will you adjust to the left or right of the scale?
Notice how the Temp slider has the blue on the left and the yellow on the right. It’s opposite of the Kelvin scale.
To the left, of course, since that’s where white is positioned. If you go to the right, you’ll add more of the same color tint. Therefore you have to add more… yellow!
In essence, white balancing is compensating for the Kelvin color temperature to generate the desired result. Or put another way, you have to add the opposite color range to balance the whites.
Why Choosing Your White Balance At Time of Capture Is Essential
Deciding on the color temperature range, you want to capture before taking the photo has two main benefits.
ONE.
Getting the white balance right in-camera saves you editing time.
TWO.
It will yield a higher quality image since you don’t have to “fix” it in post-production.
Sometimes, it can’t be fixed, and you end up with unnatural skin tones.
RAW vs. JPEG
This isn’t a debate about which file format is best. It’s about what happens when you get the white balance wrong in-camera and wish to change it.

The wrong white balance was captured during the photo shoot. It’s too warm and the skin tones look unnatural.

In Lightroom, it was easy to fix the WB since I shoot in RAW. I dialed in a Kelvin temperature of 5200K and now the skin looks more natural…. and the whites are pure white.
RAW
In RAW, it’s easy to change the white balance. In Lightroom or ACR, you can easily choose a different white balance by dialing in a specific Kelvin with the Temp slider.
Or you can select from a pre-made white balance setting option that has a specific color temperature built-in. For example, the “cloudy” option is equivalent to around 6500K (remember this is the opposite of the scale). This white balancing option will tend to make your images warmer.
JPEG
Changing the white balance for JPEG files isn’t as easy. As you may or may not know, JPEG files are compressed at the time of capture. The white balance you selected before taking the photo is embedded in the JPEG and can’t be changed afterward!
Yes, you can try and color correct the image to remove the tint. However, it all depends on the color temperature of the light and its intensity. If you choose the wrong white balance, you’ll spend a lot of time trying to get skin tones natural. Sometimes it will be impossible to fix.
How To Determine The Correct White Balance To Capture
Like photography, color is subjective. Personally, I prefer images on the warmer side that lean more towards red vs. green. It depends on the subject too.
That being said, you might prefer a cooler image. Then again, you might not even have a preference at this time. This might be due to not being aware of the different color temperatures of light.
Let’s explore the different white balance options your digital camera might have to select from.
Auto + Custom WB
The Auto White Balance (AWB): allows your camera to make the “white balance” decisions for you. This will be an estimate based on the algorithm within the camera. The color temperature range is around 4K to 7K (Kelvin).
I don’t recommend using auto white balance option since it’s prone to become a crutch. Plus, it’s not 100% accurate. If you decide to use auto white balance, I would recommend only using it when shooting RAW.
Custom: This option is used in conjunction with a gray card. You’ll take a photo of a gray card under the same lighting situation. Then you’ll save that WB as a custom preset in your digital cameras current session and for future images.
Kelvin: As you now know, Kelvin assigns a color temperature based on the light source. Plus, the colors have a corresponding number assigned to it. Once you select this option, you can dial in the exact color temperature you want to use.
My favorite and most used Kelvin range is 5000K – 5400K.
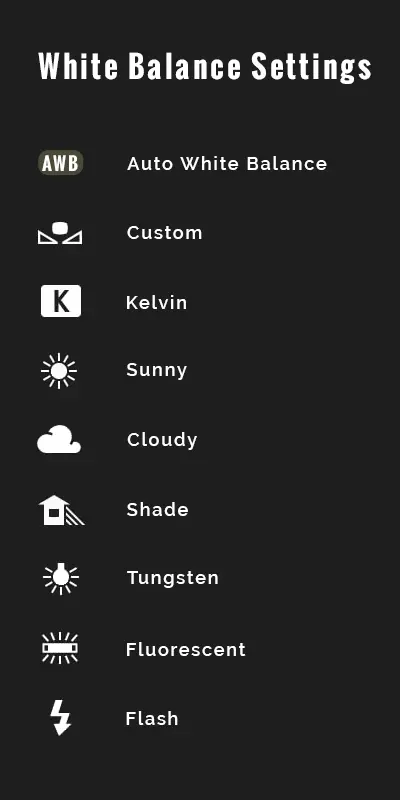
Some digital cameras might not have all of these options. Refer to your camera manual to determine which options are available to you. Each option relates to a specific lighting situation and you’ll select that option accordingly.
Preset White Balance
The remaining six WB settings (tungsten, cloudy, sunny, etc.) are about the lighting conditions or the source. Each has a preset number assigned to it. Depending on your camera, the number assigned could be different from one make vs. another.
For example, a Canon might assign 3200K for tungsten. Compare that to my Nikon cameras that have a Kelvin of 2850K for tungsten.
So, think of these preset settings as starting points for that particular light source. Depending on your color temperature preference, you may have to manually adjust the white balance in your editing software.
Kelvin Deep Dive - Where Do You Start?
Another question you may have is what Kelvin number do you start with?
You have everything from 2K to 10K. That’s a lot of options. It will take you forever to find the correct white balance if you start on the lowest number and continue increasing by 100 increments!
Check out the image below. It lists general Kelvin numbers to start with, depending on the lighting situation. Keep in mind that to get the correct white balance, you have to shift in the opposite direction of the Kelvin scale.
Hence, why the colors are backward vs. the Kelvin Scale.
So, on a sunny day, you’ll dial in a Kelvin of 5400 for pure white. As it gets cloudy, you’ll shift the Kelvin setting to the right, i.e., a higher number.
This adds more yellow to balance the “whites” to be more white. As you dial in a lower number, you add blue, and this too keeps the “whites” more white.

Colors are opposite of the Kelvin Scale when setting the white balance in-camera. You have to add yellow or blue to “balance” the “whites” to be pure white.
the Creative Side of White Balance
Most of the time, you’ll strive to remove the color casts to create a neutral tint in the highlights and shadows.
But, there will be times when you’ll want the tint to be visible. There actually might be times when you want to enhance or emphasize it since colors can evoke certain emotions and moods.
Red for love. Click to enlarge.
Note: this is an extreme example and wasn’t created with white balance alone. A red overlay was created in Photoshop to portray the mood of the image. It’s an accurate representation of my artistic vision of the shot.
Blue often provides feelings of calmness or serenity. It’s also described as peaceful, tranquil, and secure. It can also be referenced as cold.
Reds are known as warm colors and include red, orange, and yellow. These warm colors evoke emotions ranging from love, happiness, and comfort to feelings of anger or hostility.
Green is associated with envy and jealousy. It can also portray growth or freshness or even sickness.

I applied a white balance that portrays her mood… she’s got the blues.
Artistic
There will come a time as you grow as a photographer when you want to express yourself artistically.
For example, you may want to keep the blue tint to portray a specific mood. Even though blue is associated with cold, it could also represent a particular feeling or mood.
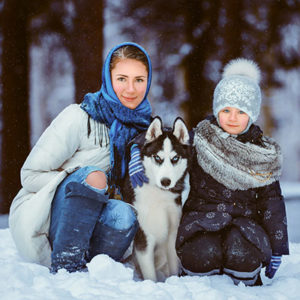
In my opinion, this edit is too warm for a winter photo. Or is it?
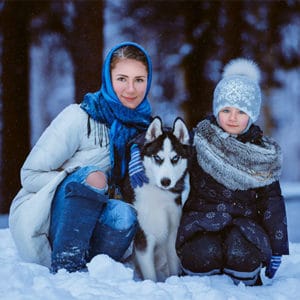
By choosing a cooler WB it portrays the coldness of winter.
Winter
Just as you wouldn’t want to remove the warm glow of a setting sun, you also wouldn’t want to add those colors on a cold winter day, depending on your creative vision, of course.
If you want your viewers to feel, the cold of your wintery landscape keep the white balance more on the blue side.

Photo by cottonbro. The green tint emphasizes the cold he’s having.
Editorial
Sometimes editorial images have a specific tint that matches the intent of the article. For example, you may want to enhance or add a yellow or green color cast for an article or ad on sick patients.
How much tint you keep or add is based on your personal, creative style. And that of the editor/art director.
Retro
There will come a time as you grow as a photographer when you want to express yourself artistically.
For example, you may want to keep a specific tint to portray a time period. Blues are often used in photos to create an old-school look.
How To Change the White Balance In Lightroom Or ACR
RAW or JPG shooter?
Your file type choice can be hazardous to your post-processing or a savior.
After 30 years as a photographer, I still make mistakes. Sometimes I’ll forget to change the WB before the next project. Or the light will suddenly change in the middle of a shoot. For example, when the sun goes behind a cloud… the color temperature changes based on the cooler temperature.
Since I shoot in RAW, it’s an easy fix. I just need to update the white balance slider (either in LR or ACR) based on my preferred color.
Or you can use the eyedropper tool to adjust the white balance and remove the unwanted tint. This comes in handy when you’re unsure which way to move the slider to remove the color cast. Or if you’re a JPEG shooter.
To use the eyedropper tool, locate a color in your image that should be a neutral gray: a white or black part of the picture. Or even a gray tone. When you click on that color, with the eyedropper tool, the tint will automatically be removed. And the WB slider will be updated with the new Kelvin temp.
If you don’t remove the color cast on the first click, continue clicking on neutral colors until you’re happy with the results.
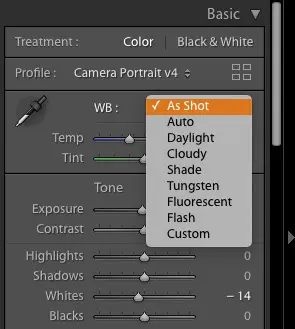
There’s actually a third option to adjust white balance. However, this only works with RAW files. Previously we went over the preset white balance options included in most digital cameras. These same settings are available in Lightroom & ACR too!
Just select the preset that matches the light source at the time of capture: tungsten, cloudy, shade, sunny, etc..
Click to enlarge.
Look at the Red, Green, Blue numbers at the bottom of the square (over the dress). The numbers are as follows: R 86, G 82.2, B 63.7.
When the numbers are all different, this lets you know there is a color cast, and the white balance needs to be corrected. Depending on your creative vision, of course.
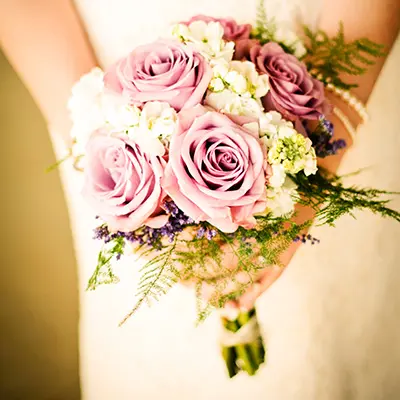
For this image it was too yellow (for my preference) and the WB Selector tool took away too much of the warm glow of the sun.
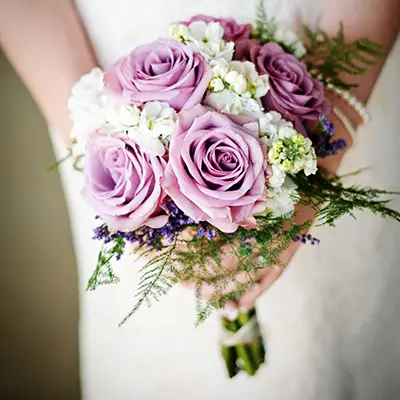
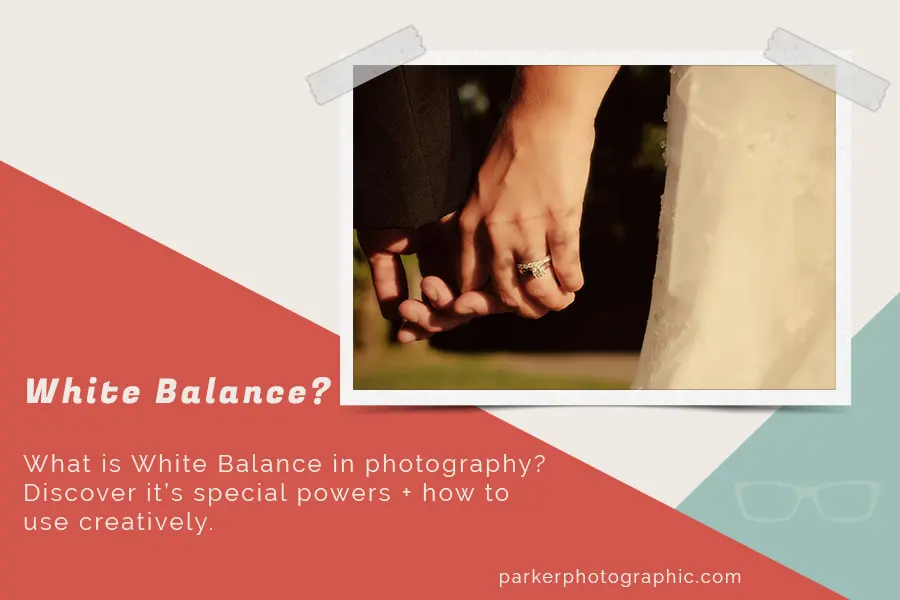
So, I adjusted the Temp slider instead to reduce some of the yellow. See the final edit above (cover for this article). This is an accurate representation of my personal style. Yours may differ and that makes us unique.
The white balance presets are available in Lightroom (and ACR) for RAW files. They match the same options I have in-camera.
How To Change White Balance in Photoshop
RAW shooter?
If so, to open your RAW file, you’ll need to use the included plugin… ACR. ACR is Lightroom. Or I should say Lightroom is ACR since ACR was created in early 2000 (vs. 2007 for Lightroom).
Either way, ACR includes the exact same white balance options as Lightroom!
JPG shooter?
Did you know you can edit your JPG files in ACR too? Yep, you sure can. But how?
Well, you’ll need to have the included Bridge application installed. Then, locate your jpg file, right-click on it, and select “Open In Camera RAW.” You now have the same eyedropper tool for removing color casts.
Tip: make sure to go with the adjustment layer options for the following tools.
If you prefer not to use ACR for your jpg files, you have a couple of options. One of my favorites is to use the Curves (or Levels) tool for adjusting the white balance.
Notice how the Temp slider has the blue on the left and the yellow on the right. It’s opposite of the Kelvin scale.
To the left of the histogram, you’ll find three eyedropper tools one for the highlights, shadows, and mid-tones. Use one of them in the appropriate tonal range to fix the white balance.
The second option is to use the Color Balance tool. This tool gives you the precision to adjust the colors based on a color spectrum. For even more precise control, you can choose from the three tonal ranges: Midtones, Highlights, or Shadows.
You can save a lot of editing time by nailing the white balance in-camera!
Now What?
To master white balance, you must first see the color of light. It will take practice. Throughout the day, watch how the color of light changes.
What color is the sunlight at 11 a.m.? How about at 6 p.m.?
What happens to the color when the sun is behind a thin cloud vs. a dark cloud?
What about the color in the shade or when it’s filtered through the leaves of a tree?
How does the color change when inside? A table lamp vs. fluorescent?
As you become aware of the color of light, think of how you want to use it based on your creative vision for the shot. Then select the appropriate color temperature in-camera!
Here are some more articles to help you create exceptional photos:
What is Aperture in photography?
What is ISO in photography?
What is Shutter Speed in photography?
Check out the 7 key ingredients for light in photography to master light in photography.


