How To Get Perfect Exposures for Photography Beginners
Subscribe
In the previous tutorial, I promised two options for helping your camera get the proper exposure based on your creative vision.
You learned about the first option: changing the metering mode.
Now let’s explore the second option, manually adjusting the exposure when your camera doesn’t give you the desired results, or in other words, compensate for your camera’s mistakes.
This second option is known as exposure compensation.
Although you have to adjust this setting manually when using any of the auto modes, it is easier than it sounds.
Before manually adjusting your exposure, you first have to understand a vital component of exposure in photography, which will be revealed in just a second.
If you are ready to master Exposure Compensation, let’s do it.
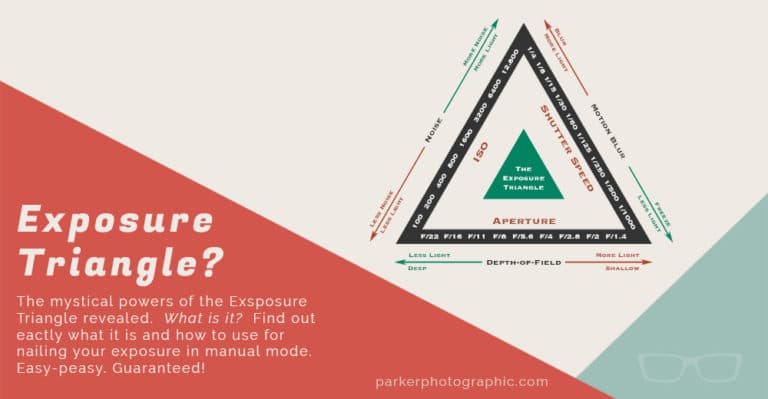
So the vital element you need to know is stops and no, I’m not referring to physically stopping or stop signs.
Instead, a stop in photography is the terminology we use to describe what happens to the amount of light reaching your camera for your exposure based on when you change a camera setting from one to another.
A stop refers to doubling the light or cutting the amount in half.
For example, switching from ISO 100 to 200 is considered a one-stop. Going from f/four to f/2.8 is one stop, going from one second to two seconds.
F
Let’s say you have a one-second shutter speed and decide to use two seconds.
Instead, doubling the shutter speed from one to two seconds means doubling the light amount since your shutter is open twice as long.
Or you could say that you’re increasing the light by one stop, which is a faster way of saying the same thing.
So if you hear someone say they increased their exposure by one stop, that means they’ve doubled the amount of light.
Or if they say, I’ve stopped by one stop, they cut the amount of light in half.
Now, no worries if this still needs to be clarified. I’m giving you the essential information for mastering exposure in time and practice.
This will all make sense, I promise.
Now, what does this have to do with exposure compensation? Well, everything.
So grab your camera and your camera manual to determine how to compensate for the exposure given by your camera.
Most cameras, at least on the Nikons I’ve owned, have a button on the camera’s body with a plus and minus sign.
Find that and then press and hold that button; your digital screen will change and look like this.
Now, when I rotate the dial to the left, I get a negative number to the right and a positive number.
Each turn increases or decreases the amount of light by roughly one-third stop.
So I have plus 0.3 turnings again, I get 0.7, and again, one-stop. If again I continue, I get 1.3, 1.7, and so on.
So again, a positive number would be an increased amount of light, and a negative number would be a decreased amount of light.
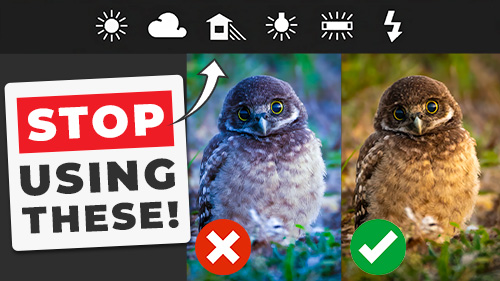
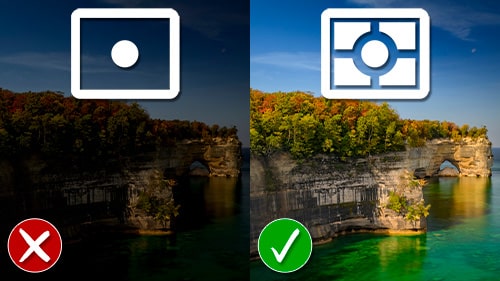
When you’re using an auto mode and see that your image is still under or overexposed, you can change the metering mode as you learned in the previous tutorial.
But if you find the image is still under or overexposed, adjust the exposure compensation accordingly.
For example, I found my daughter about two-thirds underexposed in the last images we took outside.
So manually adjusting the exposure compensation by plus 0.7, brightens the image by two third stops.
But how do you know when your image is over or underexposed in the camera, and why does it matter if it’s off by a little bit?
These are great questions that when you know the answer, will elevate your photographic skills.