Overcast Photography | Why Cloudy Days Are Great for Your Photography
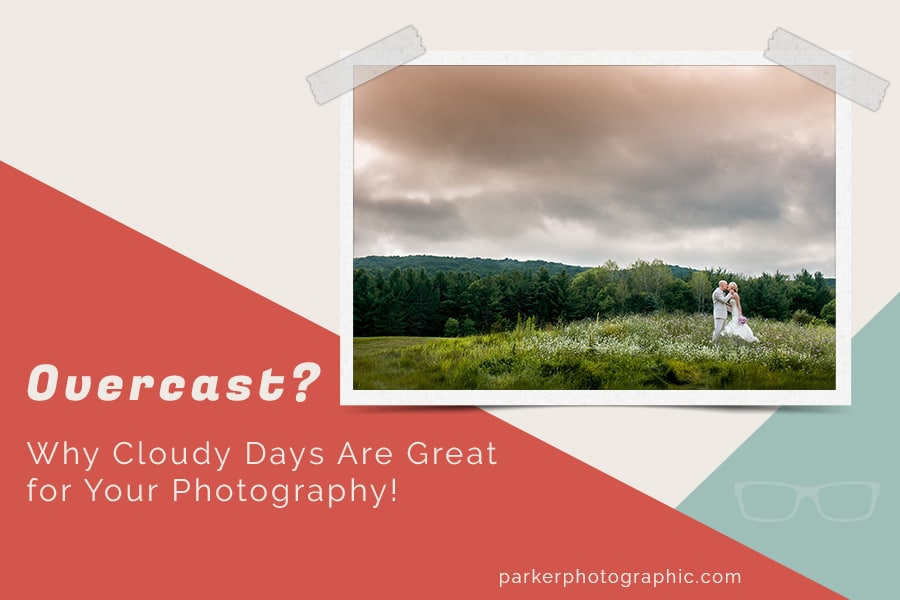
Don’t you hate waking up to an overcast day? It’s so gloomy! Wouldn’t you agree?
However, don’t skip the opportunity to take pictures when it’s cloudy. Photographing with overcast weather can provide some of the best lighting for your images.
Especially for images of people. We’re going to take a look at how the lighting on an otherwise gloomy day can benefit all types of photography.
BONUS: Take what you learn from this article and enter our photo challenge!
Table of Contents
The Lighting On An Overcast Day Is Perfect For All Photography Genres’
In photography, as you probably already know, lighting is essential for your creative vision. Not only that, but the quality of light can have a profound impact on your final image.
On a sunny day, if you’re not careful, the lighting can be harsh. That harsh lighting is not flattering for your pictures of people, wildlife, and other types of photography.
However, on a cloudy day, the light that illuminates your scene is softer (providing the sun is behind the clouds). The benefit of this softer light depends on what you’re shooting.
This softer light is ideal for portraits, weddings, wildlife, and even macro photography. For landscape photography, the softer light may not be as appealing. Although, for landscapes, an overcast sky can add drama to your images (more on that coming up).
Next, we’re going to explore how the light is affected on overcast days, it’s benefits, and tips for shooting with overcast weather.

Portrait of our daughter on an overcast day. This type of lighting is soft and flattering. Perfect for portraits.
Filtered Light
When taking pictures on cloudy days, the light is being filtered through the clouds. This creates an even intensity of (softer) light, and the quality of the light is better.
Filtered Light: one of four characteristics of light.
Highlight & Shadow Details
The challenge of taking images when it’s sunny is the limitation of the dynamic range of your digital camera.
Depending on the intensity of the light, you may not be able to capture details in both the shadows and highlights. Therefore, you will have to decide which is more important and expose for either the highlights or the shadows. Or you could add a “fill” light to brighten up the shadows.
However, this isn’t a problem when taking pictures when it’s very cloudy. And that’s because the intensity of the light doesn’t create a vast dynamic range compared to when it’s sunny.
This allows you to capture all the detail in the highlights and the shadows.
Term: Histogram
Definition: A Histogram is a visual representation of the dynamic range of an image on a scale from 0 to 255.
Histogram Comparison
Let’s compare two images and their respective histograms to see the difference between shooting when cloudy versus sunny.
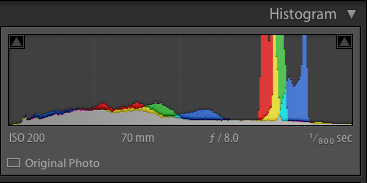
Take a look at the image shot on a sunny day and its histogram.
Due to the intensity of the light, my camera was not able to capture the full tonal range of light. This resulted in a sharp spike in the highlights.
A spike like this let’s you know the detail (in that part of the image) was not captured or that it was “clipped.”
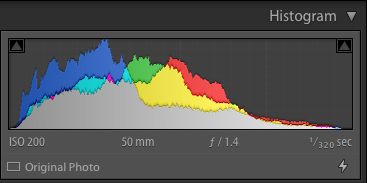
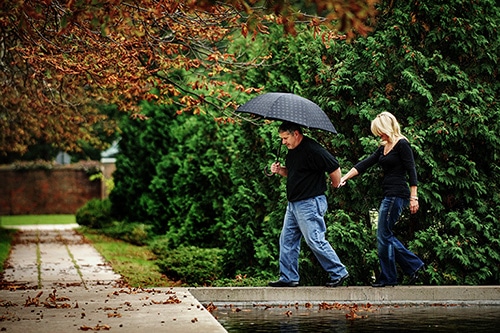
Now, if we take a look at the image shot on a cloudy day (second image), the histogram doesn’t show any significant spikes. Plus, in general, the histogram is more even from left to right.
This histogram is showing that all the detail was captured from the shadows through the highlights.
Editing Sunny Day Photos vs. Cloudy Days
Editing your images from a sunny day can be more challenging vs. pictures from a cloudy one.
If details were lost (clipped) because your camera couldn’t capture the full tonal range, then you have to try and “fix-it” in post-production. Depending on your creative vision for the image, of course.
If you capture all the details in both the shadows and highlights (nail the exposure), there’s nothing to fix. At least for the initial clean edit.
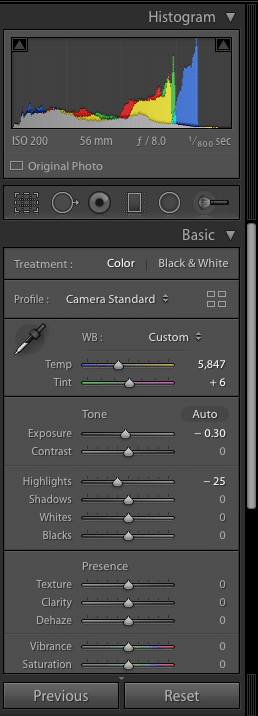
Fixing the blown highlights (from the first image above) was accomplished with some basic edits. Since I shot with RAW I was able to recover some of the detail in the highlights. Notice how the spikes, in the histogram, have come down from their highs vs. the original.
Moody + Low Contrast
One of the disadvantages of shooting when cloudy is the fact that the light is flat and produces less contrast.
However, you can use that to your advantage by creating a specific mood for the story of your image. There is no hard-fast rule that states that all your images should pop with contrast.
In fact, a low-contrast image can portray a specific mood not possible when it’s sunny.
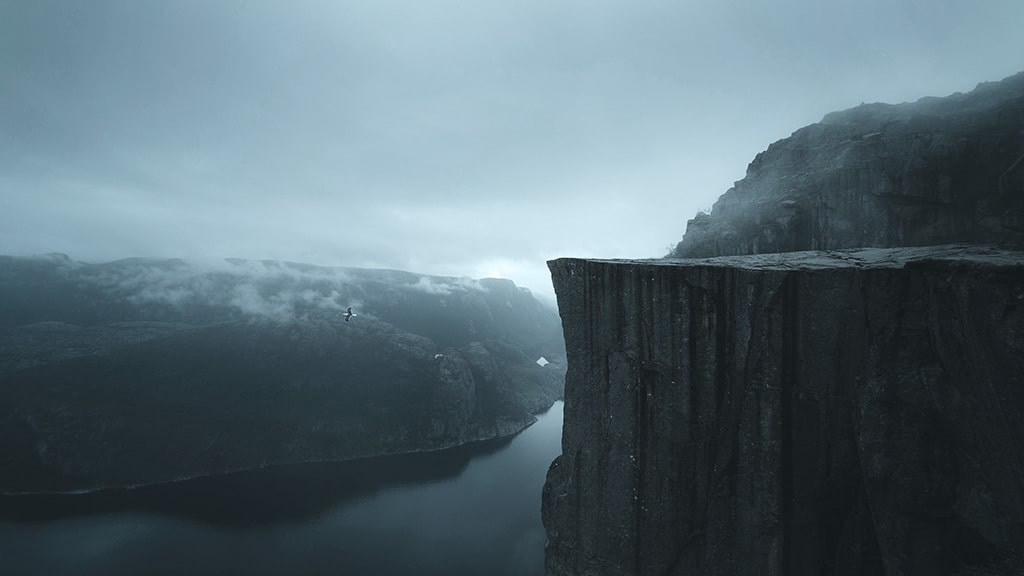
Photo by Valdemaras D.
Editing Low Contrast Images
Personally, I like my images to have the brightest highlights and deepest shadows. This creates a higher level of contrast and makes my images “pop.”
However, there are times when I want to create a specific story and/or mood. In that case, I will not increase the intensity of the highlights and shadows (lights/darks).
It all depends on the mood you want to create for a specific image and the creative vision you have for it.
Why You Might Want To Avoid “Auto Level” Adjustments
If you have the habit of using the auto levels option in your editing software, you may want to avoid it for editing images shot with overcast weather.
And that’s because most software will apply edits that increases contrast. Instead, you’ll want to manually edit your images to achieve the look you’re after.
Don’t Forget Your White Balance Selection During Overcast Conditions
Another consideration is the white balance (WB) that you’re going to capture for your image. WB is an often overlooked setting. Especially at the time of the shoot.
Not getting the correct white balance at the time of the shoot can have detrimental consequences. More on that in a moment.
When it’s cloudy, the color of light tends to be bluer. If you’re shooting someone on a cloudy day and choose a white balance that is more yellow, then the final image is going to look unnatural.
When shooting on overcast days, I like to shoot my images with a Kelvin temperature of around 4000 – 4500.
If you’re unfamiliar with Kelvin temperatures and how to set them, then you’ll want to use either the overcast or cloudy WB options. The difference between the two WB settings is one will be warmer versus the other.
Term: White Balance (WB)
Definition: The act of capturing the color of light for your scene.
The color of light changes based on the light source.
Plus, each light source emits the color based on the temperature of that light source.
This temperature is known as the Kelvin Temperature.
Fixing WB In Post-Production
Fixing the white balance for RAW images is easy. You have two choices:
- Select a different pre-programmed white balance option
- Dial-in the specific Kelvin Temperature of your choice
Either option is available in ACR or via Lightroom.
Fixing the white balance for images shot in JPG is going to cause you a lot of headaches! Especially if you’re a portrait photographer.
Unlike RAW files, the WB is locked into your JPG file. It can’t be changed after the fact. Instead, you’ll need to color correct your image accordingly.
But it’s not that easy. If you’re not careful, you may find skin tones will look unnatural.
In the end, you’re going to end up with a lower quality image. Either shoot in RAW to avoid this problem or nail your WB in-camera!
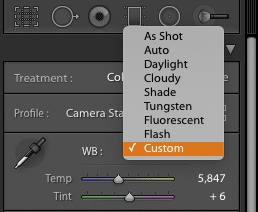
Multiple options available for auto or pre-programed white balance settings. These options are not available if you shoot in JPG.
Camera Settings & More For Your Cloudy Pictures
Next up, we’ll take a look at two popular genres’ of outdoor shooting that are ideal in overcast conditions. This will include recommended camera settings and some image examples.
Landscape Photography On a Cloudy Day

Photo by Shane Kell.
There’s nothing more boring than a plain, blue sky. They’re just not that interesting. Now, throw in some big puffy clouds, and you’re onto something!
Clouds add drama and intrigue. They’re beautiful and compelling.
Overcast conditions provide ample opportunities to spice up your landscapes. Also, under the right conditions, you can capture the sun peeking through the clouds to add a more dynamic image.
Shooting during sunrise and sunset are great times for including clouds in your sky. The color of light will bounce off the clouds creating a picturesque image that will stop your viewers in their tracks.
But, but…
Now, I’ll admit that a scene with clouds is not the same as a complete overcast sky. You could even say that shooting landscapes with a complete overcast isn’t as popular vs. a partly cloudy situation.
However, it all depends on your vision for the shot. Sometimes a full overcast sky is required for certain types of editorial pictures.
Camera Setting for Landscapes
Ideally, an ISO setting of 100 or 200 at the most is best. Although, you may need to go higher depending on how dark the existing light is when there’s an overcast sky.
But, if you bring a tripod with you, then you’ll have a better chance of using those lower ISO settings. Especially when you also want to use a large depth-of-field. For example, when shooting with f/8, f/11, or even f/22.
Those small apertures are going to allow less light to enter your lens, and you’ll need a slower shutter speed in most cases. This means, to avoid camera-shake (blurry images), you’ll need to use a tripod.
Portrait & Wedding Photography On a Cloudy Day
A bright blue sky isn’t as dull when shooting portraits and weddings. But, these types of images are going to be much more enjoyable with some clouds in the sky.
When the sun is filtered through the clouds, it creates a beautiful, soft light. This will also create an even amount of light that diminishes hard shadows. Both of which creates stunning and flattering light for capturing people.
Click to enlarge.
Camera Settings for People
When it comes to shooting people, when it’s cloudy, you’ll have to balance your settings based on your desired outcome for the shot.
- Do you want to blur the action or freeze it?
- Do you want to blur out the background or keep it sharp?
For most portraits, you might prefer the background to be blurred out. This adds separation between the two. And in most cases, you’ll probably don’t want any movement in the image.
In that case, you’ll want to use a large aperture like; f/1.8, f/2.8, or maybe f/4. For the shutter speed, you’ll want to consider shooting at twice the length of your lens.
For example, if you’re using a 50mm lens, then you’ll want to use a minimum of 1/100th of a second. Or 1/400th of a sec. with a 200mm lens. These aren’t hard-and-fast rules. They’re meant to help you avoid camera-shake.
Oh, and for the ISO, I’d recommend between 100 – 400. The thickness (or density) of the clouds will allow more or less light to filter through. This is going to play a role in your ISO selection.
What’s Next?
The soft light generated from the sun being hidden behind an overcast sky can provide new photographic opportunities. And may even make your images that more enjoyable.
The next time you wake up to an overcast day don’t be shy… grab your camera and discover the new creative options that await you!
Here are some more articles to help you create exceptional photos:
What is Aperture in photography?
What is ISO in photography?
What is Shutter Speed in photography?
Check out the 7 key ingredients for light in photography to master light in photography.


