How to Blur the Background in Photoshop... With Realistic Results!
Creating a soft, creamy + dreamy background in Photoshop is essential for separating people from the environment. When the background is blurred out, people will “pop” from the scene, and your viewers’ focus will be, well, on them.
The best way to do this is to control the depth-of-field in-camera! I’ve put together this depth of field tutorial (coming soon) to show exactly how to master bokeh (blurry backgrounds).
Although in-camera is the best method, there could be numerous reasons why you’re not able to achieve the desired result at time of capture.
It could be your lens doesn’t have the aperture needed, the distance of the subject to the environment and more.
The next best way to blur backgrounds is with the use of Photoshop.
As with most things in Photoshop, there’s usually more than one way to do something. Blurring the background is no exception. Use the wrong tools and it may look unnatural.
The key to a natural-looking blur is knowing what tools to use to get the job done right… and quickly. Luckily for you you’ve found this tutorial!
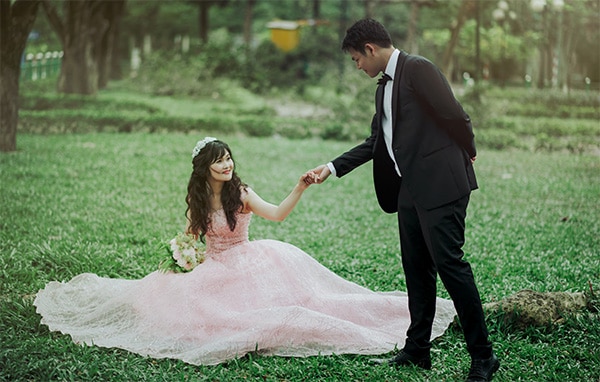
Original Image – click to enlarge.
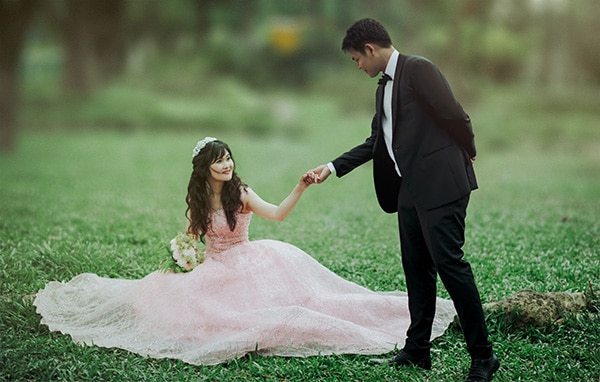
Final Edit – click to enlarge.
Creating a Natural Depth of Field Effect In Photoshop
The techniques you’re going to learn in this tutorial is presented below with step-by-step instructions.
This will include, but not limited to, how to make a selection in one-click, using the Refine Edge tool, Quick Mask mode, and more to fine-tune your selection.
Let’s not forget the step-by-step pro editing techniques for maintaining detail, like hair, that are included too! Without detail your image will look fake.
Once you’re done with this project you will have the skillset to create natural, realistic bokeh.
The subject select tool is so powerful it can automatically select your subjects in one-click… most of the time.
Like anything “automatic” it’s not going to work perfectly 100% of the time. Let’s make our selection with it, and if needed, we’ll fine-tune the selection.
Go to: Select > Subject
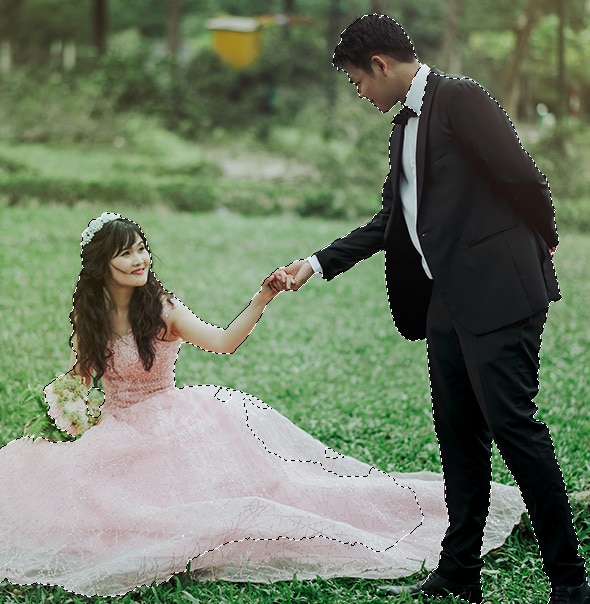
Once Photoshop is done analyzing the image, you’ll see the infamous dancing ants around the subjects. Instantly selected!
Or is it?
Although the selection tool did a pretty good job, it missed a few spots. So, we’ll need to refine the selection by adding to it and or subtracting from it.
Click to enlarge.
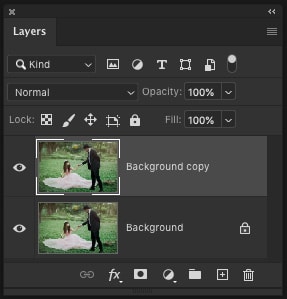
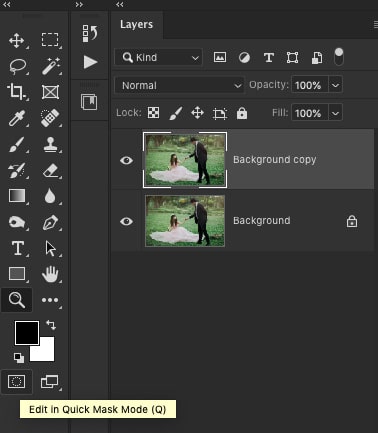
After duplicating the layer the new layer will have a name of “Background copy” or “Layer 1.” Depending on your version of Photoshop.
Click to enlarge.
“Marching Ants.” Once the selection is created little black and white lines will appear around the edges. The animation makes the selecting look like “dancing ants.”
Although the Photoshop AI did a good job of selecting our bride and groom it’s not 100% perfect. Take a close look to the right of the brides dress. A lot of it was not selected!
Step Four.
To refine the selection, we’re first going to use an old-school method. Then we’ll tap into Photoshop’s AI engine to further improve the selection.
Quick and Easy Old-School Selections
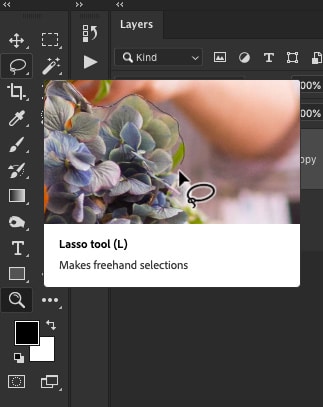
For quick, easy selections, I like to use two different tools: the Lasso + Quick Mask Mode.
With the Lasso tool, you can quickly draw around an areas to add to the selection or remove from it.
Lasso Tool
If you want to add to the selection, hold down the Shift key and follow around the areas with the Lasso.
To remove from the selection, you'll need to hold down the Alt or Option key as you draw around the area.
Once you release the keyboard shortcut and stop drawing, the selection will be updated accordingly.
Click to enlarge.
Two popular ways to choose the Lasso Tool:
1. Grab the Lasso tool from the toolbar. The icon looks like a “lasso.”
2. The keyboard shortcut for selecting the Lasso is the letter “L”.
Quick Mask Mode
The Quick Mask mode allows you to brush on the selection or remove from it. This is an underrated selection tool that I find more intuitive and easier to use vs. the Pen tool.
It’s sooo much easier to brush on/off a portion of the selection vs. hundreds of points needed with the Pen tool.
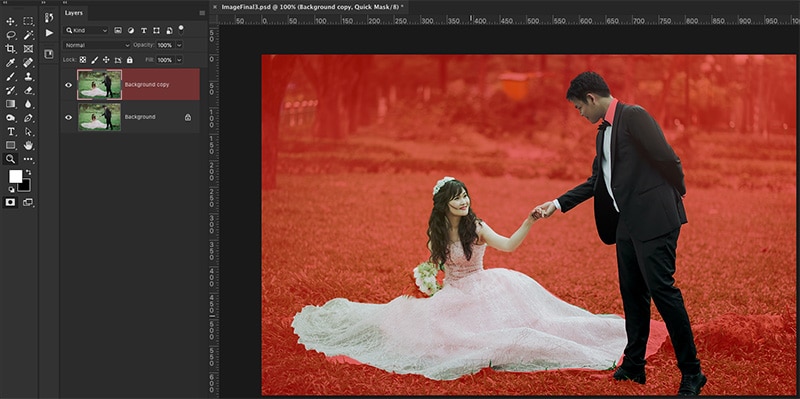
To activate this mode, press the letter “Q.” Once in Quick Mask mode, you’ll see a red overlay on your image.
Anything in red is not selected.
Click to enlarge.
Two popular ways to choose the Quick Mask Mode:
1. Click on the rectangle icon (with a circle inside) below the Foreground and Background swatches.
2. The keyboard shortcut for activating Quick Mask is the letter “Q”.
Click to enlarge.
You’ll also notice that your foreground and background colors switched to black and white.
Painting with black removes from the selection, and painting with white adds to the selection. Grab the paintbrush tool from the toolbar to “paint” with.
Next, set the foreground color to white and paint anywhere on the image that you want added to the selection.
If you made a mistake or need to remove from the selection, paint with black.
Keep in mind that for this project, your selection does not need to be pixel perfect. You could spend all day trying to select every strand of hair!
Instead, concentrate your selection along the inner part of the subjects.
Photoshop's AI For Refining Selections
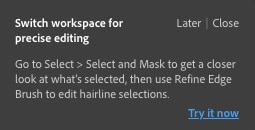
After you made your initial selection via the Subject Select tool, you may have received a pop-message from Photoshop.
That is if you’ve never used the Refine Edge tool before. The message asked if you wanted to switch your workspace for precise editing.
Yes, yes, you do!
But, if you closed the message, it’s too late, and the workspace is gone forever.
Or is it?
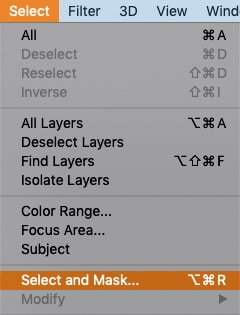
To activate the Refine Edge tool;
Go to: Select > Select Mask.
Your workspace has now been updated with two new panels… one on the left and the other on the right. In each panel are a bunch of new tools and options to help you refine your selections.
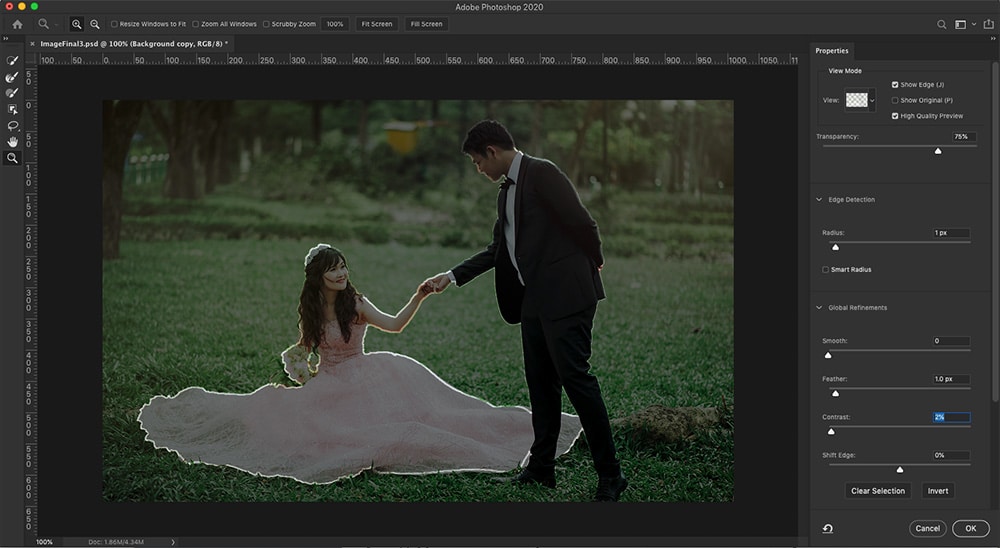
Here are my settings and a brief explanation of each adjustment
Check out this link for more info on the Photoshop refine edge (coming soon).
Radius = 1px | Increases the width of pixels affected
Feather = 1px | Smooths the edge of the selection so the edge of the selection is not as sharp or hard
Contrast = 2% | Helps define both sides of the edge to ensure the subjects are selected vs. any of the background and or foreground.
Move the slider (s) to alter the selection.
Overall, the selections were minimal. In fact, the Refine Edge tool for this project is probably overkill. Using the Quick Mask mode was sufficient. Then again, the Refine Edge tool has brush options too and can replace the Quick Mask mode.
Which one should you use then? It comes down to personal preference.
Apply your selection to a layer mask
Now that you’ve finished your selection, it’s time to apply your selection to a Layer Mask. This will remove the background in Photoshop, and you’ll be left with just the bride and groom!
In the right panel, of the Edge Refine interface, locate the “Output Settings” option, and expand.
Next, locate the “Output To” and select “Layer Mask.”
Next, we’re going to duplicate a layer and do a little organization. I know… boring! But, essential!
First, let’s duplicate our Background layer again. This will be used to apply the blur to the background. Use one of the three duplication options listed in Step 3.
Next, let’s get organized!
Getting your layers organized is an excellent habit to get into. In this case, we want to rename the layers, so we know the purpose of each.
This isn’t as crucial with an edit that requires a few additional layers. However, more complex retouching can result in dozens of layers. If they’re not organized, you’ll drive yourself crazy trying to find the adjustment layer or layer that requires refinement.
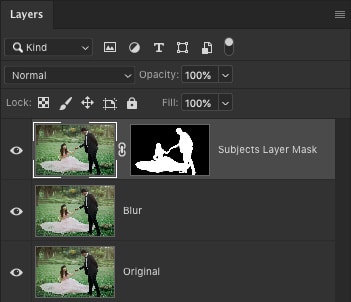
To rename the layers, double click on the name of the layer and update accordingly. Here are the layer names I used…
Subjects Layer Mask
Blur
Original
When double-clicking on the Backgrounds layer, a new window will appear where you type in the new name of the layer.
This is different from the other layers where you type in the new name directly on the layer.
The difference is the Background layer is locked whereas the others are not.
Once you rename the Background layer it is no longer locked, and you can rename it like the others.
Step Six.
Before you blur the background, you’ll need to remove the subject (s) from the layer. If you don’t, you’ll end up with halo-like effects around your subjects, and it will look unnatural.
Like with the selection tools, we have a few different options for removing items.
Why do we have so many?
Well, each tool in Photoshop is designed to alter your image differently.
If you find one specific tool isn’t giving you the results you want, check the tool options to make adjustments.
If you’re still not getting the outcome desired, it might be best to switch to a different retouching tool.
For this editing project, we’re going to use the Spot Healing Brush. This tool can be found on the toolbar with the icon that looks like a bandaid.
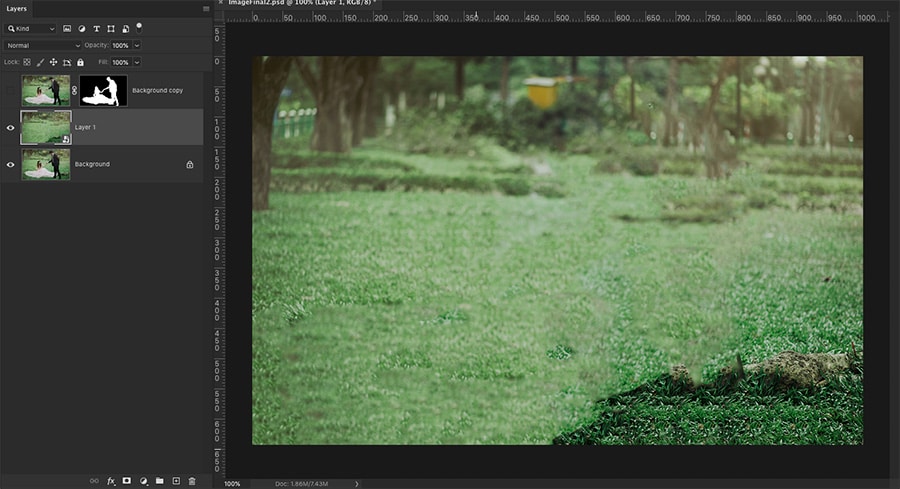
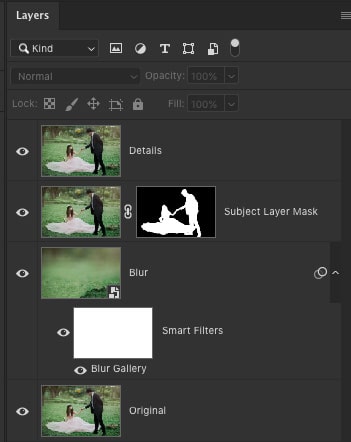
Also, before proceeding turn off the top layer by clicking on the eye icon next to it.
Click to enlarge. The top layer is turned off. Look to the left of each layer and the bottom two has an “eye” icon.
This signifies that they are turned on or visible. The top layer is missing this icon and let’s you know it’s not visible in the canvas (middle interface).
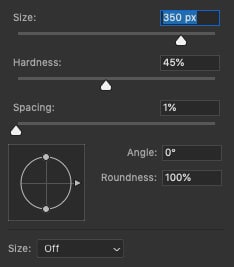
Adjust each slider or type in a number in the corresponding box.
Now, right-click on the image to adjust the softness and size of the brush. Pick a size that is roughly larger than the heads of the subject (s). Or a little larger to cover more area quicker.
Then, adjust the hardness of the brush edge to around 50%. This will feather the (pixels of the tool) edge so it doesn’t create a hard edge and will look more natural when applied.
Now, begin painting over your subject in broad strokes. Once you release, the image will be updated. For best results, you may have to break-up the brush strokes in smaller sections.
For example, start-off by retouching the head first, then do the body in 3 – 5 pieces. This will give Photoshop a chance to reference a smaller part of the image to replace the person with.
Once you’re done applying the healing brush the layer should look something like this.
Step Seven.
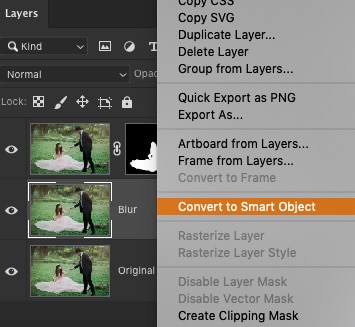
Before blurring the layer, I suggest converting the layer into a Smart Object. This will give you the freedom to update the blur if you’re not happy with the result.
Right-click on the blur layer and select “Convert to Smart Object.”
Again, we have a lot of different options for blurring the layer. The hardest part is deciding which one will give you the best results. There’s no easy answer. If you’re new to blurring, you may want to go through every option to see the results.
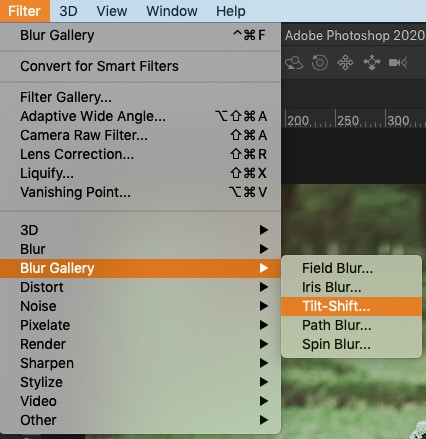
Luckily, I know the exact blur tool for this project. Which is the Tilt-Shift blur. This will provide you with the most realistic and natural edit possible. The goal is to blur the background similar to how it’s done in-camera with Aperture, focal length, and distance.
Go to: Filter > Blur Gallery > Tilt-Shift
From the new workspace interface, you’ll adjust the settings based on your creative vision for the edit.
There are two solid lines and two dashed lines. The top two lines are designed for controlling the depth-of-field for the background and the lower two for the foreground.
Any part of the image that is below the dashed line, for the foreground, will be blurred. The opposite for the top dashed line. You can move each of the lines to pinpoint where the blur occurs in your image.
For this project, I moved the foreground line to the bottom of the image to eliminate any blurring in that part.
You can also adjust the larger center point (circle) by clicking in the middle and moving up or down. I moved it down slightly.
The solid line I adjusted a little lower than default. For the dashed line I moved it closer to the solid line. This adjusts how much of the blur is applied and it creates a tighter gradation of the effect.
Adjust based on what you think looks best.
Next, in the right panel, adjust the Blur slider more or less to adjust the intensity of the blur.
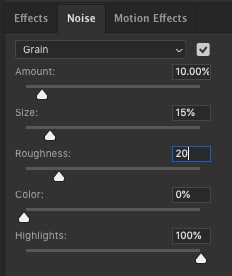
Add Some Grain
To help the edit look more natural, I recommend adding a little grain. Without the grain the blur effect is too smooth. Adding adds some needed texture to make it look more realistic.
Click on the Noise tab and select Grain from the first drop-down menu. For the “Amount” set it between 10 – 30% or to your personal taste. For this photo, I added 10%.
Once you’re happy with the results, click on the Ok button at the top or hit enter or return.
Photoshop will do its magic, and once the effect has been applied, you’ll be taken back to your original workspace. If you decide the blur isn’t all you hoped it to be and wish to adjust, double-click on “Blur Gallery” under Smart Filters.
Step Eight.
The next step is to bring back some detail that was lost, like hair and or other elements.
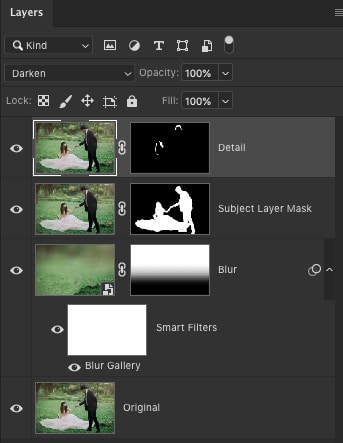
Duplicate the Original layer and drag the new layer to the top of all other layers. Also, rename the layer “Details.”
Next, you’ll need to change the Blending Mode. Navigate to the layers panel and locate the drop-down menu with the word “Normal.” Click on it and select Darken.
Pro Tip: If the hair was lighter in color and the backdrop was darker, you’ll want to select Lighten instead.
New “Details” layer duplicated from the Original and dragged to the top of all other layers.
Recover the Details
First, add a layer mask to the Details layer by clicking on the layer mask icon at the bottom of the layers panel. The layer mask, by default, will be completely white. For this edit, it should be black.
Make sure the Foreground color is set to black and use the following keyboard shortcut to update the layer mask.
Mac: Command + Delete
PC: Control + Backspace
Now, switch the Foreground swatch color to white and apply a paintbrush over the areas where you want to recover the detail.
To refine your edit change the tool options to the tool if needed.
For example, I have my brush set to the following…
Blending Mode = Normal Opacity = 100% Flow = 50%
Setting the Flow to the middle allows you to gradually bring back the detail, which creates a more natural-looking edit.
When you select the brush tool it’s options are listed at the top.
Step Nine.
At this point, we have a small problem. When you applied the Spot Healing tool to remove the couple, it also destroyed the detail in the foreground. Let’s get that back!
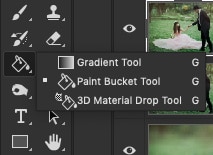
Select your blur layer and add a layer mask. Then, choose the Gradient tool. By default, it’s hidden. To choose it, navigate to the toolbar, and look for the Paint Bucket icon. Click and hold your mouse button on the bottom right of that icon. A flip-out panel will appear with additional tools. Select the Gradient tool.
Next, make sure your tool options are set like mine…
Now the fun part.
With the Gradient tool selected, click on the bottom of your image, hold down the shift key, and drag up. The Shift key will keep the gradient horizontal (no rotation).
Once you release, you’ll notice the layer mask has a gradient from black to grey to white. Oh, and the foreground should be fixed too!
If needed, you can adjust the gradient edit by clicking on the image again and re-dragging the tool up higher or lower to adjust the amount be applied to the layer mask.
Then…
…bask in your new retouching skills because you are now done!
Now What?
Two more things you should know before you leave!
One. I’d like to see your finished edit and answer any questions you have. To post your edit and to get (optional) feedback add it in our community.
Two. Do you know what’s even easier than blurring the background in Adobe Photoshop?
Blurring the background in-camera! That’s right, editing starts in-camera.
If you take the time to select an aperture and focal length to assist in controlling depth of field, you won’t have to fix it in Photoshop. But, photography, like life, isn’t always perfect.
Sometimes you still don’t get the desired outcome you had envisioned. That’s o.k. Because now you know how to blur the background, naturally, in Photoshop!
Parker
A 30-year photography pro with a desire to help you achieve your creative vision! Facebook | Youtube