How To Use the Lightroom Texture Slider For Spectacular Detail
Lightroom Texture, Clarity, and Sharpening, oh my! So, many ways to sharpen your images in Lightroom and Adobe Camera Raw (ACR). Which sharpening slider should you use?
The answer is not that easy since each slider applies sharpening differently. It all depends on the task at hand. I’ll explain how each slider applies sharpening in this article. Plus, I’ll provide numerous photos to show the differences between the Texture slider and the Clarity slider.
Ready to learn all about sharpening with Texture and Clarity? Awesome, let’s get started!
Table of Contents
What Does the Texture Slider Do?
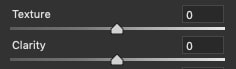
The goal of the Lightroom Texture slider is to increase or decrease the amount of medium size texture in your photo without affecting the finer detail.
Texture can be applied both globally and locally with an Adjustment Brush. Unlike Clarity it doesn’t affect the contrast as much and is more subtle.
Pro Tip: Although I refer to the slider as “Lightroom Texture,” the concept applies to ACR too. Also, “Texture” is sometimes referred to as the “new texture slider.”
However, it’s been around for a couple of years and isn’t so new to Lightroom after all.
According to Adobe, the Texture slider was initially created primarily for retouching people. In particular smoothing skin. But, the Texture slider can be used for enhancing details in your photo too.
Although retouching and smoothing skin with the Texture slider provides excellent results, Photoshop itself may still be needed for advanced edits. As with all tools in Lightroom Classic + Lightroom CC, and ACR, Texture is non-destructive.
Texture + Clarity + Sharpening
Each one of these tools will provide a certain amount of sharpening and apply it differently. Let’s examine each.
Texture Slider – is applied to the medium-sized bits of detail in your photo and can smooth or sharpen it.
Clarity Slider – is applied to the mid-tones of your image by boosting the contrast in this tonal range. It gives the appearance of sharpening.
Sharpening (Detail Panel) – is applied along the edges and adds contrast. This gives the illusion of sharpening. The amount of “sharpening” can be controlled with various options for pinpoint accuracy.
Texture With Flat Lighting
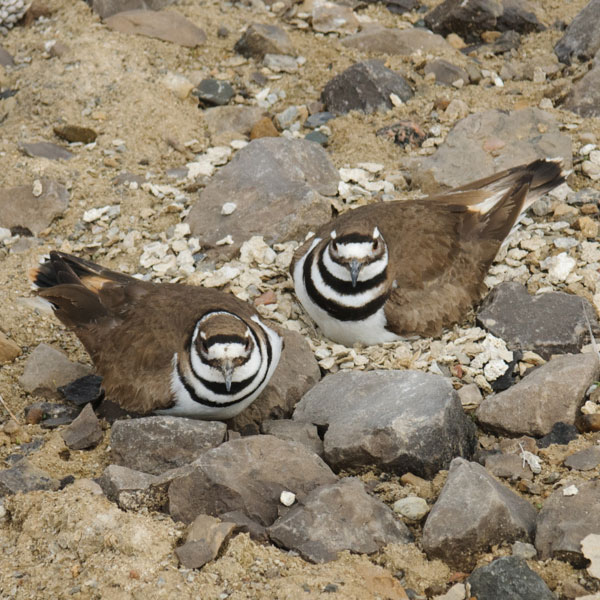
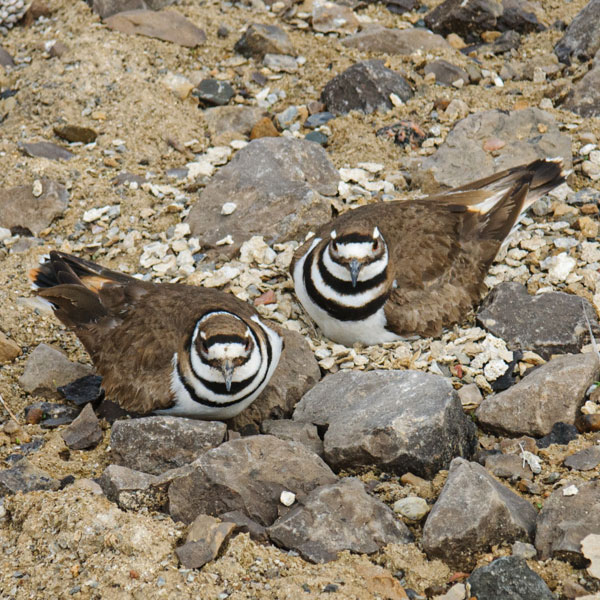
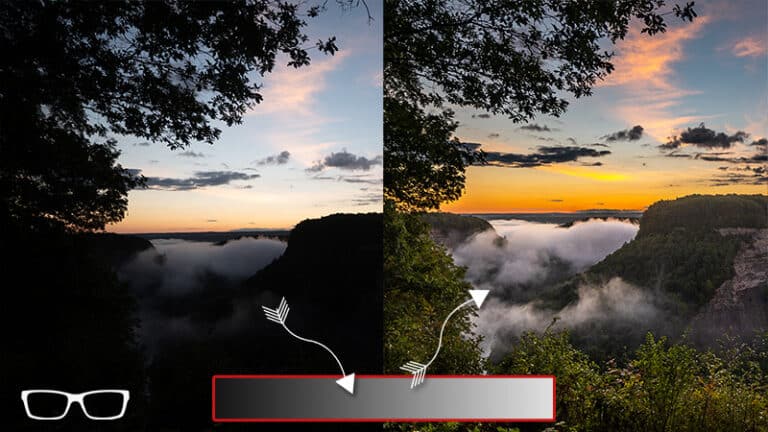
On cloudy days the light is flat. Although a scene may have a lot of Texture, flat lighting doesn’t yield a lot of contrast. This results in a rather dull image.
Adjusting the Lightroom Texture slider can boost the contrast and emphasizes the detail. Although, so too can the Clarity tool. Here are three images for comparison. Which one do you prefer?
The first image is the original – straight out of camera (no edits). The second I added +100 Texture with no Clarity. In the third image, I set the Texture back to zero and added +100 Clarity. Click to enlarge. Note: Lightroom Classic is used throughout this article.
Click each to enlarge.
Texture For Portraits
When it comes to adding Texture and Clarity for portraits, you may want to do so sparingly. Too much will make the skin look unnatural. Another option is to use them for smoothing skin (retouching). Again, do so sparingly; otherwise, the skin will begin to look like plastic.
For the best results, I’d recommend applying the Texture with the local adjustment tools. This way, the edit isn’t applied globally. Using a brush gives you the precision and control of applying the Texture and Clarity exactly where you want it.
In this case, you wouldn’t want to smooth the eyebrows, eyelashes, or even the lips for portraits. Although, you could smooth the lips if they’re extremely chapped.
The great thing about brushes is you can apply the edit multiple times in different intensities. As you add your first brush application, it leaves behind a pin. This pin can be selected at any time to adjust the edit as needed.
To add a new adjustment, click on “New” at the top of the brush panel. Change the amount of Texture for this new edit and apply.
Once you’re done applying, a new pin will be added to the image. You now have two different amounts of Texture that can be re-adjusted by selecting the pins.
How cool is that! I love it!
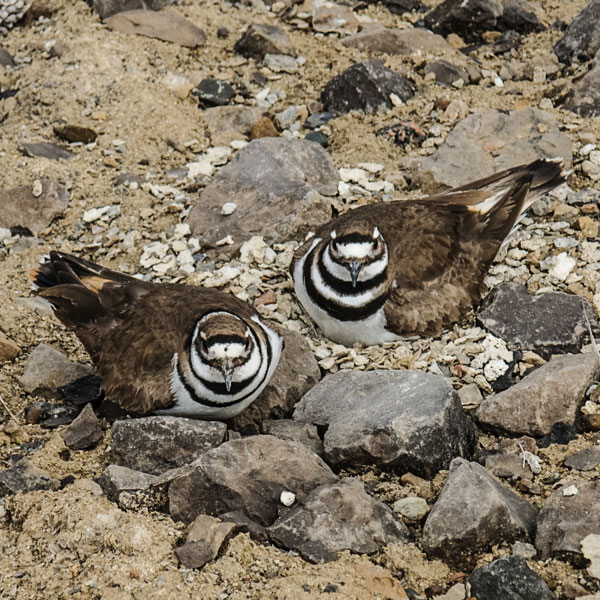
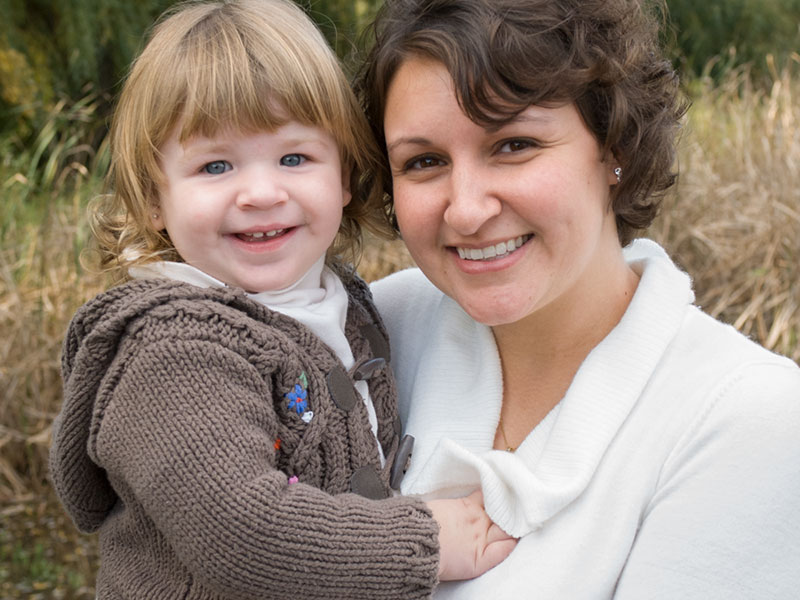
Click to enlarge. Original portrait straight out of camera (no edits).
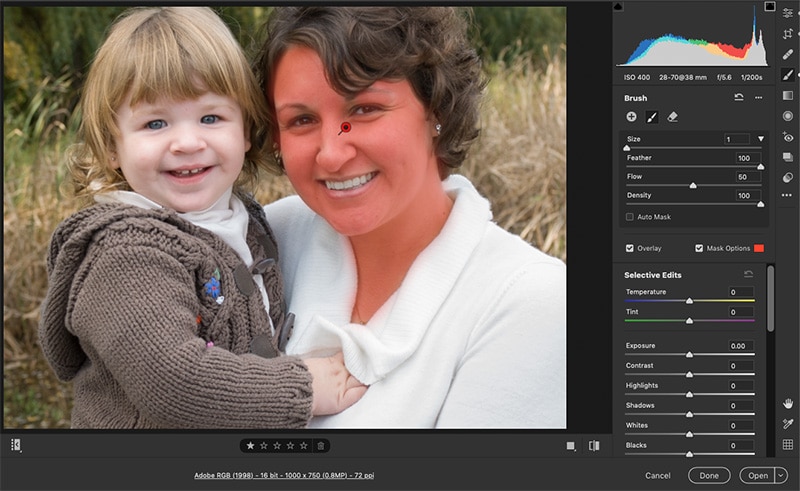
Click to enlarge. Mom was conscious about her skin and added -71 Texture on her face only. I avoided the eyes, eyelashes, brows, lips, and teeth by using a brush. Also, -71 is too much! I had to add at least that amount so you could see the difference.
Click to enlarge. The red pin and red overlay as seen in Adobe Camera Raw. The pin looks slightly different in Lightroom.
Texture For Landscapes
For landscapes, I’ll use either the global edit or an adjustment brush. Or both. It depends on the image and the creative vision I have for the final image. Sometimes, I may mix it up by adding a brush with Texture with a new brush adjustment with only Clarity.
If you apply Texture with a brush and are not happy with the results, you can quickly switch to Clarity. Since the pin is still selected (if not re-select it), you can reset the Texture and increase/decrease the Clarity. This is a quick way to make an adjustment to find the right type of sharpening.
For this image, I prefer Clarity over Texture. Although Clarity at +100 is too much! I ended up adding +30 instead. Which do you prefer?
Texture For HDR
The art of HDR is the process of taking 3 or more photos at different exposures. Then, merging those photos to maximize the texture in both the highlights and shadows.
For this image, I took three images. One was exposed for the highlights, another for the shadows, and the third for the mid-tones.
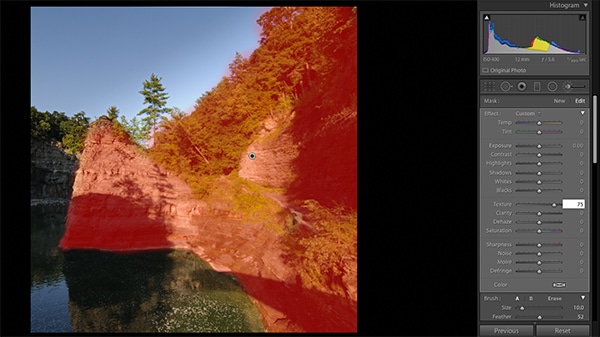
After merging, the results were as expected. However, I wanted to emphasize the detail of the hill, rocks, and trees. This was achieved by adding +75 with the Texture slider… via a brush.
The second image includes the Adjustment Brush mask that I applied for the edit. To get the red overlay, press the letter “O” and press again to hide it. If you made a mistake and added the brush where it shouldn’t hold down the Alt or Option key as you paint. This keyboard shortcut switches the brush to an eraser tool.
Click to enlarge. This image is missing a white point. I didn’t feel it needed one and was happy with the final edit. Texture was added to the hill, rocks, and trees.
Click to enlarge. The red mask overlay represents where I applied the Texture brush. Brushes give you the precision and control of apply your edit exactly where you want it.
What Now?
Here are some more articles to help you continue growing as an editor in Lightroom + ACR…