Textures In Photography And How To Use In Your Photos
Did you know texture is an integral part of your composition? Although not a composition technique by itself, textures can bring an otherwise lifeless subject to, well, life.
If you under or overexpose an image, you risk losing textures that add tone, color, and depth to your photo. In the end, you’ll end up with a mediocre image.
Getting the exposure right (at time of capture) will allow you to capture the texture in all its glory. When you do, your image will be that much more powerful.
In this article, you’ll discover how to master the art of texture in photography to create better photos, why it’s essential, and more.
Table of Contents
Why Is Texture Important In Your Photos?
Without texture, your image becomes just another average photo. It’s just not as impressive vs. a picture with all the texture visible to the viewer.
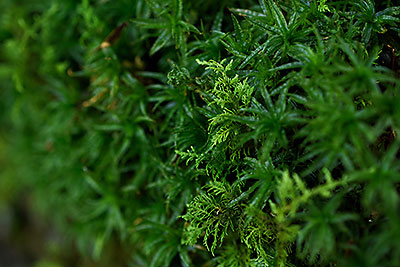
Textures define the elements in your scene.
Picture a landscape of snow void of any texture. It’s just a sea of white. Blown out skies are lifeless and dreary. Yep, you can “fix it” in post-production. But, it’s going to take time, and it’s not going to look as good if you captured that texture in-camera.
How To Capture & Enhance Textures In-Camera
To enhance your textures, for better images, you can use contrast at the time of capture. When it comes to contrast, there are two types: tonal contrast and color contrast.
Tonal Contrast
Tonal contrast refers to the contrast that is affected by light. Tonal contrast enhances the existing texture by making it more visible. This can be achieved by adjusting the direction of light and or intensity of the light.
If you’re primarily using ambient light, let’s say from the sun, you’ll have less control over the contrast. Your options include waiting for the sun to move to change the direction of light, changing your position, altering the sunlight with reflectors and or skims.
By controlling or manipulating the light, you can enhance the texture. Doing so will make your images more dramatic since the texture has more clarity.
Although you can’t take for granted getting the exposure right during capture either. Otherwise, you risk clipping the details and will lose the textures.
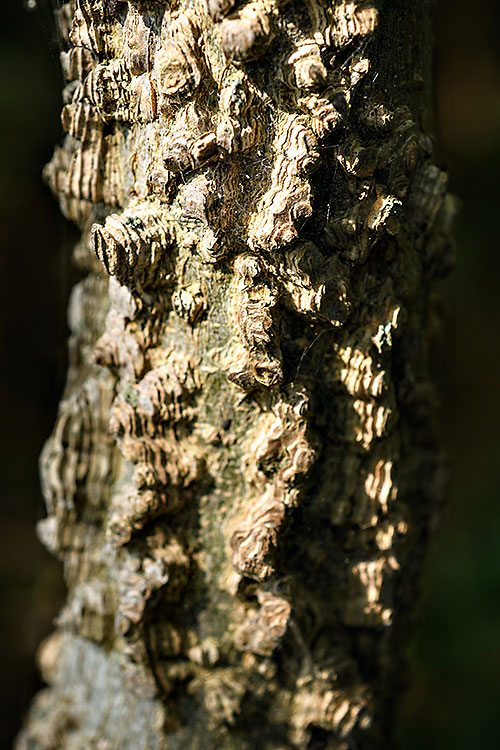
The direction of the light and it’s intensity adds contrast to the overall image. At the same time, the deep textures of the tree trunk are revealed.
Color Contrast
Another method for enhancing the texture is through the use of colors. Contrasting colors help your subjects and the included texture stand out even more.
This is a popular technique used in movies. Orange and blue are two of the most popular used contrasting colors in cinema. The highlights will have one color and the shadows another.
In regards to texture, these contrasting colors make the textures pop that much more.
Orange was enhanced in the highlights and teal was added to the shadows. This is known as a cinematic look and helps textures pop.
Exposure
To maximize the texture in your image, you’ll need to first capture it in-camera.
If you’re new to photography, then you might want to consider shooting in aperture priority or shutter speed priority. This way, the camera can help you capture a well balanced exposure.
Be careful, though. Because the camera can still be fooled by the brightness in your scene. This will result in a photo that is over or underexposed.
To ensure you get the right exposure learn to read your histogram. It tells you whether or not detail is being clipped. If so, then it’s best to re-take the shot now vs. trying to fix in post-production.
Sometimes you do everything possible to get the exposure right at the time of capture, and it doesn’t always yield the results you wanted.
This can be due to a limitation of the dynamic range of your camera.
You have two options…
Take multiple photos at different exposures and combine them in post-production. This is known as HDR.
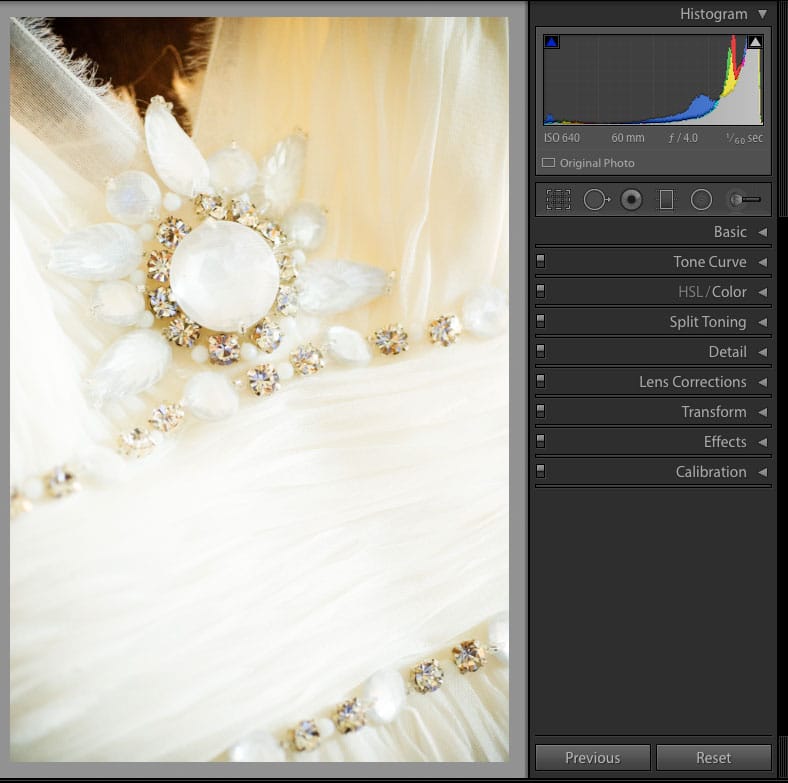
Click to enlarge. The histogram is showing that the image is overexposed.

I took a second image, with the correct exposure, to capture all the detail (texture) in-camera. Compared to the overexposed image it’s hard to tell.
How To Enhance Textures In Post-Production
In post-production, depending on your software of choice, you can enhance the textures even further: curves, clarity, levels, and “texture” (in Lightroom), to name a few.
Oh, and if you shoot in RAW, you can bring back textures (detail) if you didn’t nail the exposure in-camera.
Photoshop, ACR + Lightroom
Since most editing software has a Curves and Levels tool, we’ll focus on PS + LR for now. In essence, the tools we’re covering alters the contrast in your image. More contrast results in the texture becoming more vibrant. Or helps it “pop” from the scene.
Levels
Levels is an editing tool available in Photoshop and most pixel-based software. Adjusting the contrast with this tool, to make the texture stand out more is a simple adjustment.
Your image is made up of a tonal range from 0 to 255. By adjusting the black and white points, within Levels, increases the amount of contrast along with the tonal range.
But, you should proceed with caution when editing with Levels. Adjusting too much can clip data in your file. In other words, you’ll begin to lose texture in parts of your image. Ideally, you’ll want to adjust the black and white points to the edge of the histogram.
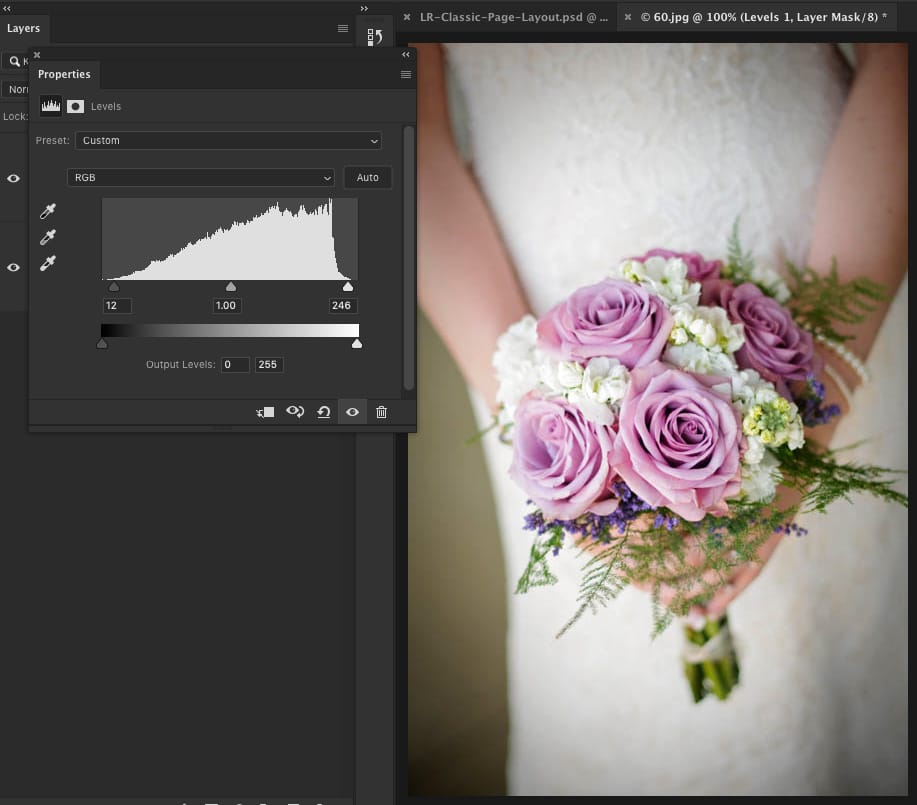
Click to enlarge.
Levels is similar to the Curves adjustment in regards to adding contrast. However, the Curves tool provides more precision and control over the highlights + shadows.
Curves
I love Curves!
It provides precision and control over your contrast. A curve adjustment can be applied in both Photoshop & Lightroom. Oh, and most other editing software too.
With Levels, your adjustment is placed along a fixed linear line. With Curves, that linear line can be bent! In fact, you can “bend” the contrast along different
tonal ranges too.
This provides more control over the amount of contrast and allows you to apply it exactly where you want it (within the tonal range).
My favorite type of tone curve is what is known as an “S” curve. This applies an equal amount of contrast in the highlights and shadows. The end result is delicious textures!
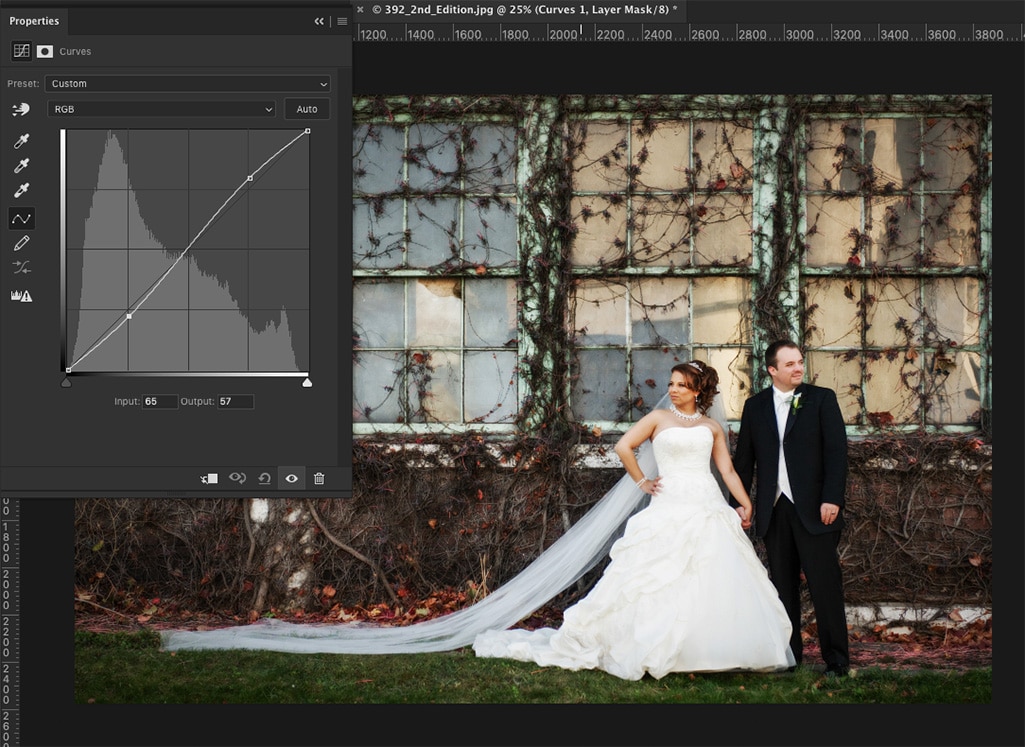
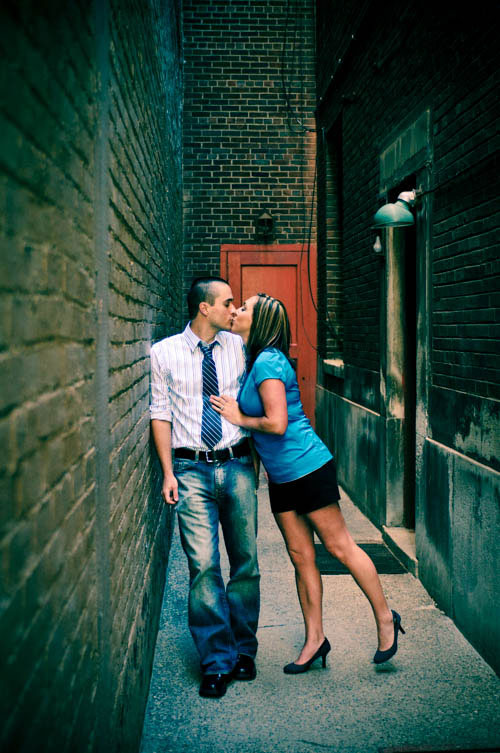
The curve I applied is known as an “S” curve. This type of adjustment is a popular method for adding contrast in the highlights and shadows.
In doing so, the texture of the foliage (on the wall behind them) is much more dramatic.
Clarity + Texture
These tools are available in Adobe Camera Raw and Lightroom. Both adjust the contrast too. However, each does so differently within the tonal range of an image.
Due to the contrast being adjusted within a specific tonal range, it makes that “range” appear sharper. Again, like any editing tool, you’ll want to apply in moderation. If overdone, your images will look unnatural.
Clarity – affects the contrast in the mid-tones of your image.
Texture – affects the mid-size detail only.
For photos with people I tend to add a minimal amount of clarity + texture. If at all!
How Over Editing Destroys the Integrity Of Your Image & The Texture
Although I eluded to the dangers of over-editing in the previous section, I thought it was worth exploring a little more. One question I get from photography beginners and editors is:
“How do I know if I’m over-editing?”
Well, if your editing results in the loss of textures, then chances are you’re over-editing. This isn’t a hard-and-fast rule, though. Rules are meant to be broken.
How important is the texture of your image? Or the story you’re trying to tell with it? Who are you editing for? Yourself or a client?
The answer to these questions is vital to your final edit. If it’s for personal use and someone on Facebook says you over-edited… who cares. As long as you’re happy and are aware that the photo has been over-edited… because you like that style.
If it’s for a client, then you may want to scale back on the contrast to preserve the textures. But, again, it depends on the client and their expectations.

Lightroom and ACR both have built in tools to help you avoid over editing… and destroying the texture (detail). In Lightroom, the histogram includes clipping tools for the black and white points of the tonal range.
When turned on they will display a blue overlay (on your image) if the black points are over edited and a red overlay for the white points.
TIP: If you’re concerned about what others think, you can add a disclaimer describing the editing technique. For example, clean edit, custom edit, or a creative edit. A creative edit is one that some may consider over-edited.
Two Reasons Why Texture May Not Be Important
There are times when the texture isn’t as important. Or you may want to alter the texture based on your creative vision. Let’s explore two scenarios.
When Texture Isn’t As Important To Portrait Photographers
There will come a time when you photograph someone that will request their skin to be retouched.
Retouching is an art form in and of itself. If you do it too much, the person will look unnatural and plastic. This happens when you remove too much texture from the skin, trying to “smooth” it out.
Your goal should be to remove some of the unwanted texture or to minimize it. Not to remove it entirely. At least if you’re after an image that looks realistic.
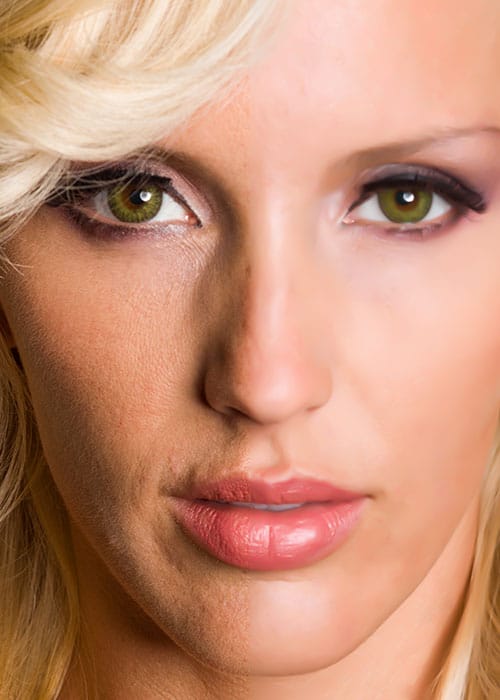
Click to enlarge. Photo by Croft Alexander.
Don’t do this! The right side is over edited and too soft. All the texture from her skin has been removed. It looks like plastic.
When Texture Isn’t As Important To Landscape Photographers
There are times when you get in a photographic rut, and may need a new creative outlet. Long exposure photography might be one to help you get out of that rut.
This technique isn’t about capturing all the texture. Instead, it’s a creative option that smooths out the texture due to the slow shutter speed. This gives anything in motion a blurred effect.
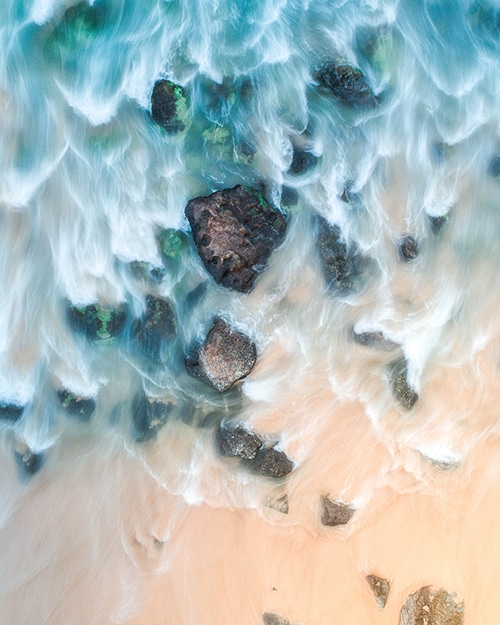
Photo by Simon Clayton.
What's Next?
Here are some more articles to help you continue growing as a photographer to create exceptional photos:
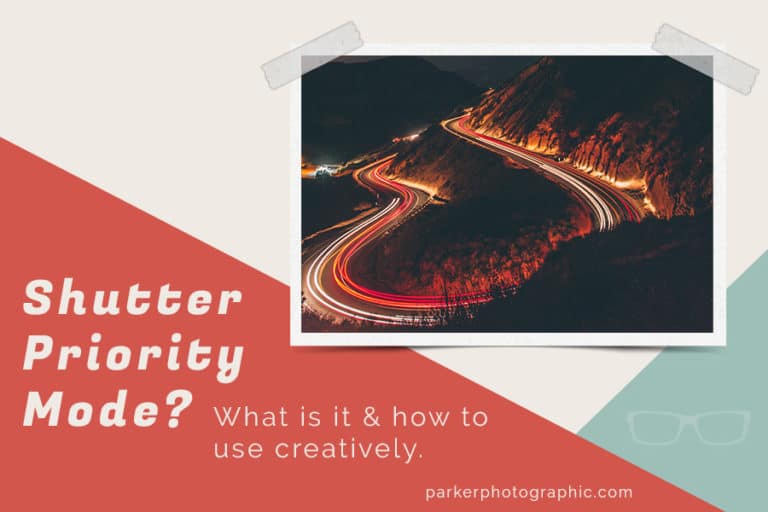
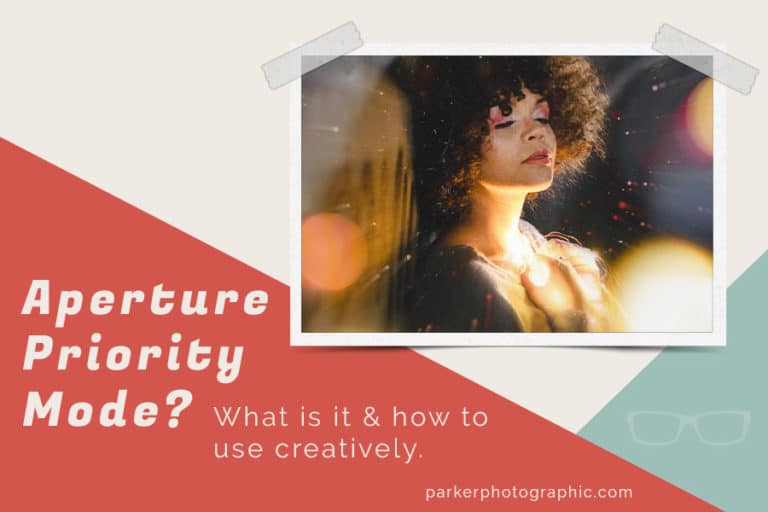
What is Aperture in photography?
What is ISO in photography?
What is Shutter Speed in photography?
What is White Balance?
Check out the 7 key ingredients for light in photography to master light in photography.