How To Import Photos Into Lightroom Classic &
All Import Settings Explained
- Post by Parker: 30 Years experience!
- 2 Comments
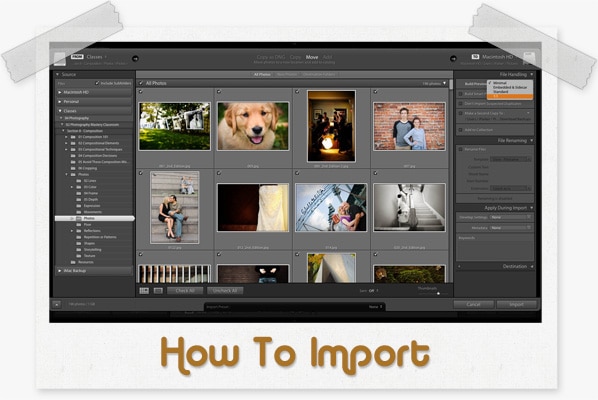
Are you new to Lightroom and wondering how to get your photos inside of it? Well, unlike Photoshop, we have to import our pictures into Lightroom.
Easy enough? Yes and no.
Click the Import button, and you’re presented with 4 different panels and a central interface.
Soooo many options! Where do you start, and which options do you need?
No worries. I have you covered in today’s article on importing photos into Lightroom.
Here is what you’re going to learn:
- What the Import process is and why we need to do it.
- How to Import directly from your camera or hard drive.
- How to get organized, during the import process, by learning all the settings in the File Handling, Renaming, and Apply During Import panels.
Table of Contents

Photo by: The Lazy Artist Gallery
What is Importing & Why Do You Need To Do It?
Lightroom is more than just for editing your photos. The power of Lightroom isn’t fully understood until you realize it’s full potential.
In addition to editing, you can organize your photos, create photo albums, create slideshows, and more.
Let’s say you’re only interested in editing. But, maybe you’re intrigued by getting organized too.
By getting organized, in Lightroom, you’ll have the power to find any photo among thousands in a matter of seconds. This is just one example of the benefit of having your files organized in Lightroom.
When you edit in Lightroom, you’re not applying the edits directly to the file itself! You’re also not using layers to edit with like we do in Photoshop.
What happens to your photos after import?
It’s important to understand that you are not physically importing the original file!
Instead, you’re importing a preview of the original. This means the original is never physically altered during editing.
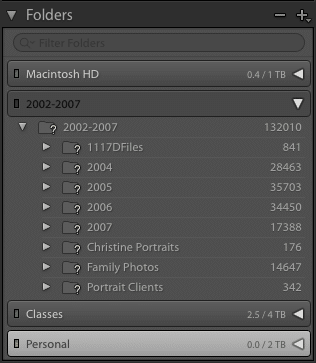
Once your photos are imported, they stay in their original location on your hard drive.
Depending on the options you select during the import process will determine the quality of the preview you see in Lightroom.
Oh, and I should point out that if you only backup your Lightroom catalog, your original files are still at risk. It’s essential to have a backup workflow for your original files too!
There are two main methods for importing your files into Lightroom.
The two primary “Source” options to begin importing are…
One: a hard drive or
Two: directly from your camera.
Either option is fine. It all depends on your preferred workflow.Let’s go over both options in more detail. First, we’ll take a look at importing from your hard drive.
How To Import From Your Hard Drive + All the Different Settings Explained
For this option, you’ll first need to download your files, from your camera to a specific location on your hard drive.
Make sure you place your files in the exact folder location before importing it. Otherwise, you’ll create a massive mess in Lightroom if you move the folder afterward.
Now what?
Click that big ‘ole “Import” button in the bottom left of the Library Module.
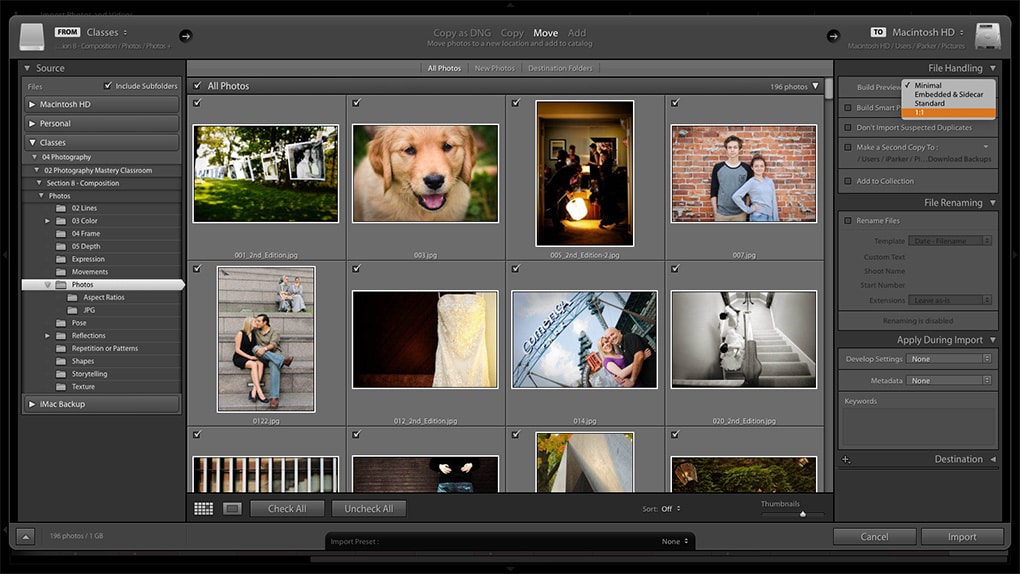
A new screen appears with import settings on each side and a window in the center of the Interface.
Let’s go over all of the import settings, so you know what they are used for.
Left Panel: "Source"
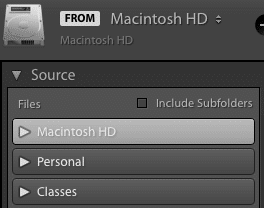
The first step is to select the photos, from the source, for importing. In the left panel, navigate to the folder of images you’d like to import and select it.
Once selected, the middle section of the import window should now start to show a thumbnail of all the files.
If not, here are the possible causes…
1. your files are in subfolders
2. files are already in Lightroom – they’ll be greyed out
If your files are inside subfolders, then make sure to check the “Include Subfolders” box.
By default, “All Photos” is selected, and all photos will be auto chosen.
the Interface
The window, in the center, will begin populating with the images available for import based on the folder selected. More options!
At the top, you can select to import “All Photos,” “New Photos,” or “Destination Folders.”
All Photos: will select all the files in the folder.
New Photos: will only select and import photos that are not already in the catalog.
Destination Folders: will group your folders by destination. Also, this option will not be displayed if you select “Add” from the top panel.
The bottom panel gives you some options for viewing the thumbnails. These are self-explanatory. Click on each option to see what happens.
How to Import specific images or multiple folders
Did you know you can import more than 1 folder of images at a time? Yep, you sure can. Here’s how…
Hold down your “shift” key and select all the folders with pictures you want to import. Note: when Lightroom imports your photos, the folder structure will stay the same.
You can also select individual photos vs. all of them. Here’s how…
Step 1
If you want, you can adjust the thumbnail sizes of the images. In the lower right (under the thumbnails), is a slider for resizing your Thumbnails. Sliding left makes them smaller, and to the right makes them larger.
Step 2
Unselect all photos by unchecking the “New Photos” box (top left – just above the thumbnails).
Then, to select a row of images – first select the first photo, then hold down your shift key and select the last image in the row.
Those 2 photos and all in between will now be selected.
Step 3
Click a dark gray box (top left of your thumbnails), and all of the images will be selected for import.
To select a random assortment of photos, hold down your Alt key (PC) or your Option key (Mac), and randomly choose the images you wish to import.
Finally, click a dark gray box (top left of your thumbnails), and all of the photos will be selected for import.
Top Panel Options
Next up, the 4 options in the top panel. This includes; Copy as DNG, Copy, Move & Add.
Copy as DNG
This option will copy your files to a new location, import and convert to DNG.
DNG stands for; Digital Negative. Whole books have been written about DNG and are beyond the scope of this article.
Copy
Copies your photos to a new location and adds them to your catalog.
Move
Moves your photos to a new location and adds them to your catalog.
Add
This option is selected by default. This will add your photos to the catalog without moving them.
Which One Should You Use?
I’ve always used “Add” since I download the photos, from my camera, directly to my hard drive.
I’ve never had a need to copy or move them while importing. It’s just not part of my workflow.
Tip
I’ve always used “Add” since I download the photos, from my camera, directly to my hard drive.
I’ve never had a need to copy or move them while importing. It’s just not part of my workflow.
File Handling + Apply During Import
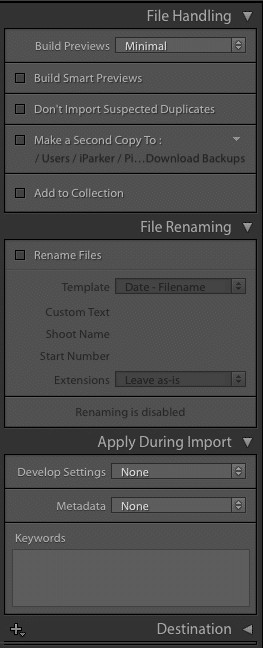
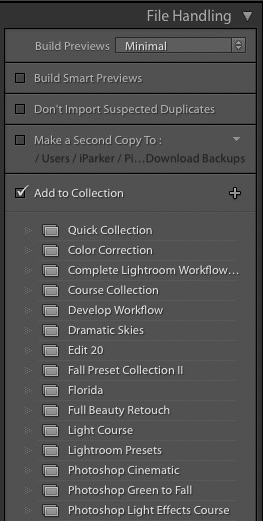
The power of importing into Lightroom rests in the right panel. From here, you can streamline your editing workflow and start getting organized at the same time!
How To Streamline Your Lightroom Workflow with File Handling
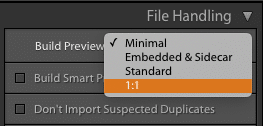
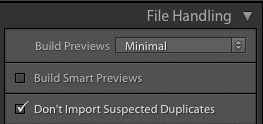
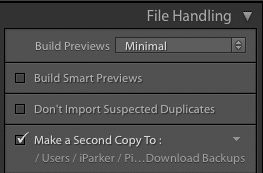
The most important choice is the first one; “Build Previews.” This will have a considerable effect on your productivity.
Keep in mind, your photos are not actually imported into Lightroom. So, Lightroom has to create a preview to work with. Similar to the preview on the back of your camera.
The “Build Previews” option has several choices and is based on the size of the preview. So, let’s go over each of the different options, and then you’ll be able to decide which one will be best for you.
Minimal
This creates the smallest size preview and will import/process the fastest.
An import test of 94 photos, set at Minimal, took 50 seconds to import & build the previews.
Embedded & Sidecar
These previews were created by your camera & are a little larger than Minimal.
Standard
A decent size preview larger than the first two.
1:1
Highest quality preview and will take the longest to import/process.
Another import test of the same 94 photos and set to 1:1. It took 3 minutes and 27 seconds to import & build the previews.
Which "Build Preview" Option Should You Select?
Well, once again, it depends on your workflow. I’d recommend 1:1, and here’s why…
Let’s say you selected one of the other options. Then, you go to edit your image and need to zoom in for whatever reason. Before you can edit, while zoomed in, Lightroom needs to create a 1:1 preview.
So, my recommendation is to select 1:1 from the beginning. Yes, it will take longer to process your images.
However, you can work on another project while they import. Especially if you’re importing thousands at once.
In that case, you can import overnight. Or you can begin processing those that have finished importing. As you do, Lightroom will continue importing the remaining in the background.
Pro Tip 1
Do you use and store your photos on external drives?
If you have an external hard drive set up on your computer, but then it’s disconnected from your computer, you can still edit your photos. That is if you have smart previews built.
If not, then when the external drive is disconnected from your computer, you will no longer be able to edit your photos. To continue working on the files, you’ll need to reconnect the drive.
Photo by Johannes Plenio.
Going on a road trip? You can take your photos with you when you’ve created Smart Previews. Once created you can leave the original files at home.
Pro Tip 2
Do you travel a lot?
Smart Previews are fantastic for photographers that travel a lot or maybe use more than one computer. Smart Previews allow you to take all your photos with you without the need for the original files!
Instead of taking your hard drive that has all your photos, you’ll just take your Lightroom Catalog with you.
Add to Collection
Collections are one of my favorite organization tools in Lightroom. When you activate this option, any existing Collections will be listed in a new drop-down list.
If not, you can create a new Collection by clicking on the “plus” icon.
Tip
Collections allow you to organize your photos into “virtual folders.”
Find out more with this complete guide on what Collections are and how to use them.
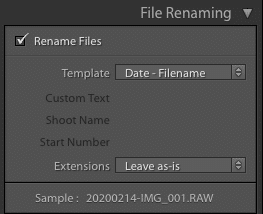
File Renaming
This is another option to begin organizing your photos as your photos are imported into Lightroom. This option is pretty basic. It allows you to rename your files during the import process.
Once activated, you’ll be able to select from the premade renaming Templates.
Or, if you have a specific file naming structure, as part of your workflow, you can create a custom template and save it for future use.
Please note: The File Renaming option is not available if you select “Add.”
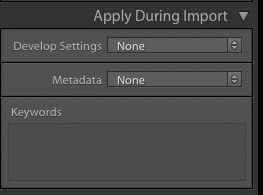
Apply During Import
Imagine applying your favorite edits during import. How much would that improve your productivity?
Well, the “Apply During Import” panel will allow you to edit during import!
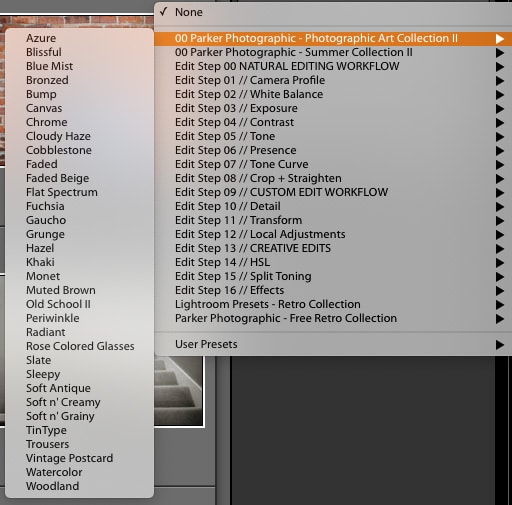
Have you created your own Develop Presets? Or maybe purchased some from your favorite artist?
If so, you can apply one of those Develop Presets during import!
Even if you choose not to apply an “edit” preset during import, you can still take advantage of this panel. Here’s how…
One Type of Edit Every Photo Should Get
There is one type of edit that EVERY photo should get. And that is a Lens Correction edit.
All lenses create lens distortion. This includes vignetting in the corners and warping. If you shoot in RAW, you can fix this in the Develop Module under “Lens Correction.”
Instead of doing this manually, create a preset with this edit, and apply during import!
Copyright Information Applied During Import
The digital world is like the wild, wild, west. Some people have no problem stealing your photos and profiting from it. A watermark may not be enough for legal recourse.
It’s imperative that you embed copyright information with the photo file itself. This can be a pain to do manually.
Or create a copyright preset to be applied during import!
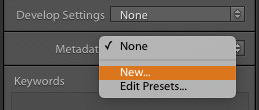
To create one, click on the Metadata menu and select “New.” Once you’ve added all your info, click “Create.” Now, you can choose this to be applied during import.
Keywords
The digital world is like the wild, wild, west. Some people have no problem stealing your photos and profiting from it. A watermark may not be enough for legal recourse.
It’s imperative that you embed copyright information with the photo file itself. This can be a pain to do manually.
Or create a copyright preset to be applied during import!
To create one, click on the Metadata menu and select “New.” Once you’ve added all your info, click “Create.” Now, you can choose this to be applied during import.
Import From External Device
Now let’s look at the options for importing from your camera or external device.
Once your camera is connected to your computer, you’ll see it under “Source.” Go ahead and select it.
This time Move and Add are grayed out. Your only options are Copy as DNG and Copy. Copy is selected by default. This will copy the files on your camera to a location of your choice.
To select the destination, you’ll find a “Destination” inner panel to the right. Choose your hard drive, choose if you want the photos in a Subfolder and if so, you’ll need to select Organize and Date Format.
That’s it! All the other options are the same. Just follow the instructions above.
Ready to Import?
Let’s import your photos by clicking on the “Import” button (bottom right). In the top left of your Interface, you’ll see the progress bar for your import.
Congratulations! Your photos are now importing into Lightroom.
Now What?
Now that your images are imported into Lightroom, what’s next?
Well, do you want to organize your photos? Or do you want to go straight to editing?
Let me know what you want to learn about next in the comments below.













2 Responses
I have been saving photos to an external hard drive, drive F, so I don’t fill up my iMac’s internal SSD with photos. I am about to purchase Lightroom Classic/Photoshop but I am a little concerned that if that external HDD has a failure, it will totally disrupt Lightroom’s cataloging process. My photos are generally recorded on my camera and downloaded as RAW/JPEG.
What do you suggest to get around this potential problem?
Hi Alex, For the external drive my recommendation is to back it up to the cloud. Here’s a complete backup workflow for Lightroom.
Let me know if you need anything else.
Chris