Topaz Photo AI update 1.4.0
Subscribe
Today we have a new update to Topaz Photo ai. We are now at 1.4.0, and it’s been a couple of months since I’ve done any updated video tutorials, and that’s because a lot of the updates have been really simple and nothing earth-shattering.
Some models have been updated to include new and improved algorithms for making our images sharper and cleaner.
However, I’m not a big fan of some of these new algorithms, and I prefer the old models, and that’s just a personal preference.
I found out a long time ago what I like and need, and it works.
So, there’s no need to use something else if something is already working.
So hopefully, some of you are using these new models now because they work better than the old models.
So it’s nice to have multiple options to choose from versus a set tool or feature, which they had initially planned on doing was getting rid of lens blur and motion blur.
But due to the community speaking up and saying that we still want and use these models, they ended up keeping them, and hopefully, in the future, as they improve Topaz Photo ai, they will continue keeping the older models that they’ve been introducing.
Now, as part of this update, they have a new model for helping us improve our images, and it’s for enhancing text.
Now, I don’t shoot a lot of images with text, but if you do, there is now an AI model that will help you improve the “text,” whether it’s low-res or high-res.
This model will help you sharpen that text, so it’s much easier to read or make it even sharper than the original high res file.
And you can see that in the update right here, it says added preserved text enhancement. And then, just below that, we have some updates to the interface.
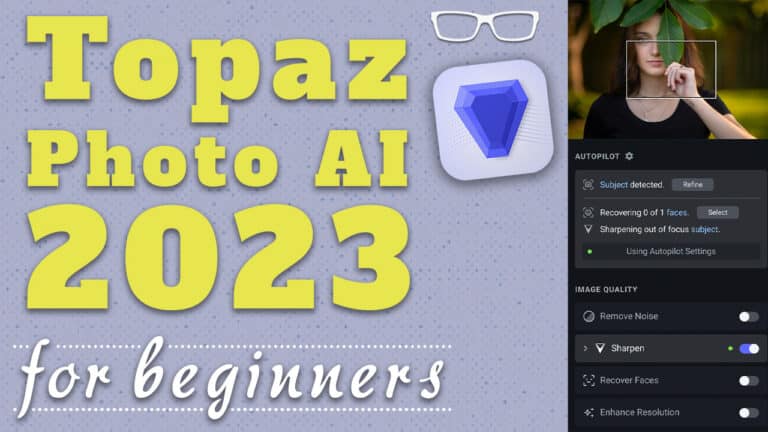
So they’ve redesigned the right panel, which I think looks much better than before, and the welcome screen. They’ve also optimized the autopilot when rerunning due to switching images or toggling the upscale.
Even when I’m navigating to another part of the image, it updates the preview much faster than before.
So let’s look at the new welcome screen they’ve redesigned.
So on the right side here, we have the most recent files that we’ve opened up, and this is only for those of you that use the standalone version of Topaz Photo ai.
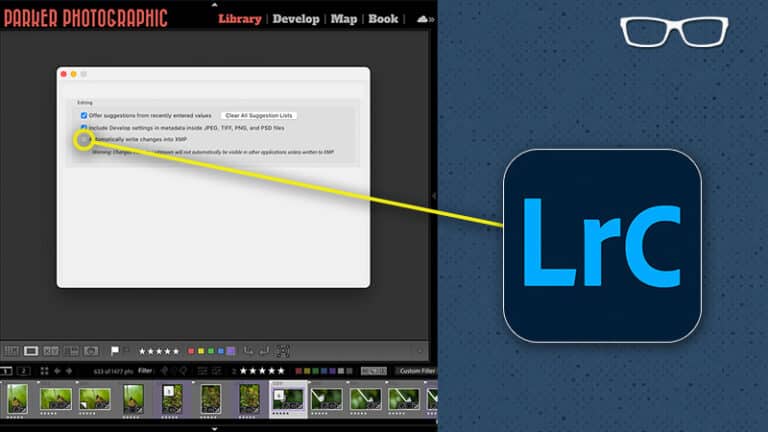
If you bring in your images as I do from another application with Topaz photo AI as a plugin inside that app, in this case, Lightroom, it will not show those recent files if you bring them in to pass photo AI this way.
And that’s because it bypasses the welcome screen and goes directly into the interface where you can begin working on your images.
Here are some quick links to help you get started with Topaz photo ai, some user guides, features, and plugin information here. And just like before, you can browse your images on your computer with this button here.
So I’m going to go ahead and quit Topaz’s photo ai. And I will open up these two images here to reopen into Topaz photo ai.
So we can look at the new feature in Topaz photo AI and the redesigned right panel.
They’ve updated the font and cleaned up the icons, and it’s a more streamlined layout than what we had before.
It’s a lot more inviting and easier on the eyes, and when you click on an item, you’ll notice that inside, we no longer have a list of the models to choose from.
Instead, they are now available in a button form.
I’d like this better than just a straight list of the names. I think it looks cleaner than it did before.
You’ll also notice that the upscale model here has moved up to the top from the bottom and at the bottom. Now we have preserved the text.
Now I found this image out of tens of thousands with text.
So let me show you how “Preserve Text” works because before it enhances the text, you have to select it.
So once you click on this option here, it will expand and give you a brush with add automatically selected.
And then, you can resize your brush size here and then paint over the areas that include text.
And this is masking out this area so that Topaz photo AI knows this text needs to be enhanced.
And, of course, you can subtract from that if you go too far outside the lines, and then make sure you click on Apply to apply that mask.
So Topaz Photo AI knows that text needs to be enhanced, and there are two options.
There’s noisy compressed, which this one is. It’s a high res file. It’s around 40, no, 20 megapixels in size. And I used an ISO setting of 2,500.
It was early in the morning, and my aperture was F/8. So that was wide open at the time for that particular lens. So it’s very noisy.
If you have a low-resolution file, select the low-resolution AI model instead. And, of course, you can increase the “strength. “
So right now, it looks like it needs to do more to the text.
So if we try and increase this, let’s say up to around 40, let’s see if that gives us a better result. So, not much improvement for this particular image. It is a high-resolution image, and the text was pretty sharp straight out of the camera.
So I don’t know if I would ever use this feature.
But for those of you that have text in your images, you now have the option to enhance that text with this particular AI model.
Now, I did discover something today, and that is when you want to open up another image during your session. In Topaz Photo ai, there’s no clear menu option to do that, so there’s nothing in here to open up your images.
This may be an oversight.
I am trying to remember it being in previous versions. Still, there is a way to open up additional images using a keyboard shortcut: command or control plus the letter O.
You’ll get this window browser here, where you can navigate to the image you want to open up in this current topaz photo AI session. Let’s say I want to open up this image here.
This is a burrowing owl I shot the same day I took this photo of the sign that is basically a warning to others that harassing the owls or their nests is prohibited by law in Florida.
And Topaz photo ai, I already edited this image. This is the TIFF file. I did a good job of removing that noise and sharpening it.
We now have a strong and extreme option regarding the updated sharpen and remove noise models.
So I can’t remember what they were a couple months ago, but these two are the two newest AI models.
But for me, the normal option with increased strength typically does a better job for my images than extreme ones.
Now this image was shot at ISO 8,000, and you can see it did an excellent job of removing that noise.
As I mentioned before, when you navigate to another part of the image, that preview update is a lot faster than it was in the previous version.
So I’m really enjoying that because it makes it easier to navigate around the image to see if the de-noise tool is doing its job and not adding any additional digital artifacts during the noise removal.
In the sharpening subject model, we now have lens blur and motion blur inside of here.
By default, you no longer need to go into preferences to have these activated, which is
Awesome because I use lens blur 90% of the time for my images and about 5% of the time motion blur. And then rarely do I use standard and strong.
The lens blur for my images works best and gives me the results I want based on my creative vision.
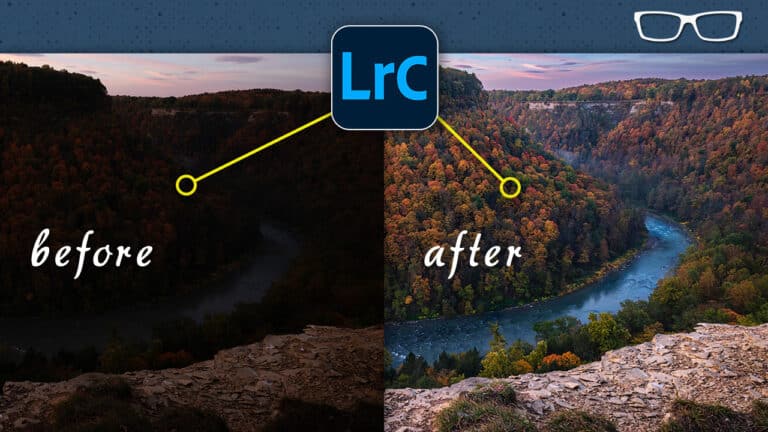
All right, so real quick, I want to show you the before and after of this particular image.
And if you want to see how I edited this image in Lightroom, Photoshop, and Topaz photo ai, check out this video tutorial next.