Supercharge your wildlife photo editing skills with
this Lightroom tutorial | Episode 01
Subscribe
Well, at least that’s what my wife says.
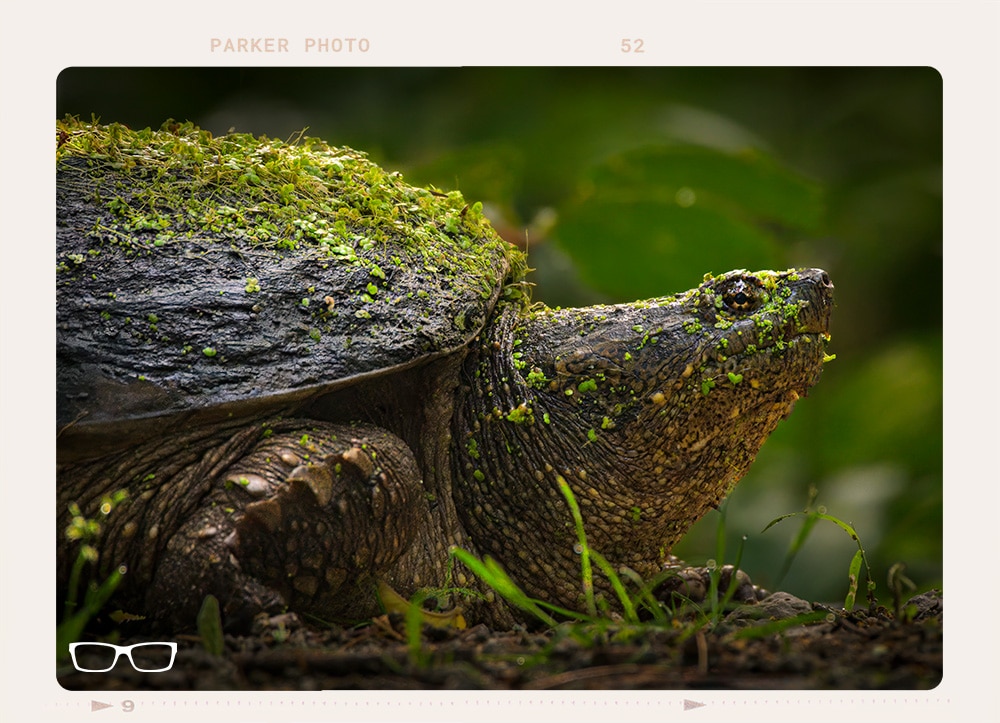
The first time she saw it, she said, that’s Morla from Never Ending Story, which was our daughter’s favorite movie growing up, and that’s probably why she wanted a turtle as a pet.
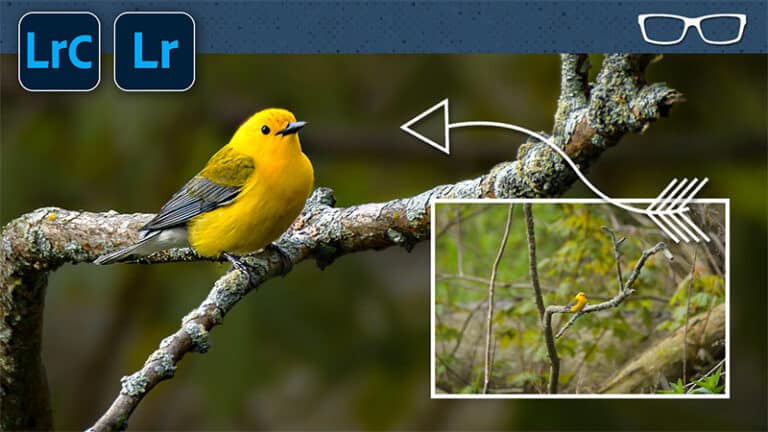
So today, I want to show you how I transformed Morla from this original image trade out of the camera here on the left to this edit here on the right, as well as the edits that I did in Photoshop to retouch the image as well as the final step, which was to remove the digital noise and sharpen the image.
The original edit on the right is a bit softer than the final edit, and you can see some digital noise here.
And I removed that digital noise and the final edit and didn’t use Lightroom de-noise or sharpening tools.
Then I’ll explain why when we get to that part of the editing workflow.
Now, if you look right here, it says ISO 8,000. You can expect to see much more digital noise than what’s currently visible in this image.
And there’s not much noise in this ISO setting because I shot with a Nikon Z8, which is a mirrorless camera. It does a better job of creating less digital noise than a DSLR.
And that’s why there’s less noise in the image initially.
This was shot during the golden hour in the morning, around 6:30 to seven o’clock.
I can’t remember exactly when, but in that time zone, the color of the light was very yellow and orange due to shooting during the golden hour.
Still, I was using the wrong white balance when I shot this image, which is why the original image has that blue color cast.
And I warmed it up in the original edit.
Here you can see that the temp is 6,000. Originally this was at 5,300.
And then, the tent, I also increased or added some magenta to warm it up a little bit more.
The original was 14, and I increased it to 23 and again, White Balance at 6,000, which helps create some context.
So we get a feeling of when that image was created.
Now, some of the other edits that I did were very minimal. I have my highlights here down to minus 100.
If I reset this, you’ll notice that those highlights are a lot brighter, and I wanted to tone it down so that it was a little bit more even.
Unfortunately, what that does is it removes some of the contrast in the image.
So you can counteract that by either adjusting the contrast slider, adding Some Dehaze, which will add some contrast, or applying a tone curve.
Now for this shot of Morela, I also decreased the highlights to minus 85.
I also increased the tent this time but adjusted the Dehaze to plus 20 to increase the contrast and applied the tone curve.
So without that, the overall light is a lot flatter.
So you want to be careful with highlights when adjusting it to be darker.
And keep in mind that you may need to add some contrast to the image if you do that. All right, let’s go back to this image of Morela.
There were a couple of other settings that I applied in HSL. I darkened the yellow and the greens because I found them slightly too bright.
It’s a modest amount of darkening of those colors, but it helps improve the visibility or to have more or less stand out from the background.
More so than having those colors as bright as they were before. I also applied a highlight priority vignette at minus 39.
So here’s the before and the after, and you can see how those corners are much brighter versus the vignette.
And that helps our viewer’s eyes toward the center of the image or the subject. In this case, more, the snapping turtle.
I like to apply a vignette minus 10 to minus 40 and create a less obvious one.
If I were to go really dark like that, it would be too obvious that a vignette was applied versus something in this setting here.
So I keep it as natural as possible. Now for this particular image, I did apply some masks, but for this one, I did not.
Now for this, though, I want to show you the retouching I did here.
I got rid of that grass and will show you how to do that in just a second.
Let’s look at the masks I applied to Marla here.
And I targeted three masks to apply specific edits to that part of the image based on the mask.
The first one here targets the eye, and I’m just targeting the top portion of the “eye” here.
And what I did for this mask was I increased the exposure, and it also increased the whites and decreased the blacks, which adds a little bit of contrast.
And you’re going to notice here’s the before and the after, and you can see how much brighter the eye is, and it helps that eye stand out just a little bit more.
And then, for the next mask, this one here, I targeted more with a mask.
So with this mask, I increased the exposure, and that was it. I have a tone curve and applied texture, clarity, and de-haze.
Now these settings, in addition to adding contrast, will help create a little bit of sharpening in your image or give the appearance of sharpening since that contrast is being applied along the edge of different size D detail.
Now you want to ensure you’re adding only a little because I like to do my final sharpening with a specific sharpening tool in the final step of my editing workflow.
It’s not something that I do in Lightroom because the sharpening tool in Lightroom is outdated, and I can’t get the desired results.
Now the next target is this mask.
I didn’t cover the entire subject or all… more or less.
So what I had to do was because the edits that I was applying to this mask were making the top portion and the neck too bright or overexposed, I had to subtract from that mask with a brush.
So you click on subtract, select your brush, and then you can paint away that mask where you don’t want it.
Here’s the before and the after, and you can see how much brighter Morela is now in the area where that mask is being applied.
So once I completed that edit, I right-clicked, duplicated, and inverted the mask to get the rest of the image selected other than these portions of Moral.
Which I had to use the brush here again to subtract different parts of Moral to ensure that those edits weren’t being applied to her or not entirely to her.
So I’m primarily targeting the background and the foreground with this particular edit, which made it darker.
And I think that was it for this mask.
So here’s the before and after. I like to shape the light around my subject to help that subject stand out even more versus the light that was available when I captured the image.
And again, the show’s star is Morela or the snapping turtle. We want to bring out the best in that subject by making it stand out even more and eliminating or minimizing any distractions in the background and the foreground.
So you can see how the brighter foreground and background take away from the main subject, and our eyes dart back and forth between those bright levels and the snapping turtle.
By toning it down, we’re now fixated more on morale than the background and the foreground.
Once I have those edits done, it probably took me a couple of minutes to do it based on a workflow I’ve been using for years and years.
I’m able to do these types of edits reasonably quickly.
Once you have your own system, you can edit your images in a few minutes or less. And then the next part of my workflow is to begin retouching the photo.
And I can usually do it in Lightroom with these healing tools.
I like to use the content-aware tool. Still, for this image and this other image, I had to use a more powerful retouching tool that’s only in Photoshop now.
I hope that they bring it to Lightroom eventually. I like to open up the image in Photoshop and remove anything that I want to eliminate from the image.
For this one, you can see a little bright highlight right here and some bright highlights back in the back.
And in Photoshop, I was able to remove them. I also was able to remove this grass, as I mentioned before.
So let me go ahead and show you how to do that.
I’m going to right-click and select edit in Photoshop 2023. And then Lightroom will open up this image in Photoshop, and once I save it, it will be brought back into Lightroom as a PSD file.
So let’s take a look inside of Photoshop now. And now we have more or less.
So the tool that I like to use for retouching is called the Remove tool.
So if you come to this little bandaid icon, you might see this one; right-click and select the Remove tool.
And this AI-based tool will analyze different parts of your image and look for colors, textures, and other things to cover up the area you’re painting over.
So it’s a brush you can resize with your left and right bracket keys, then paint over the area that needs to be retouched.
And you’re going to get this little pink overlay.
Once you release it, Photoshop will begin analyzing your photo to remove the area you’re targeting.
And boom, just like that, the grass is gone, at least where I painted.
All I have to do now is continue going over different areas to continue removing the elements that need to be removed from the image.
Sometimes unlike now, it will only give you 100% perfect results.
You may need to “go over” an area two, three, and sometimes more to get the desired results.
So I will wait to complete this; you get the idea.
I recommend practicing with this tool to see how it works and the limitations and the abilities to remove elements in your image.
So once you’re done retouching your image, you can save it. So I like to use keyboard shortcuts.
I will use command or control plus the letter S, or you can go to file and select save. So there’s the keyboard shortcut right there.
Once I click on that, it will save that PSD file in the same folder as the original raw file. And it’s going to import it into Lightroom, as I mentioned previously.
So if we go back into Lightroom, you can see I have
My PSD file is here and appended with edit dash two because this is the second PSD file with that same file name.
It appends the name according to what’s currently in the folder.
But I also like having that edit in there to let me know.
Okay, this image was edited.
All right, the next step is to do the sharpening and the removal of the digital noise.
This image was shot at 11,400, so I had a higher ISO than the other image, which I said was 8,000.
I’m going to select both of these PSD files here. And if we scroll down here, you will see your sharpening.
And then we also have noise reduction right here.
So Lightroom has AI Denoise tools built in. Now I’m not a big fan of either one of these.
One, the sharpening needs to be updated, and it needs the tools I need to sharpen my images.
And it creates a lot of digital artifacts when you’re applying this sharpening tool here. And we have tools to reduce it.
But it’s been around for 15-plus years, and it’s just never received any improvements to make our images better and sharper.
So that’s why I don’t use sharpening in the detail section here. And Denoise AI in Lightroom needs more tools to remove that digital noise.
Yes, it does an excellent job of removing the noise.
Still, I like to have more control over the final results because the tool I’m going to show you will remove the noise perfectly.
It’s going to remove any digital artifacts, and it’s going to increase the clarity where that noise is being removed to add more punch to the overall image.
The other thing is that I can’t remove that digital noise because I have selected PSD files.
You can only use those tools if you use an original raw file, which is right here.
And now the sharpening and de-noise tools are available.
So you can’t use these tools if you have JPEG files if you shoot in jpeg, or if you work with TIF files, or in my case, PSD files.
So that’s another reason I’m using this other editing tool: I do my retouching in Photoshop, not for all images, but for most of them.
You could do all this de-noise and sharpening before, but I get better results by doing it last.
So I’m going to right-click on this image. I will select edit in and Topaz Photo AI.
Which is my preferred method of removing noise and sharpening the image.
And because I’m using a 200 to 500 zoom lens with an FTZ adapter, the images tend to be slightly softer than those I’ve used.
And the sharpening that I like to use is lens blur because it will make that soft image crisper or sharper based on the algorithm used inside this lens blur sharpening tool.
I need to increase this because it still needs to be more sharp.
So once I increase this strength, it will sharpen that image even further, and now it’s starting to provide me with the amount of sharpening I want.
I want to turn it on and remove the noise. “Normal” for this particular image should be sufficient.
Even though I’m at ISO 8,000, it will remove all that digital noise.
And if you take a look right here, here’s the before you can see there’s a little bit of grain and digital noise in there. And then that is the after.
How cool is that? I love it.
If you want to see the POV of me capturing Morla, check out this video next.