Wildlife: Full edit from Lightroom to Photoshop
Subscribe
Intro
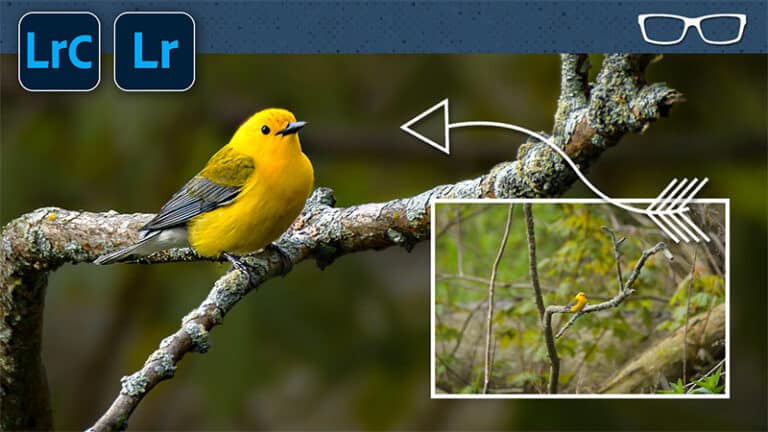
Hello, I’m Chris Parker with parkerphotographic.com, and this is a photo of a Chickadee that I shot recently without any edits.
However, check this out. This is the final edit. How cool is that? I love it.
All right, so it’s not a great photo, but I want to share how I edit my images in Lightroom in conjunction with Photoshop.
In this case, I used Photoshop’s new AI removal tool to remove the leaves, branches, and trees in the background to clean up the image so that the Chickadee stood out more.
And I also shaped the light in the image to help that Chickadee stand out even more.
And we’re going to talk about that in just a moment.
Develop Module
First, let’s dive into the developed module and do the first thing I typically do with wildlife images: crop the image to fix the composition.
Crop
I’m trying to perfect the composition on camera, which I can do with portraits and landscapes. However, with wildlife, they are less cooperative than other subjects.
We need to crop this image with the crop tool.
I will press the letter R to activate that, or you can access it right here on the toolbar.
Now, the grid overlay that I currently have on the crop tool is known as the rule of thirds, and it’s divided up into three rows and three columns.
If you need to get more familiar with the Rule of Thirds, we’ll discuss that in another video tutorial.
You can also navigate to other overlays to help you improve your composition based on different photography rules by pressing the letter “O.”
So I’m going to go back to the rule of thirds here, and I’m going to click and drag down, and I’m going to place his head roughly in this area right here, this intersection.
I’m going to pull this down. That might be too tight.
That looks good right there. Okay, click enter, or return to commit to that crop.
Lens Distortions
I want to fix any lens distortions created by the lens I used, and we can do that with lens corrections.
So I’m going to turn on these two options here.
And Lightroom will automatically fix any lens distortions based on the Lens Profile it selects here.
And it’s reading that information from the metadata of the file. And it works with raw and DNG files as well.
But if you shoot in jpeg, you must do this manually with these sliders at the bottom.
Truthfully, my lens corrections are automatically applied during import based on a preset I created to use these types of edits during import.
So I don’t have to come down and do this every time.
Vignette
Another type of edit that I include in that preset is a vignette.
I usually do minus ten on the precept, but sometimes I come in and do a little bit darker.
We only have a few colors in this image so I can skip HSL.
Tone Curve
Another type of edit that I applied during import is a tone curve.
Now, if you find the tone curve intimidating, you need help with how to use it. However, I have an in-depth tutorial explaining how to use the tone curve.
And once you go through that, you’ll always find yourself using the tone curve.
I also have video tutorials on the other tools I will use for this edit.
I’m not going into great detail right now, but you can check out the playlist of all those video tutorials in the description below to get more information about each of the tools I will be using.
Now for the tone curve, I want to create an S curve, which will make a little contrast.
So when you click and drag up, you’re making those highlights and whites brighter, and the shadows will become darker when you pull it down here to create what is known as the S curve because you can see it looks like an S.
All right, that’s too intense.
I’m going to undo that and just make a subtle adjustment.
So there’s the before and the after. So the highlights in the whites are brighter.
The darks are darker, but not as much as the whites.
And because we’re doing the opposite on those tonal values, that creates the contrast.
Contrast
The other thing I want to do is increase the contrast along the edges of the detail to give the impression that those details, like the feathers, are sharper than they currently are.
And we can do that with sliders right here, texture, clarity, and de haze, but I want to apply that to only some of the images.
So these edits here, and these down here, are what are known as global edits.
So I want to target the details in the Chickadee, not elsewhere. I don’t want to sharpen or add contrast anymore to the background.
So I’m going to skip that for now.
Tonal Values
The other thing I suggest for this particular image is to adjust the tonal values in this section.
So we have our tones, and if you look at your histogram, that’s usually going to tell you what you can fix or do to your image as far as where to start your editing for the tonal values.
So I have a lot of detail from the blacks to the whites, but I do have a little gap right here in the whites.
So I may want to adjust the tonal values to shift that histogram to the right to fill this gap and create some detail in that area.
So I will drag my white slider to the right to fill that gap. Now, if I go too far, I will start clipping data.
And this red overlay shows where I’m over-editing.
And if you’re not seeing this red overlay, but you know you’re overexposing parts of your image, make sure your clipping indicators are turned on, which are these little arrows in the top right.
And you can turn these on and off for the blacks and the white.
So if I adjust my blacks to the left, we’ll get a blue overlay instead, which represents that part of the image is becoming clipped or the detail is becoming clipped.
I’m going to do right around plus 24 the whites.
I don’t need to fill the gap but I want to move it over slightly.
The other thing I want to do in my tones is to bring back some detail in the feathers in this area and some of the other highlights in the feathers on the back of his wing.
And I can do that with the highlight slider.
Now, that will adjust the entire image, which is okay because I want to tone down the highlights in the background.
And we will do that even more in a future step first. But, before we do that, I suggest increasing the exposure just a tad, maybe a quarter of a stop, to brighten it up more.
Photo Edit Goal
Remember, the whole idea of editing is to make your image look better.
And we can do that by shaping the light around our subject to make that subject stand out even more and to bring out more detail in the highlights and the shadows, which we’ve done so far.
But we can go even further by doing what is known as dodging and burning.
And we’re going to do that in the masking tool here. But before doing that, I want to warm up the image.
White Balance
Now, on the day when I shot this, it was a cloudy day, and the color of light on a cloudy day, and even in the shade, tends to be a little bit more blue air, I should say, a lot bluer than on a sunny day, which is more white to yellow depending on the time of day.
I want to warm it up, although I could keep that color tone there now.
That will give us context about the image and the picture’s story.
And that was it was shot on a cold, cloudy day, but I like my images a little warmer.
I will increase the white balance to the right to add a yellow tone or a yellow tint to the image.
You can click and drag this to the right, but I’d like to hover my mouse over this little icon.
And then, when I press my up or down arrow key, I will increase or decrease the color temperature in increments of 50.
So one click gives me 5350, and then one more click gives me 5400.
So that’s the color that I like for this particular image.
Masking
Let’s go into our masking tool and target different elements in the image to help that Chickadee stand out even more.
Background Mask
I will start with the background first, and I want to make that background darker.
Now, before I make my adjustments, I need to adjust the mask itself because it includes this branch right here, and I don’t want to have this branch as part of this particular mask and its edits.
So I’m going to click on this subtract button here. First, I will select the brush. Then I can brush over what I don’t want to be included.
Now I’m going outside the branch here, so I will select command or control plus the letter “Z” to undo that.
And let’s go back and select our brush.
And I will make it smaller with the scroll wheel on my mouth, and hopefully, I can stay within the lines this time. All right, that looks good.
All right, now I will come over to my edit settings here, and I want to adjust my tonal values by adjusting the exposure darker.
So about one stop darker, that might be too much.
Let’s go down a bit too, say, three-quarter stop darker. But, again, it’s a personal preference on what you find suitable for your particular editing style.
So I’m going to go right there, and we can see if we look at the before and the after that Chickadee is standing out a lot more so than before.
Now this particular mask selects some of the feathers in the Chickadee.
So I will click on the brush I used to subtract from the branch.
And I will click in this area to remove that edit from the Chickadee and his feathers because I don’t want that included in the edit.
Subject Mask
Now I will right-click and select duplicate and invert mask to select my subject.
However, because I removed the branch earlier, it’s now included as part of the subject.
Again, I want to leave this out of this particular edit.
I will go ahead and subtract with the brush again, and let’s remove it from this branch.
And I want to do the top part as well.
So right up here, I must eliminate this part of the mask.
And then I’m going to go ahead and zoom in by pressing the letter “Z,” I’m going to hold down my space bar to get my hand tool, and then I can click and navigate to different parts of the image so I can work on refining the mask for this particular edit.
So I can remove all of this right here.
Now, if it’s not removing everything that you want to remove, you may want to come over here and see if you have an auto mask turned on.
It looks like I do.
I will turn that off so I can get through editing this mask faster by having that turned off.
So space bar again. And then I’m going to go ahead and remove it from here.
So that auto mask prevented me from removing all of the Masks where I wanted them.
Let’s go up here and double-check here and then Z to go ahead and zoom back out.
All right, I will increase the exposure. I want to avoid getting too aggressive on it. Otherwise it’s going to look fake.
I’m also going to tone down the highlights again. Even though we did it before, I want to target the highlights in the Chickadee itself.
But now that I’m thinking about it, I suggest targeting those edits in the background and tone down and making these highlights darker in the background so they’re not as prominent.
So by creating different masks, we can target them individually with different edits.
All right, I will go back to my Chickadee mask here. If I double-click here, I can rename this. So let’s call this Chickadee, and let’s call this one background.
All right, so I want to do a few more edits to the Chickadee itself, and then we can go on to the next step, removing the digital noise.
All right, so I will use texture clarity in Dehaze to enhance the feather details in the Chickadee.
And it will add some contrast along the edges of different size detail to make them appear sharper and add a little contrast throughout the process.
So I’m doing a bit of texture, maybe right around 10, clarity about the same.
Dehaze is more aggressive.
And as you can see, it’s adding a lot more contrast, and I’m losing more detail so I will do less de haze versus the other two.
So maybe around four to five.
So that looks good.
All right, I will click here to deactivate the masks and hide all of those.
Denoise AI
What we want to do now is go down to detail and remove the digital noise.
And if we zoom back in here, you can see a ton of noise.
So why is there so much noise?
Now that I’m looking at it, this area here is too bright.
I need to go back in and add that as part of the mask for the background.
I will add a brush and then paint over this area.
And you can see how that has darkened up that area because it’s taking on the edits I had previously applied.
And that looks much better because when it’s too bright, it distracts from other parts of the image, particularly our Chickadee.
We can also add some depth to our branch by just coming in and painting along the edge on either side.
And that adds more depth to the overall image, especially the branch. So, all right, let’s go back in, zoom in.
And let’s take a look at the ISO setting that I use for this.
I will press the letter I to reveal the metadata in the top left.
And check this out, ISO 16,000. That’s insane.
A year ago, I would’ve never considered using ISO 16,000, but it’s something that we have to do in wildlife photography because we use a fast shutter speed a lot of the time to ensure that we don’t create any motion blur.
And because I had this very large lens, which is around 10 pounds with the camera, I had to use this fast shutter speed.
Not only that, I had a teleconverter on, which meant I lost a stop light.
So I had to use the maximum aperture of F eight instead of 5.6.
Once I put that tele converter on, putting all that together with the cloudy day meant I had to use a high ISO of 16,000 to get the proper exposure, which resulted in all this digital noise.
Long story short, can we get rid of all the noise?
Yes, we can because, in Lightroom, we have a new Denoise AI tool that will magically automagically remove all of the digital noise.
So I will click right here to zoom out and click again on the face to zoom into the face because I like to look at the face when I’m removing noise.
So I did right around 90 the last time I did this.
And if you’re a bit too aggressive, which we are with 80 to 89 or 90 in this particular image, we start to lose some detail.
We can use other apps to remove digital noise that may retain some of that detail.
And we’ll go into another video tutorial comparing Lightroom’s, de-noise, ai, and other options.
I’ll put a link to that in the description below so you can get an idea of the different options for noise removal and which one may work better.
I will apply 89 for the amount, and things get set around 20 to 25 seconds to process this image.
And boom, check that out. All that noise is gone, and check this out. The detail in the feathers is now revealed. It’s ten times sharper than it was before.
So if I select both images and press the letter C, we can compare them.
It will take a second for the selection here on the left to update, but you can see we have a lot more detail, and it’s sharper than it was before.
Removing all that digital noise and applying raw detail is selected by default.
For more information, check out the video tutorial in the description below.
Photoshop Removal Tool
All right, so the next thing we need to do is retouching in Photoshop, and we can do that from Lightroom, or we can take this image and open it into Photoshop to do that edit.
To do that, we will right-click and select edit in, then choose Adobe Photoshop, and then that file will be opened up in Photoshop.
It may take a second or two for it to load up, And there it is.
Now we can use the new Photoshop AI removal tool to remove anything we want from the image.
So you’ll find that tool right inside of your healing tools here.
If you right-click, you’ll see the remove tool option right here.
Ensure you have that selected, and then you can begin applying it.
But I’d like to apply the edit on a new layer in case I need to return to the original later.
I will click on this icon to create a new layer.
Now in the tool options up here, ensure you have removed after each stroke selected and sample all layers.
This way, it will sample the layer below it, then take that information and the area you want to retouch and do its magic and blend it in with the background to create a new background for us.
So I’m just going to paint over this tree branch right here.
I don’t want to do it in a straight line because if you do, sometimes it will create a straight edge, which becomes apparent, and it will look like you retouched it.
But when you do it in a zigzag style like this, it’s a lot more natural versus a straight line. And look at that. Boom, we have that branch gone completely.
Sometimes you may need to come in and clean up the edges to blend it in better, which I need to do for this particular image, but it won’t take much work.
To do this with older retouching tools would take a hundred times longer than what we have available in this new AI retouching tool. So now you can come in, and you can select the entire area.
Sometimes that works.
Sometimes it’s better to take a little bit of the editing at a time versus trying to do it all at once like I’m doing it right now, but sometimes it will work and remove everything at once, just like that. Boom. How awesome is that?
All right, once you’re done with all your retouching, you need to save it.
And then Lightroom will automagically import the file along with the original raw file.
So I will hold down my command or control key and press the letter “S” to save it.
Or you can go up to file and select save from here.
Once it’s saved, go back into Lightroom, and you’ll find your new P s D file in Lightroom.
How cool is that? I love it.
To continue elevating your Lightroom editing skills, check out this playlist.


