Topaz Photo AI 2 Complete Guide
Subscribe
In this Topaz Photo AI version two tutorial, you’ll learn everything you need to know to get the most out of it, including…
- how to use it
- Pro editing tips for fixing out-of-focus images
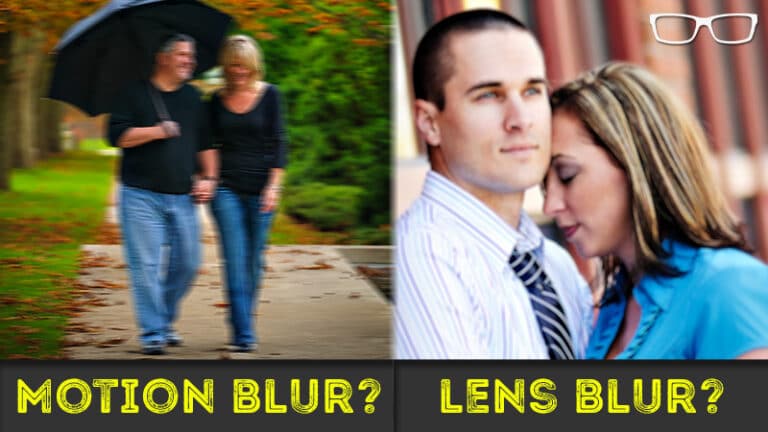
- fixing motion blur
- removing digital noise
- Sharpening
- enhancing low-res files
- upscaling your pictures
- much more
If you are ready, let’s do it.
Install Topaz Photo AI
The first thing you must do is install Topaz Photo AI.
If you use it as a plugin, close your editing app before installing it.
And if you would like to try out Topaz Photo AI before buying, use this free trial link.
It is an affiliate link and costs you nothing extra to use, but it will help support my two kids if you decide to buy it.
So thank you very much to all who have used it. You can use Topaz Photo AI as a standalone app or a plugin with editing software like Photoshop, Lightroom, Apple Photos, and Affinity Photo.
Topaz Photo AI – Stand Alone App
Let’s take a quick peek at the standalone app first, then use it as a plugin.
Once you have Topaz Photo AI open, you can add images inside of Topaz by clicking and dragging them onto the interface.
Or click this button to navigate to a folder of images to open them up.
You can also access recent images via the right panel here.
And then, down here, we have some user guides. Or leave a question in the comments below, and I’ll help you.
Open Images in Photoshop
All right, there are a few ways to open up images when using it as a plugin.
So, in Photoshop, you want to go up to filter, scroll down to Topaz Labs, and select Topaz Photo AI from here, and it will launch Topaz Photo AI.
However, before you do that, I recommend duplicating the layer so that your edits are on the new layer in case you want to return to the original.
For example, if we select this background layer and use command or control plus the letter “J,” we can duplicate it. Now, we can go in and open up Topaz Photo AI.
So, let’s go ahead and do that.
Now we have this thing here called AutoPilot.
We will talk about that in just a second.
Once it’s done applying its edits, it’s sharpening the image, so let’s remove some noise, and so we can see the edits after the fact, let’s go ahead and do something I usually wouldn’t recommend.
I will increase the strength to 100, and we will save this back to Adobe Photoshop.
It will take a few seconds to process, and then we’ll see the edits applied to that new layer.
All right, let’s go ahead and zoom in.
And you can see it’s over-sharpened here, but that’s okay.
So, the edits have been applied to this layer, and there’s the original layer.
So this is how you work non-destructively.
Open Images in Lightroom
You can select one or more images to edit your original raw files for Lightroom users.
Let’s select all these files here, and then you can go up to file, scroll down to plugin extras, and select process with Topaz Photo AI.
From here and now, I’m not using Topaz for raw files and recommend using JPEG or TIFF files instead.
But you can try out the raw process to see how that works.
Once you get through this video tutorial, you’ll better understand how all the tools work, and then you can decide if you want to use Raw, TIFF, or JPEG files.
To access that part of the workflow, we will right-click on any image and select edit in Topaz Photo AI. And then you get this new window here.
By default, it will select this top option, but then, at the bottom, you must let Topaz know which settings you want to use Once the edits are applied and saved back into Lightroom.
Now, I will show you which ones I prefer, but they are a personal preference, and I like to use TIFF files.
You have some other options here, and I like to use 16-bit with pro photo RGB and a resolution of 300.
If you choose these same options, the file sizes will be huge.
They’re well over 100 megabytes per file so you can choose eight bits instead, and that file size will be smaller, or if you need something even smaller, you can select a JPEG file.
I chose these settings because I prefer them since they preserve more colors in the image and reduce the chance of banding or pixelization of the image after processing.
I will jump into Topaz Photo AI by opening up these files inside of Topaz. It’s preparing the files by creating a TIFF file of each of the files that I selected.
Topaz Photo AI Interface
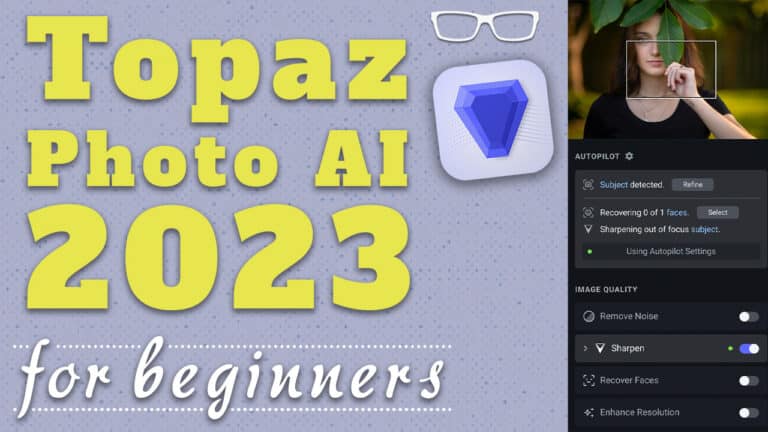
Now, the first thing you’ll notice when Topaz opens is AutoPilot.
Right here, we have this little window; it’s a status of the progress of AutoPilot, and we’re going to talk more about that in just a second.
But first, let’s go ahead and take a quick peek around the interface so you know where everything is.
Now, the Topaz Photo AI interface is divided into three sections.
The largest section displays a preview of your image. There are a couple of ways to view the before and afters of the edits you apply, located in the second part of the interface, which is this bottom panel.
And then we have a right panel here on the right side.
Alright, so I will switch to this image while showing you the before and after options.
Bottom Panel
The first option is to apply all the edits and make it visible on the entire image.
The second option is going to divide it up. So the left side is before, and the right is after.
For me, this particular tool or this preview was a little addicting at first because I couldn’t believe how great of a job Topaz Photo AI was at improving my images, making them sharper, and removing noise.
If you click on it, you can drag it left and right to see the before and after.
Check out the eyes, the beak, and the feathers. They are much sharper, and the Noise is gone.
Awesome, if you ask me.
The third option will show you the before and after side by side.
Before is on the left, the edited is on the right.
We also have some options here to zoom in and out as needed.
And then, we have these thumbnails in the bottom panel as well.
If you do not see these, click here to show or hide as needed.
Now, these thumbnails provide some information regarding what edits were applied, if any, and there’s a hidden menu for batch processing.
Let’s check this out before we move into the editing tools.
So, in this first image, there are two icons, and the one next has none.
So, this first one here has edits applied to it, and this one does not. This one has. And then these last three have no edits applied.
Now, each of them has a green pilot, which means that AutoPilot is already looking ahead and deciding what type of edits it should apply to improve your image.
When we go into the right panel, you’ll see those green dots indicating that AutoPilot has applied specific edits.
It’s just showing you which edits it’s applying, and we’ll see that in just a moment.
The other thing you’ll see when you hover over a thumbnail is the actual edits applied and the percentages used for each editing tool.
So, in this case, we have to remove the noise and sharpen. Sharpen is in green, and that means that was the AutoPilot setting that it suggested for this particular image.
Regarding sharpening, it didn’t think noise reduction was needed, so it didn’t apply that automatically. I added that after.
Now, if you look at Sharpen, we have lens blur and two percentages, and it’s in white.
And that’s because I applied these settings manually. If I hadn’t, they would be in green as well.
Now, the hidden menu is in these three dots. If we click on it, we’ll get this pop-up menu with different options.
Now, under apply, we have current settings for all.
This batch-processing tool will take all the edits for that particular image and apply it to all the other open images.
It is perfect when you want to copy edits from one to another when you have images shot at the same location with the same lighting and camera settings.
This way, you can process multiple images faster than doing them one at a time. Pretty awesome.
Topaz Photo AI Navigator
All right, now in the right panel, here we have a navigator window.
Let’s go ahead and go back to this screen. We have a rectangle indicating where we’re zoomed in currently.
Now, you need to navigate to another part of the image. In that case, you can either click on your image and drag it, and you’ll notice that this rectangle box will also update with that new location.
You can also click and drag the box to review a different part of your image. Those are all the two different ways that you can do it.
And then, under that, we have three little icons. Here, we have a crop tool, we have our select subject, and then it shows whether or not faces were detected.
It’s currently grayed out, so no faces were detected.
And if it detects a face, it will apply different edit settings.
We will go into all three of these in more detail briefly.
Topaz Photo AI AutoPilot
Before we get into the rest of these tools, let’s talk about AutoPilot because it’s a very important part of Topaz Photo AI.
It’s the brains of AutoPilot.
So, let’s take a deep dive into AutoPilot first.
AutoPilot analyzes your image with its built-in AI to determine how much noise to remove, sharpen, and improve your image.
It will automagically do this as soon as you open an image like I showed you before or when you click on a thumbnail in the panel at the bottom.
And, of course, you’ll have to wait for AutoPilot to analyze your image and apply each edit before you can manually edit the image.
As part of analyzing your image, it’s also looking for any subjects in your image, like people, pets, wildlife, or something else.
And if it finds a person, as I mentioned before, it will turn on the face-detected feature. It will apply any edits to improve those faces. It can also detect multiple faces.
Now, the cool thing is you can customize AutoPilot for your needs.
For example, let’s say you like a specific type of adjustment and find you’re using it constantly, but AutoPilot consistently picks something else.
Topaz Photo AI Preferences
Well, you can go into preferences right up here at the top, click on Topaz Photo AI, click on preferences, and then you can tell your preferences.
There are three sections here, and the third one is for shortcuts.
This will show you all the different shortcuts available in Topaz Photo AI.
Then, we have a general section with some basic options; you can leave these settings on the defaults for now. Later, you can adjust these as you learn more about Topaz Photo AI and how you’ll use it.
Then, you can adjust anything relevant to your workflow.
The AutoPilot section will give you precision and control over automagically applying these edits.
If you shoot those primarily, you may consider setting your default subject type here to portraits or landscapes.
I shoot a little bit of both, and I have the mindset to the default option.
After that, there are a few more options here, and they’re either going to have a slider or a menu, or both.
This will give you more precision and control over how AutoPilot decides which image quality models to use.
Each has additional choices via this dropdown menu, and some will have this slider that will control how aggressive the AI is.
If you’re new to Topaz Photo AI, I recommend defaulting these settings.
As you discover which settings work best with your images, you can fine-tune AutoPilot to match your expected results, increasing productivity.
If you change anything, come down here and click on save to save those changes.
Let’s dive back into Topaz Photo AI and check out these image editing tools.
Topaz Photo AI Upscaling
This image I created around 20 years ago with my Fuji S2 and AutoPilot has upscaled the image to around 12 megapixels.
If your image is below that size, it will automatically upscale to that size around 12 megapixels.
Topaz Photo AI will generate new pixels and remove noise, blur, and compression artifacts when upscaling.
You can upscale your image up to 6x with max or type in a number based on your needs.
Now, you have some options to fine-tune the upscale for best results, which includes four different AI models.
According to the developers of photo AI, “Standard” works great with images from older cameras like this image and smartphones.
High Fidelity is better for high-quality images from modern cameras and smartphones.
And then graphics are perfect for art or AI-generated images.
And then low resolution is ideal for low-quality images.
Now, for best results, you’ll have to try each of them, and after you edit some images, you’ll have a better idea of which of the four works best for your images.
Also, for a quick reminder of which one does what, hover over this little icon here, and then you’ll get that pop-up menu telling you which each of the AI Models does.
Now, just below those four AI models, you have these three sliders for additional control if you’re unhappy with the auto edit.
Alright, let’s go ahead and check out removing noise next.
Topaz Photo AI Remove Noise
So, removing noise is the one tool I use on all my high-ISO images, and it comes in three flavors: Normal, Strong, and Extreme.
You might wonder why I use Topaz Photo AI for Denoise instead of Lightroom AI noise reduction.
Well, photo AI has the advantage of providing three different AI models versus Lightroom, and we have more control and precision over the strength, some minor blur, and recovering original detail with these three sliders here.
All of this will result in a higher-quality image with no noise.
Let’s look at three different images and apply some Denoise to them.
So, this first image I created at an ISO of 1000.
And in this case, the normal AI model is ideal for that ISO setting or lower.
Now, “Strong” is better suited for images with a higher ISO, like 1600, and a little higher for this image, which I created at an ISO of 4,000.
Now, this next image here, I created this one at an ISO of 8,000. So, in that case, you might find that extreme works better.
However, this AI noise reduction model is aggressive and will remove fine details.
If you notice this, try using the recovered original detail slider to return some of that detail.
If it’s too aggressive and you’re losing too much detail, I suggest going with strong instead.
Now, for me personally, I like to use normal the majority of the time because it works for the majority of my images, and I will typically increase or decrease the strength accordingly.
Topaz Photo AI Sharpen
As of this recording, the sharpened AI models come with five options.
So, we have the standard “V” two or version two, which will replace version one soon.
If you still see both, standard “V” two is supposed to create a higher quality sharpen, and what you need to do until one replaces the other is to experiment with both to see which gives you the desired results.
The standard AI sharpening models are designed for images with low to medium blur, and strong is better for medium to high blur.
Here’s the thing: a low to medium to high amount of blur is subjective, and you’ll have to experiment with all of these to see which provides the right amount of sharpening for your images.
My favorites are Lens Blur and Motion Blur, and I use them for 90% of my images.
So check this out. Here’s an image of my daughter where I misplaced the focus point, which ended up on her nose instead of her eye, resulting in an out-of-focus image, at least for the eye.
And you always want to make sure the eyes are sharpest for portraits and wildlife.
Once I created this image and brought it into Lightroom, I noticed my mistake. I was disappointed until I brought it into Topaz Photo AI and applied the lens blur.
Check this out. It fixed it. How cool is that? I love it.
Alright, next, we have motion blur. Let’s go ahead and switch over to another image of my daughter. Let’s go ahead and fit inside the window.
I used a very slow shutter speed or one that wasn’t fast enough to freeze the action, which resulted in some motion blur, which you can see along her sneaker here, her clothing along her face, and her hair.
And with motion blur, it’s going to improve it drastically.
It won’t eliminate all of the motion blur, but it’s enough to wear her skin.
Her eyes and her clothing are much more defined than they were before applying motion blur.
And like before, we have a couple of sliders here to refine further the amount of sharpening in our images.
Topaz Photo AI Subject Select
Now, the masking tool is another vital tool for De-noise and Sharpening.
So, let’s go ahead and check that out.
The AutoPilot will search for a subject in your image. When it does, it will automagically create a mask around the subject.
I’m going back to this image here.
And if we go up here to this icon right here and hover over it, you’ll see this red overlay representing the mask.
Now, there’s only one problem: it’s not perfect, so you’ll have to adjust it as needed, or maybe you only want to target the eyes and the eyebrows like I want for this particular image because the sharpening applied to her skin makes it look unnatural.
Let’s move this over here like so.
I want to remove the mask or the sharpening on her skin and target her eyes and eyebrows.
And to do that, we must click on this select subject icon, revealing this new window.
Alright, so the first option here is to change the subject for AutoPilot to search for, and then it will update the mask accordingly.
And if I select portrait, it will do the same as it already did.
It selected all of her and didn’t select the background or the leaves.
So, I’m going to leave it at default.
But what I do like to do is to increase the feathering from the default of 50 to 100.
So I have a nice soft edge from where the edit is being applied to where it’s not being applied.
So, we can use our refinement brush to add or subtract from the mask to increase the brush size here to cover a larger area.
And I will zoom out here to show you how this works.
I will click on it, subtract, and let’s increase the brush size so I can cover a larger area faster.
So I would come in, and I would paint over the area where it should be removed from the edit like so.
And then, I would go in here with a smaller brush around her eye and eyebrow to target that area.
More specifically, an AI brush is supposed to be intelligent. It’s supposed to target different areas of the image as you paint.
Still, I don’t find it very intelligent, so I prefer a regular brush.
But once you’re happy, click apply, and that mask will be updated. Then, those edits will only be applied to where that mask is currently located.
Topaz Photo AI Recover Faces
Alright, now let’s check out Recover Faces and Recover Faces. Works best with low-res files.
This is a high res file, so I will return to this image here because it is low res and works well with upscaling.
If you upscale an image and have faces, try.
Check out recover faces to see if you can improve them even further with this AI model.
So once you have it turned on, you have a slider here for strength, which will increase or decrease the intensity of that enhancement of the face or face.
And if we look at the before and after, you can see it’s much cleaner and sharper.
It needs to be sharper.
So I will turn on lens blur, and we now have more definition in her eyebrows.
Her eyelashes are more separated, and her face is sharper and cleaner than before without recovering faces.
So make sure to check that out if you have res files.
Topaz Photo AI Preserve Text
Next, we have Preserve Text.
If you have any text in your images, you can enhance it to make it more legible if it’s a little blurry or pixelated.
However, Topaz Photo AI doesn’t automagically locate that text in the image.
You have to give it a little bit of help.
So we’re going to turn on the preserved text, and once you turn it on, you’ll get this little menu of options here to either add or subtract to the mask that you need to apply to your image.
We have a brush size here, so all we have to do is paint over the text to let Topaz know this is where the text is and enhance this text format. Please go ahead and click on apply.
Topaz Photo AI will do its magic, and you have two AI models to choose from: low resolution, noisy, compressed, and then a strength slider to increase or decrease the intensity of that enhancement.
Alright, I’m going to go back to this image one more time.
We have two more editing tools, then we will look at the crop tool.
Topaz Photo AI Adust Lighting + Balance Color
So, adjusting lighting and balance color are in beta mode right now.
They’re not 100% perfect yet, but let’s take a quick look at what these tools do so you can see how they work and use them for your images.
You can also give feedback while in beta mode to help the developers improve these two editing tools.
Adjusting lighting will fix the exposure and the image to make your image either brighter or darker.
So, to the left here, it will make your image brighter. To the right, it’s going to make it darker.
All right, I will turn that off for now.
Next, we have a balanced color. If you have a color cast in your image, try and remove that with the temperature slider here.
If you have a yellow color cast, slide it to the left to reduce that color cast and vice versa.
If you have a blue color cast, slide it to the right to add a little yellow to compensate for that color cast.
And then, if it’s too intense, you can lower the opacity to tone it down just a little bit.
Alright, now let’s check out the crop tool.
I’m going to navigate to another image here.
Topaz Photo AI Crop Tool
To activate the crop tool, click on this icon right here, and you’ll get this interface with this nine-grid box that will help us compose our image after cropping.
We have some options to change the aspect ratio with this dropdown menu.
You can type in a custom amount here, or if you want to use one of these pre-med presets here, you can use that.
These are common aspect ratios, so if you want a four by five or an eight by 10, you can choose that one or maybe a five by seven.
If you want to convert this to horizontal versus vertical, click on this center icon, and it will switch it around.
Then, you can grab a side or a corner to resize that to crop it as needed.
Click inside to drag around your image to reposition your subject as needed.
You can also click on this little icon here to use free transform, which means you can click and then resize the crop or the aspect ratio to a custom setting based on your image.
I suggest something more cinematic like that.
And then once you’re happy with your new crop, click on apply, and then Topaz will adjust your image based on that crop.
Now, the last thing we have to do before quitting the program is to click on this button to save all the images back into Lightroom.
It will automagically do that for us once you click on that.
Then, all these images will be saved into Lightroom for further processing or exporting as needed.
Check out this playlist for tips on using Topaz Photo AI and pro editing video tutorials.