My Lightroom editing workflow + tips for editing wildlife | Episode 02
Subscribe
Today I have two images of this female prothonotary warbler.
And both images were shot about 30 seconds apart.
And I got lucky that she showed up when she did because the national park where I shoot a lot of my wildlife has a sign out that says that these Prothonotary Warblers are an endangered species.
There’s a maximum of five minutes of viewing time at this location.
So once I got there, she showed up, I got this first image before she fed her offspring, which are nesting inside this dead tree, and you can see the insects inside her beak.
Once she reached in and fed them, she found something inside her beak, which looked like a grub.
So I don’t know if that’s what that is or not.
Let me know what you think it is in the comments below. So, was it too big to feed her offspring if it was a grub?
And that’s why she’s pulling it out. I don’t know what was going on there, but it’s a cool little story.
As part of this photo shoot, I also captured video based on my point of view of what I was seeing when I looked through the camera.
I captured this interaction that lasted not more than 30 seconds, 20 seconds, or less.
And it’s a small snippet of the entire morning that I was shooting on this day.
And if you want to see more points of view from me in the Wild Shooting Wildlife, check out the link in the description below to check out that point-of-view wildlife photography video.
Now, for this video, I want to show you how I edited this image.
And here’s the before and after.
So the image on the left is straight out of the camera. Edits still need to be made to it.
And this is my final edit right here on the right side.
The edits I apply are simple because I keep things as natural as possible.
And for this particular image, because I was shooting during golden hour, the “color of light” at that time of day is much warmer than what I captured.
So I was using the wrong white balance at this time of day.
So the first thing I did was I adjusted the White Balance and the Tint to be much warmer than it was initially.
So if I go ahead and reset these, you can see that the White Balance and the Tint were 5,300 and plus 14 after it was 6,000 and plus 20 on the Tint.
So that makes it much warmer than initially when I shot it.
Now another thing I noticed after I brought it into Lightroom is that it’s underexposed.
So I increased the exposure by about half a stop. The highlights were bright,
So I toned those down by adjusting the highlights to the left at minus 24 to make those highlights darker.
The shadows were really dark, and I wanted to highlight some detail in that area.
So I increased the shadows to plus 100, and I also brightened up the image by adjusting the whites, and I increased that by 18.
So that is the basic tonal adjustments that I do inside of here.
But I also apply some texture, Clarity, and Dehaze, not in this case, but usually, I will use a little bit of each to refine or clarify the details.
And these edits here will apply along the edges of different size detail to create some contrast, giving the appearance of sharper details.
I also applied a tone curve to add a little contrast and a vignette to help us focus more on the Subject versus the bright edges and the corners, which you will see here once I turn this off.
So you can see how much brighter it is without that vignette. And the vignette helps us direct our viewer’s attention toward the center of the image or the Subject.
Now, the magic happens in the masking I applied for this particular image, and I do what is known as dodging and burning.
You’re making parts of the image brighter or darker. In this case, I did much darkening in the photo except for the eyes. I made the eyes brighter.
So the first thing I did was adjust the eye via this mask right here.
Let’s go ahead and zoom in.
And the edit that I applied was to increase the exposure by almost one stop.
Now, if we look at the before, we can see that the eye is underexposed and almost pure black, creating a lifeless feeling to the Subject.
I increased the exposure to add a little bit of life back into those eyes.
After that, I selected the Subject with a new mass called the Select Subject. Lightroom did its magic and selected the Prothonotary Warbler.
And I applied these adjustments here, which included a tad increase to the exposure.
I increased the shadows to bring out more details in the Warbler and added some effects here for texture, Clarity, and de haze.
Again, that’s just adding more contrast and sharpening those details.
When I applied these edits, I realized that a portion of her head was overexposed, and I had to use my brush to subtract from that part of the mask, which you can see right there.
And if I turn this off, you can see how that area is overexposed, which is why I removed that part of the edit.
Next, I targeted different foreground and background parts with a linear gradient.
So I have two, one for the left and one for the right. So the first one here is on the left.
I’m going to go ahead and turn that overlay on by pressing the letter O, and I’m going to show the tool by pressing the letter H.
And then, when I click right here, you’ll see the handles that I used to extend from the left to the right.
Based on this, the edit would also target the Prothonotary Warbler. And it was, and I didn’t want that, so I had to subtract the Subject from this mask.
Now, you can see where that mask was by hovering over the center.
But once I removed the Warbler from the mask, it’s not affecting, or that edit is not affecting the Warbler.
So to do that, you will subtract and select the Subject to remove the Subject from that mask. I also did the same thing on the right side.
I subtracted the Subject after I applied the mask. The edits that I used were similar, and it was making that part of the image darker.
I did the left side darker than the right side, not by much, but enough to shape that light to make that Prothonotary Warbler stand out even more.
Here’s the before and the after. So these edits are subtle, but it’s enough to help our viewers center on or focus on the Warbler more than other elements in the scene.
The final step of my editing workflow is to clean up the image by removing any digital noise or digital artifacts and to make the subject tack sharp.
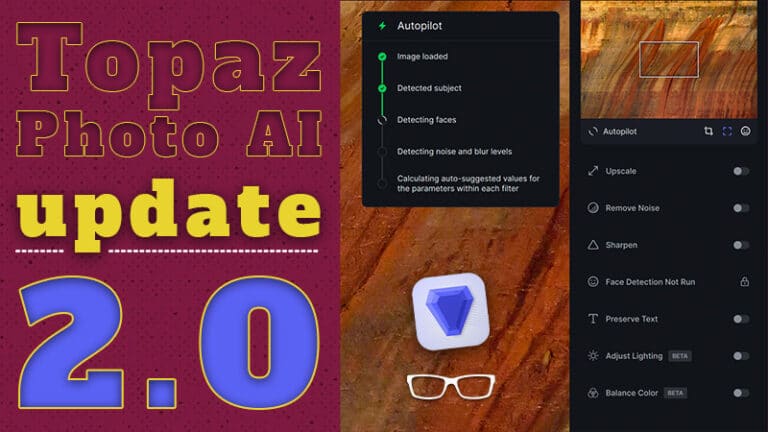
Now, we have tools in Lightroom to do this, but there’s a better tool that does a better job versus what we have in Lightroom. And what I use is Topaz Photo AI.
And I’m going to show you real quick the difference between sharpening with it versus not.
So I’ve already applied noise removal and the lens blur sharpen model, and this is the before. And when I slide this to the left, it will reveal the final results and see how sharper the Prothonotary Warbler is.
How awesome is that? I love it.
To see the magic of Topaz Photo AI for yourself and try it on your own images, check out the link below for a free trial. You’ll be blown away by how excellent this editing software is.
Check out this playlist if you want to continue learning about Topaz Photo AI.