Nikon z8 Autofocus Test with BIF
Subscribe
So how well does the Nikon z8 autofocus perform with birds and flight?
Well, we’re going to review footage of an Eagle, Barn Owl, Great Horn Owl, and a Harris’ Hawk that I captured at the Canada Raptor Conservancy with images to follow.
Plus, I have a clarification about the previous autofocus review I did for the Nikon z8. So let’s get that out of the way first.
CLARIFICATION
I lumped the Wide Area and custom focus modes into one category in that tutorial. I needed to clarify that the C1 and C2 are customizable.
This means you can customize those focus areas to any size you need. Now the question is, how do you resize C1 and c2?
Well, stay till the very end, and I’ll share how you can customize your C1 and C2 autofocus areas for your Nikon z8.
GREAT HORNED OWL
We will start with some video footage of this great horned owl. I’m using the auto area focus mode with animal subject detection.
And the owl will fly from one perch to another on the right side.
And you’ll notice that the focus mode will begin hunting or searching for the subject and will have difficulty locating and focusing on it.
So let’s go ahead and start the video here.
And you can see that the hunting is going on. And once the owl leaves this perch, it recognizes this tree stump as a possible animal.
But as the owl flies through the scene, that tree stump leaves the frame, and then the auto-focus system has to find another subject within it, making it hard to locate the owl.
So you can see here it’s focusing more on the background because it’s still unsure where the animal is.
And again, down here, it’s focusing below the owl.
And it’s not until the owl begins filling up the frame because it’s getting closer to me that it then says, oh, wait a minute, there’s the subject right there. And then, it begins focusing on this point.
And then, once it lands, it’s focusing to this point right here.
So out of this sequence of images, I took 40 images in total, and only seven were in focus.
All right, so let’s take a quick look at the 40 images I captured. I will give you some additional tips on what’s going on with the autofocus system and how to improve your chances of tracking and focusing on your subject.
I’m going to zoom in.
This is the first image of the great horn owl, and as you can see, it’s out of focus.
And so are every other image that follows until, as I mentioned, the owl fills up the frame. Then the autofocus system begins to recognize the subject and focus right here.
This image is in focus as well as the last six. A few things are going on to help the autofocus system find track and focus on a subject.
At this point, it’s starting to recognize that there’s a shift in color contrast and texture in this part of the frame, and it recognizes this as a subject because of that.
Also, because we have some separation between the background and the subject, now it’s better able to recognize this as the subject.
So if we look at the first image here, we don’t have any Bokeh going on, or the depth of field is not as shallow as it is once it begins focusing right here.
So if we look at these two images side by side, one has a shallow depth field, and the other doesn’t (even though I’m using 5.6 for both). It’s because the background is too close to the subject.
It will be somewhat in focus if it’s within that range here because the background is further from the subject. We can get that separation and creates that blurry background or that Bokeh.
And the other thing affecting the depth of field is that I’m closer to the subject, which creates more compression and blurs out the background even more.
And that helps the autofocus system, regardless of which one you use, better recognize the subject to track and focus on it.
And we can see that in this photo here.
Now, same great horned owl, just a different position within the park, two different purchases.
And the background this time is even further away from the subject than the other set of images I showed you.
And because of that shallow depth of field, there’s a greater separation between the background and the subject.
And the auto area focus mode could recognize, find, track, and focus on the great horned owl.
And in this sequence of images, I took 20 images, and only two were out of focus.
Now in the wild, we’re not going to have the luxury of positioning our subjects and ourselves in a way to create that separation between the background and the foreground or the subject in this case.
So we can choose the right autofocus mode for the situation.
Suppose you’re in a situation where that background and your subject are close. In that case, you may use a wide area focus mode instead to allow that focus mode to concentrate on that little area versus the entire frame.
HARRIS HAWK
Next, we have the Harris’s Hawk.
And this is the same location and setup as that Great Horned Owl image I showed you.
And because we have enough distance between the subject and the background, I can create that shallow depth of field, which makes it easier for the auto area focus mode to find, track and focus on our subject until it gets lower to the ground. So it’s in focus here.
And then, once it gets into this area, it begins losing the subject in all of this tall grass here.
So all of these elements here are now becoming a distraction because they are within the same plain or depth of field as the hawk, and it’s only quite sure where that hawk is once like before.
Once it gets closer to me, it begins locating, tracking, and focusing on the hawk.
Now for this set of images, I took 21 photos, and 14 were out of focus. That’s not a very good success ratio.
However, for the next set of images here, let’s see, I took 19 images, and two were out of focus, but just like before, let’s go ahead and reset this.
It had a good success rate at the beginning. Still, once it got lower to the ground, it lost track of the hawk and couldn’t focus on it until, again, it got closer to me, and then, we had enough separation between the background and our subject.
Let’s look at that if we compare this to that great horned owl image. You’re going to notice that the without the crop that I applied, the owl is flying higher than the hawk.
So no additional elements are coming into the frame to distract the focus system. And the distance between the background and the subject stays the same.
Whereas with the hawk, because it’s flying lower to the ground, we’re introducing additional elements to compete with the subject. The focus system gets confused and loses the subject in the process.
BARN OWL
Next, we have a barn owl, and you can see that the auto area focus mode is locked onto the owl. Once it takes off, it begins tracking and focusing on the owl all the way through.
We have a very short distance for this particular setup. Still, I captured four images, and only one needed to be in focus.
Now, for the next sequence, it was a bit longer of a flight. So let’s take a look.
We have auto area focus mode.
Again, we have enough color, contrast, and texture difference between the aisle and the rest of the frame to lock onto the aisle and follow it through the entire scene, but it loses it at one point.
It’s right in here because of this background change. I’m unsure if that was it, but I captured several more images, and most were in focus.
So let’s take a look at those real quick. Those are the first four images, and I took 22 or 21 images here, and only two needed to be in focus in this sequence.
So there’s the first image, and the tracking system is doing a good job of tracking and focusing.
But this image here was a little soft. It’s not bad, but it’s a little soft, and so was this image here, and then it locks back on, and it’s tack sharp again.
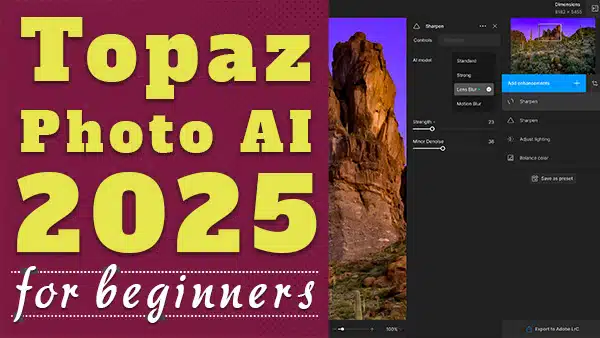
And here is my final image that I liked that I cropped and edited in Lightroom and Topaz photo AI to sharpen up that image and to remove some of that digital noise. I prefer Topaz photo AI versus Deno in Lightroom.
That’s just my personal preference.
BALD EAGLE
That’s just my personal preference. Now let’s check out the bald ego again, auto-area focus mode.
It’s locked onto the head of the bald eagle. Once it begins taking off, it loses the head of the ego and the eagle’s body and cannot track and focus on it until it finds the head of the eagle again.
It’s right there. It recognizes it, then it begins focusing right here, and it’s better able to track from this point through the end. Even though there’s some grass you’ll see here in the front, it’s blurred out enough.
It’s not a distraction to the autofocus system.
Plus, he’s flying so fast that I don’t think the autofocus system had enough time to be distracted from that grass or even this grass right here.
It can focus on the end here, which is fantastic. And check out this image that I captured from this sequence.
This image is one of my favorites from this series.
Out of 24 images, I had 12 shots in focus.
BALD EAGLE PART 2
Now for this last set of images, I switched to wide large because they wanted to give the z8 a smaller area to locate track and target my subject as he flew across the pond. And although my success rate in terms of the number of images in focus versus
Out of focus was much higher versus auto area focus mode. This area mode needed to be more significant for this subject.
I struggled to keep the subject within this area and eventually lost him. So I would’ve been better off using one of the custom area modes and increasing the size of the area to keep that subject within it.
Now the question is, how do you resize those custom area modes to get a larger area?
Well, Check out this video tutorial next to find out how.