142 Photography Words
All Digital Artists Should Know
Download a {free} PDF of this list...
...no email required! 
- Post by Parker: 30 Years experience!
- 24 Comments

Hello, and welcome to the “Photography Words for Digital Artists,” the guide! With over 132 terms, you’re bound to learn something new.
Terms have been organized into several categories: Photography, Digital Imaging, Image Attributes, Color Management, Retouching, Printing Profiles, and Software.
Table of Contents
PHOTOGRAPHY
Photography has a language of it’s own and often times it feels like learning a foreign
language.

The following photography terms include everything you should know as a photographer.
Aperture
What is aperture? The aperture refers to the size of the opening in your lens.
Think of it as a window. The larger the window, the more light that will come through.
A large (wide-open) Aperture will let more light into the camera for a brighter photo.
While a smaller Aperture lets in less light for a darker image.
An Aperture is 1 of 3 settings that determine a photo’s “Exposure.”
Or how light or dark it is.
The Aperture also provides a creative option depending on the size chosen.
Small Apertures keep the foreground and background in more focus vs. a larger Aperture.
Large Apertures blur out the background and help separate the foreground from the background.
Also, an Aperture is measured in f-stops (definition below).
ISO
A term leftover from the days of film. It was used to determine the “speed” of the film by providing a rating expressed as a number.
There’s a common misconception that “ISO” is an acronym for an international organization for standardization. Which is not true.
If ISO was an acronym (for something), then it would be spelled out as I.S.O., and not ISO. Therefore ISO is a word.
Anyway… what is ISO for in the digital world?
Well, since we’re not using film, we can’t really use it for rating the speed of it.
But, the basic concept can still be applied to digital photography. Which is…
…the higher the ISO number, the more light it will allow your camera’s sensor to capture. However, higher ISO’s also create more Digital Noise.
If possible, always try and use the lowest ISO number you can for the Exposure you need.
Digital Noise
The appearance of color artifacts in your digital photo.
Which is somewhat similar to the film days.
With film, instead of color artifacts, you’ll notice grain with faster ISO film.
Digital noise occurs more often at higher ISO settings.
The higher the ISO, the more “noise” you’ll see in your photos.
Crop Factor
Crop factor (CF) is the ratio of your camera’s (diagonal) sensor size compared to a 35mm film frame.
Autofocus
A feature of most cameras and lenses that will “focus” on your subject automatically.
If your lens does not have autofocus, then you’ll need to manually turn the focus ring (on your lens) to focus on a subject.
Blowout
Occurs when highlights in your image are overexposed and cause complete loss of detail (in the highlights).
Bracketing
A technique of taking multiple images (of the same scene) in incremental Exposure settings.
This gives you the opportunity to ensure proper Exposure.
It’s also popular among photographers that like to merge the multiple images together to create an HDR image.
F-Stop
Used to describe the Aperture of a lens. They are described numerically like this: f/1.4, f/2.8, f/5.6, f/8, etc.
The larger the “F” number, the smaller the aperture opening, and the smaller the “F” number, the larger the aperture opening. This is the opposite of what you may think and can be confusing.
If you want to use a larger aperture (to say blur out the background), just remember (the opposite) to select a smaller aperture number, like f/1.4.
Low-Pass Filter
A feature of some cameras that helps eliminate unwanted artifacts like moiré.
Wide Angle Lenses
These lenses have a very small focal length and are used to capture a “wider” part of the scene.
Wide-angle lens focal lengths are usually in the 15mm – 35mm range.
Prime Lenses
These lenses have a fixed focal length.
Prime lenses come in a large assortment of focal lengths and can include both wide-angle and telephotos.
For example: 24mm, 50mm, 85mm, 300mm, etc..
Zoom Lenses
These lenses have multiple focal lengths built-in and can come in wide, short, and longer focal lengths.
A wide zoom lens could be something like a 12-24mm.
A mid-range (or short) focal length zoom would be around 24-70.
Then, longer or telephoto zoom lenses could be 70-200mm.
Zoom lenses have an additional ring, in addition to the focus ring, that allows you to “zoom” between the different focal lengths.
TTL
Refers to a feature of cameras whereby the intensity of light is measured (for proper Exposure) through the lens.
TTL, also known as through-the-lens Metering.
Megapixel
A unit of measurement to describe the size of your camera’s sensor. A megapixel contains 1 million pixels.
Moire
An un-wanted pattern that occurs when a scene contains repetitive details, like lines, colors, etc..
This is due to the limitations of your camera’s sensor.
Not all sensors are created equal.
Some will have more weaknesses than others when it comes to capturing details and/or colors of a scene.
Red-Eye
The result of photographing your subjects with direct flash, and the pupils of your subjects become red.
But, if you’re photographing pets or wild animals, their eyes will be green (when using direct flash).
Exposure Compensation
A technique whereby you add to or subtract from the “correct” Exposure time indicated by your camera’s light meter.
This will result in your image being lighter or darker vs. what your camera suggested.
Why would you want to do this?
Well, maybe your cameras light meter is being fooled by something in the scene, like snow, and is under-exposing the image.
In that case, you can override the Exposure recommended by your camera, by increasing or decreasing the aperture and/or shutter speed (or change the ISO).
Manual Mode
A term referring to setting the three camera options, for Exposure, manually vs. letting the camera do it for you.
Shooting in Manual Mode provides full creative control and is something all photographers should strive to master.
Aperture Priority
Aperture Priority is a Metering Mode that allows you to choose a specific aperture (based on your creative vision).
Then, the camera will automatically set the shutter speed to set the proper Exposure for the scene.
Stops
A “stop” is a measure of exposure relating to the doubling or halving of the amount of light when adjusting your camera settings (in relation to exposure).
These camera settings include the aperture, shutter speed, and ISO.
Each of these settings is adjusted in fractions or whole numbers.
Wide Open
A term used to describe the setting of your Aperture to the largest Aperture for your lens.
For example, “Set your aperture to Wide-Open” or “I shot this Wide-Open.”
Stop Down
Refers to increasing the aperture number to reduce the amount of light being captured by your camera’s sensor.
Shuter Speed
The length of time the shutter remains open when activated by the shutter release.
The shutter speed is expressed in fractions of seconds.
Shutter Speed Priority
A Metering mode whereby you set the shutter speed.
Then the camera will automatically set the Aperture for the Exposure.
Shutter
A mechanism in your camera that controls how long light is transmitted to your digital sensor (or your film).
APS-C
A term used to describe the size of your cameras imaging sensor.
This is the most popular sensor size for compact DSLR cameras.
Artifact
Refers to distortions within a photo that results from image compression, interpolation, or can occur due to over-editing.
These Artifacts can include blooming, chromatic aberrations, moire, and noise, to name a few.
Metering
A process of evaluating the light from your scene to ensure proper Exposure.
AWB
An in-camera feature that will automatically determine the proper white balance for the light from your scene.
Bokeh
Bokeh is a photography term used to describe the characteristics of how the background looks when blurred out.
Bokeh appears as little circles in the out-of-focus areas.
HDR
An HDR image is one that captures the full Dynamic Range of the scene.
Every detail, in both the Highlights and Shadows, is captured in your photo… which is done through Bracketing.
HDR is short for High Dynamic Range.
Depth-of-Field (DOF)
The distance between the foreground and background that appears acceptably in-focus.
A shallow DOF refers to a smaller area of the image in focus.
A large DOF refers to more of the foreground and background in focus.
Depending on the lens, camera settings (aperture) and distance to the main subject can affect how much of the scene is in sharp focus.
Focal Length
A measurement of the distance between the lens and your camera’s image sensor when the subject is in focus.
The measurement is usually in MM: 24mm, 50mm, 85mm, 300mm, etc..
Macro Lenses
Specialty type lenses used for extreme close-up photography.
Best used for photographing small subjects at very close distances.
Think of a Macro lens as a magnifying glass.
Macro lenses come in a variety of focal lengths: 40mm, 60mm, 105mm, 200mm (these are Nikon lengths).
Telephoto Lenses
A very long focal length: 200mm, 300mm, 500mm, etc.
Perfect for capturing subjects that are far away and/or to blur out the background.
Tilt-Shift Lens
Another specialty lens for shooting architecture.
A common occurrence when shooting buildings is the shift in perspective.
If you’re close to a building and wish to capture it in its entirety, you may end up with a structure that looks as though it’s leaning.
A Tilt-Shift lens will fix these perspective issues.
Spot Metering
When your camera measures the Exposure from the center of your viewfinder.
Matrix Metering
A feature of most cameras that measures (or meters) a scene by sections for your photo’s Exposure.
Matrix Metering measures the entire scene, by sections, and calculates an average for the proper Exposure.
Center-Weighted Metering
Takes a measure of the Exposure from both the center and outer areas (of center).
It then averages the two for a balanced Exposure.
Pixelization
Occurs when an image file is enlarged to a point where the pixels are no longer able to form a smooth image.
This is due to the pixels themselves be enlarged.
A pixel is, well, square and will create the “jagged” edge or pixelization of the image.
Vignetting
An un-wanted occurrence due to the inability of your lens to evenly distribute light to the corners of your frame.
The amount of vignetting varies based on the focal length and quality of the lens.
Vignetting, in editing, is the process of manually applying a “vignette”.
Long Exposure
A photography term used to describe an Exposure with a very long shutter speed.
For example: if you’re shooting in a low-light situation, you may need to set the shutter, to stay open, for 30 seconds or more.
DIGITAL IMAGING
As a digital imaging artist, you must have a basic understanding of the digital world to get the most from your artwork.

The following terms cover the basics all photographers (and designers) should know.
Bit-Depth
This term refers to the number of colors or shades of gray in an image.
The higher the bit-depth, the more colors will be used to display an image.
Like “resolution,” the higher the bit-depth, the larger the file size.
The main benefit of using a higher Bit-Depth is little to no banding. Depending on the Bit-Depth used.
For example, an 8 Bit landscape photo could display banding in the sky.
The color transition from dark to light may not have enough colors to make a smooth transition from one end to the other.
However, if you increase the number of colors captured (i.e., 16 bit vs. 8 bit), the transition will be much smoother thanks to more colors to fill in the gaps.
8 Bit Image
These images have up to 256 colors or shades of gray.
Since an image is displayed in RGB, each color channel will result in 256 shades of color for that channel.
If we take 256 (Red) x 256 (Green) x 256 (Blue), we end up with…
…colors in our image.
16 Bit Image
These images are made up of 65,536 levels of color!
So…
65,536 (Red) x 65,536 (Green) x 65,536 (Blue) equals…
…colors in your image!
Fun Fact: Scientists estimate our eyes can only see up to 10 Million colors.
Digital Image Capture
Involves the use of a digital camera, smartphone, or another digital device to capture light information in a photo format.
Image Processing or Retouching
Involves using software to manipulate the individual pixels of our image file. The goal is to enhance the original file to fulfill our creative vision or that of our clients.
This is accomplished by adjusting the brightness, contrast, color, sharpness, cropping for composition, and using any other tools available to achieve our vision.
Pixels
In digital imaging are the individual points of color (RGB) that make up the image that we can then see on our monitor.
Image Dimensions
This is the actual size of your image, in pixels, based on the length and width. Depending on the software, you may be able to see and work with a variety of equivalent options: inches, centimeters, and more.
Image Resolution
This refers to the dimensions, measured by width and height, for the device you’re using to capture the image.
The higher the image resolution, the more detail the image will have. Higher image resolutions also result in larger file sizes.
For example, my Nikon D500 has a resolution of 5568 × 3712 pixels, and my Nikon D300 has a resolution of 4,288 x 2,848 pixels.
Image Output
A process of converting the pixels in a way that will display the image file as we intend it for others to see it. Whether it’s to be viewed on-screen or in print.
Metadata
Information about your image file that includes, but not limited to;
Camera make & model used, exposure settings, copyright info, keywords, and editing data to name a few.
File Format
A standard way that image data is encoded for storage.
The File Format type will determine how the information is encoded and whether or not the data is compressed.
In photography, the three most common types of File Formats are RAW, JPG & DNG.
XCF
An XCF file is similar to a PSD file in that it will save multiple layers.
However, this file format is used with the GIMP editing software.
PNG
A file format used when you want the transparency of a layer to applied vs. a solid color.
RAW
This file format consists of minimally processed data from your cameras image sensor.
Think of them as digital photography’s equivalent of negative in film photography.
This type of file format is proprietary based on the camera manufacturer and will have different extensions.
- Nikon = NEF
- Cannon = CR3
- Sony = ARW
In most cases, RAW files are not compressed. Resulting in much larger files.
DPI vs. PPI
Dots per inch (dpi) is a measure of the dot density in an inch of a printed image. The higher the dpi, the more detail in the printed image.
Pixel per inch (PPI) is a measurement used to define the resolution of devices such as monitors and scanners.
A common misconception is that dpi and PPI affect on-screen image resolution, but they are entirely unrelated to it.
Upsampling
A process of resizing an image larger by increasing the size of the pixels.
Plus, it will auto-fill any gaps via the available algorithms included in the software being used (which can create a softer image and/or degrade the image overall if overdone).
Upsampling is applied when a lower resolution image will be printed (or seen on-screen) at a larger size.
Banding
When the transition between colors is not smooth it is known as “banding”. The banding will create vertical or horizontal lines that are quite noticeable.
Banding occurs when the smooth transitions of gradients are rendered at a low bit-rate of 8-bit or lower.
This happens because your image doesn’t have enough bit-depth to create a smooth transition of colors (gradient).
It’s most common when shooting clear blue skies or sunsets. Shooting in 16-bit is one way to avoid banding.
EXIF Data
The information stored with your digital image file.
This information can include a range of settings.
For example, Aperture, Shutter Speed, ISO, WB, and other info like camera make/model, date and time photo was taken, lens used, focal length, and much more.
PSD
A file format that’s used with Adobe Photoshop.
This file type allows you to save all the layers from your artwork.
JPG
An image file saved in a compressed format.
When compressed, the processor within your camera determines which data to keep and deletes the rest.
When compressed, the JPG file is considerably smaller vs. RAW files.
DNG
The DNG file format is also considered to be a RAW image file.
This is Adobe’s proprietary image standard that was created to store image data in a generic and highly compatible format.
Compare that to the RAW files of different camera manufacturers (.NEF and .CR3) that have specific formats that are not as compatible.
For example, Let’s say Nikon went out of business. At some point, your software will no longer support their file format (.NEF).
This means you’ll no longer be able to process that file with that software.
With DNG, it’s more widely accepted and will always be available for editing within Adobe’s suite of software.
Since DNG is not a format created within your camera, you’ll have to convert your proprietary file format to DNG.
This can be done with Adobe’s free DNG converter.
XMP
An XMP file is a file that stores metadata information about the edits made with a camera raw file. This can include Raw photos created by Sony, Nikon, or Canon, for example.
XMP’s were developed by Adobe to be used with their suite of software like Photoshop, Adobe Camera Raw (ACR), and Lightroom.
IMAGE ATTRIBUTES
These terms are about the actual photo file itself. One could argue that these terms could be included in the photography section.

Although true, I wanted to separate the terms of the photo files themselves from the act of actually taking photos.

The following terms include file formats and phrases that describe different characteristics of your photos.
Exposure
Refers to how bright or dark your photo is. The brightness is determined by the amount of light that is captured while taking a picture.
Under Exposed
An image that didn’t get enough light during captured and is now too dark.
Over Exposed
An image that received too much light during capture and is now too bright.
Color Temperature
Refers to the color of light captured at the time you take a photo.
On the warmer side, the color is yellow, and on the cooler side, the color is blue.
Kelvin Scale
Defines the colors of light (the Temp), on a scale, via numbers.
Kelvin ranges from 1,000 (reds/oranges) to 10,000 (blues).
Yellows/Oranges range from 3-5,000.
White Balance (WB)
The act of capturing the Color Temp you want “in-camera.”
This can be done by manually inputting the Kelvin number in your camera (if the option is available) or selecting an auto WB on option.
The auto WB setting you’ll choose will be based on the lighting situation you’re in daylight, shade, tungsten, etc..
Highlights
Include the lightest parts of an image where the light is illuminating the surface.
To capture all the details in the Highlights, you’ll need a camera with a large DR.
The darker areas of an image that are receiving little to no light from the primary light source.
Like with Highlights, the DR of your camera will determine how much detail is captured.
Although, if no light is reaching an area, then the detail is not visible.
Therefore, none will be captured. Unless you use another light source or redirect the existing light (reflectors) for the shadow areas.
Mid-Tones
The range of tones in-between the Highlights and Shadows.
Histogram
A graphic representation of the tonal range of an image on a scale from 0 to 255.
Zero represents pixels that have 0% brightness, and 255 represents pixels that have 100% brightness.
Zero also represents pure black (Black Point), and 255 represents pure white (White Point).
When the full Dynamic Range of a scene is captured, the Histogram will show data (detail in the Highlights and Shadows) from the far left (0) to the far right (255).
Contrast
A measure in the difference of Hue, Saturation, or Brightness values (Luminosity).
High contrast is present in areas of your image that have noticeably different values.
On the other hand, when those differences are minimal, you’ll then have low contrast.
Dynamic Range (DR)
The difference between the darkest and lightest tones in an image: pure black – pure black.
In low light situations, the Dynamic Range is much smaller vs. a well-lit scene.
DR is also limited by your camera of choice. If your camera is unable to capture the large DR of a scene, then not all of the light (details from Highlights to Shadows) will be obtained.
Tonal Range
The tonal range in photography is the range of tones between the darkest and brightest areas of an image that are captured by your camera.
The darkest area represents pure black, and the brightest is pure white. In-between includes the shadows, mid-tones, and highlights.
Black Point & White Points
Defines the areas of your image that are pure black and pure white.
Depending on your Exposure, these points may not be precisely set at the time of capture.
When set correctly, you increase the Tonal Range of the image and add contrast to the picture.
These points can be (and should be) set during Post Processing (if not done during capture).
Shadows
The darker areas of an image that are receiving little to no light from the primary light source.
Like with Highlights, the DR of your camera will determine how much detail is captured.
Although, if no light is reaching an area, then the detail is not visible.
Therefore, none will be captured. Unless you use another light source or redirect the existing light (reflectors) for the shadow areas.
COLOR MANAGEMENT
Color Management is the process of controlling the way “colors” are represented across a variety of devices.

Also, a basic understanding of color itself will go a long way
in helping you become a better digital artist.

Plus, knowing how your devices (monitors) display color and the limitations of them will help you produce a more accurate color.
Primary Colors
Primary Colors come in 2 different models; Additive & Subtractive.
In the digital world, Red, Green & Blue (RGB), are part of the Additive Color Model.
RGB colors are projected by (the color of) light on your monitor.
In the print world, we have the Subtractive Color Model, and this consists of Cyan, Magenta, and Yellow (CMY).
Subtractive colors are applied (to the “paper”) with paint, ink, dyes, etc..
The colors that make up the respective Color Model cannot be mixed from other colors.
Instead, the Primary Colors, when mixed together, make up all the different colors.
For example…
When, from the Additive Model, you mix Red and Blue, you end up with Magenta.
In the Subtractive Model, if you mix Magenta and Cyan, you end with Purple.
Monochromatic Colors
Monochromatic Colors are different shades, tones, and tints of a single color. They’re created by making the single hue darker or lighter.
Secondary Colors
Secondary Colors are created when you mix 2 primary colors.
Tertiary Colors
Tertiary Colors are a combination of primary and secondary colors.
There are six tertiary colors; red-orange, yellow-orange, yellow-green, blue-green, blue-violet, and red-violet.
Color Space
Refers to a specific range of colors that can be represented in a photo.
Some Color Spaces can display or output (print) more colors than others. Some can even render more colors than our eyes can actually see.
Even your output devices (your monitor and in-home printer) are limited in how many colors it can display (or print).
It all depends on the quality of the output device.
As digital artists, the three most popular types of Color Spaces are sRGB, AdobeRGB, and ProPhoto RGB.
sRGB is the most widely used and accepted Color Space.
It’s usually good enough for the majority of people.
If color is critical for your work, then you may want to expand your knowledge of other Color Spaces.
sRGB
An RGB color space that was created for displaying colors on the internet.
It is the most widely used and compatible color space.
Overall, the sRGB color space has a smaller range of colors vs. other color spaces.
This can result in images that are dull and have muted tones.
If you shoot in a different color space, like AdobeRGB, your image will be converted to sRGB on most modern web browsers.
Color Wheel
A circle that visually shows the relationships among the primary, secondary, and tertiary colors.
Fun Fact: the color wheel was created by Sir Isaac Newton and related to the wavelengths of light, as opposed to hues.
Complimentary Colors
Pairs of colors which, when combined or mixed, cancel each other out by producing a grayscale color like white or black.
When placed next to each other, they create the strongest contrast in your artwork. (popular in Hollywood – to make movie posters more dramatic or dynamic).
Complimentary Colors are positioned opposite of each other.
For example, red and cyan are complementary colors.
Analogous Colors
A group of 3 colors that are next to each other on the Color Wheel.
These three colors share a common color, the dominant color, which tends to be a primary or secondary color and a tertiary.
To see the analogous colors, select a dominant color (from the Color Wheel) and then select the other 2 on either side of it.
For example; Red (primary), Orange (secondary), and Red/Orange (tertiary).
RGB
A color mode in the additive color model.
The Red, Green & Blue (RGB color channels) are added together in various ways to create all other colors with light.
CMYK
A color space used for outputting to print. CMY = Cyan, Magenta, and Yellow.
These are the primary colors for this color space, and mixing them creates all other colors. K is for black.
Although you can mix the primary colors to get black, it’s not always a pure black.
In that case, a solid black is added to create a more pure black.
Working Spaces
Working spaces are a collection of “color spaces” that tell Photoshop which one to use depending on the device used for output.
Working spaces are used to preserve the color of your image across many different types of devices.
The most popular types of color working spaces are sRGB, Adobe RGB, and ProPhoto RGB.
AdobeRGB
A color space that provides a broader range of colors (about 30% more).
When capturing your images in this color space, your pictures will be more vibrant vs. sRGB.
If you want rich, vibrant colors when printing your images, this may be the color space for you.
Calibration
The process of calibrating your monitor for precise color rendition.
ProPhoto RGB
A color space that has the broadest range of colors for photographic output.
RETOUCHING
Retouching is an art form all digital artists need to master.

Retouching gives you the power to fulfill YOUR creative vision.

Here are some terms all digital artists should know.
Dodge & Burn
A technique that was derived from the days gone by when we had to use a darkroom to develop our photos.
During the printing process, we would adjust the Luminosity of an image to either brighten (Dodging) or darken (Burn) certain areas.
This technique can also be applied in the digital world with the appropriate tools.
Doing so will allow you to creatively alter the image in a way to enhance the overall contrast, better define a subject’s form or contour, add depth, and more.
These two tools can also be used for advanced retouching of detail-level issues like skin texture problems.
Contouring
The process of creating depth and dimensions in images.
This can be done with retouching techniques that highlight and shade specific areas of the face or body or the subject in general.
Color Cast
A tint of a particular color, usually unwanted, that affects the majority of your image.
This can occur due to certain types of light that are emitting that specific color.
Clipped Highlights & Shadows
Refers to the highlights and shadows containing no pixel information (or detail).
This occurs when you over-edit an image by creating specific areas that are too over or underexposed.
It can also happen during the time of capture when your Exposure is over or underexposed.
Frequency Separation
A retouching technique that separates image details into distinct frequencies independently.
This allows you to retouch detail more precisely.
The image data is usually separated into 2 frequencies: High and Low.
The High frequencies contain information about fine details, such as skin pores, hair, fine lines, and skin imperfections.
The Low frequencies contain information about the volume, tone, and color transitions.
Color Correction
The process of fixing unwanted color casts, color shifts, and to fix uneven skin tones.
Corrections can be made in your software of choice: Photoshop, Lightroom, GIMP, ACDSee, DarkTable, or Capture One Pro, to name a few.
Color Grading
The process of deliberately shifting the colors in an image to achieve a particular mood or style.
Luminosity
This is similar to the brightness of an image. Although, inside of your editing software of choice, the Luminosity is the “perceived” brightness of a pixel.
For example, a red-colored pixel with 100% brightness has a much lower Luminosity value vs. a blue-colored pixel with the same 100% brightness.
Blending Modes
When applied, will take the layer (s) above and “blend” it with the layer (s) below it.
There several Modes to choose from to help you achieve your creative vision.
Color Shift
Occurs when the color space of the original image is outputted to a device with a different color space.
For example, editing your image (in your software of choice) with ProPhoto RGB will look different when displayed in a browser that is using the sRGB color space.
Compositing
A technique where you combine 2 or more images to create another single image.
It could be something as simple as replacing an existing background with another.
Or combining several images to help you fulfill your creative vision.
To make your composites look realistic, you’ll need to pay close attention to the light and shadows (must be consistent), depth-of-field, perspective, color, and tones.
Chromatic Aberration
A common optical issue with lenses.
As a result, the image can have noticeable colored edges; red, green, blue, yellow, purple, and/or magenta.
Masking
A retouching technique that allows artists to hide or show different parts of an image layer, adjustment layer, or layer group.
In other words, Masking allows you to control precisely where your edits are applied.
Once the Mask is applied, you then paint with Black and/or White to show or hide your edit. Black removes. White adds.
Painting with a shade of gray is also possible.
This will allow you to slowly build up the edit as needed vs. applying all at once with Black or White.
Think of gray as an Opacity brush.
Not only can you apply a Mask to a layer, but you can also use one to a group layer (in Photoshop only at this time) as well.
Layers
Contains the data of pixels or vectors, being displayed from your file.
Multiple layers can contain different data to keep your original layer, the photo itself, for example, from being destroyed.
Layer Masks
An add-on to “layers” that allow you to control precisely where your edits are placed on your file.
Heal
The area that you target to “heal” from will take the texture, colors, tone, and other data to cover up the area being retouched and blends it together.
This results in a much more natural edit.
Although Heal sounds like the real winner, it will not work 100% of the time for all edits.
Especially along edges with a strong contrast of texture and colors.
If you’re not getting the results you want, from Heal, switch to the Clone tool (and vice versa).
Clone
The area that you target to “clone” from copies all the pixels from one area.
Then it applies those pixels in the area that is being retouched.
If the area being retouched doesn’t have the same texture and details in the shadows/highlights, it will not look natural.
PRINTING
There are a variety of factors that can affect your final printed artwork.

One of the most important is Profiles.

Although they are related to color management, I decided to list them here with other printing terms.
ICC Profiles
Allow you to obtain the correct color reproduction for your display monitor.
These are software-based profiles that consist of data which will specify how color should be produced and its relationship to other colors.
Assigning Profiles
The act of changing the Embedded Profile to a different profile.
Embedded Profile
The color profile that is attached to your image that describes the color space.
Converting Profiles
The process of turning color information from one color space to another.
Ink-Jet
Designed to spray ionized ink onto a sheet of paper that will create the image it was programmed to produce.
Sharpening
The process of sharpening an image for specific printing situations.
For example, the amount of sharpening you apply will be different for a 4×6 print vs. a 30×40 print.
The amount of sharpening applied could also be affected based on the GSM of the paper, the texture, whether it’s being printed via an Inkjet or photo paper.
A one-size-fits-all approach to sharpening is not advised.
Watermark
A symbol, text (your signature), or even your logo that is applied to your artwork.
This is mostly used for copyright purposes (for photographers)
Digital Printing
The process of printing your digital images on an inkjet printer.
Analog Printing
Similar to the good ‘ole days of “printing” in a darkroom.
The image is placed on chemically coated paper and then is further developed in a chemical bath, rinsed, and dried.
Embossing
The process of raising text or a design that is pushed up above the surface of the paper.
This creates an almost 3D like effect.
Paper Coating
Affects the qualities of the paper itself.
The coating can affect the smoothness, how glossy it is, the weight, and more.
GSM
A unit in the printing industry that describes the weight of the paper.
The higher the GSM number, the heavier it is.
Paper Finish
The “Finish” refers to different properties of the paper: texture, thickness, and more.
Popular finishes include, but not limited to, matte, glossy, canvas, luster, satin, and more.
Giclée
A fancy (French) term that refers to the digital printing process known as inkjet printing.
Inkjet printing sometimes has negative connotations, and Giclée will be used to describe the inkjet printing of “fine art prints.”
SOFTWARE
Software is a personal choice and should help you achieve YOUR creative vision.

As a digital artist, you must decide on which software will help you best achieve your desired result.

Here are a few terms that can help you get the most out of your software of choice.
Raster vs. Vector
Not all editing software is created equal.
It’s either (primarily) a Raster based or Vector based software.
Raster-Based Software
Presets
Essential for a fast and productive workflow… if used correctly.
Presets are nothing more than data that is saved to re-use at a later date.
For example, instead of trying to remember the exact edits you applied to one image (let’s say last month), you can save that information into a preset.
You can then apply all those edits to future images, quickly and easily by utilizing the preset.
Photoshop
Adobe Photoshop is a raster graphics editor developed and published by Adobe Inc. for Windows and macOS.
It has become the industry standard not only in raster graphics editing but in digital art as a whole.
Although, over the years, new developers have started to take market share away from Photoshop.
GIMP
GIMP is also a raster-based graphics app and is a free alternative to Photoshop.
The development process for GIMP is slooow.
They’ve yet to include some basic features that I can’t live without; Adjustment Layers, One-click subject selection, seamless RAW editing, and more.
Vector-Based Software
Displays the artwork through individual points.
Mathematics is then used (automatically by the software) to join the points with a line.
Some popular Vector-based software: Illustrator and Inkscape.
Although the Raster based software (mentioned above) is primarily used for showing pixels, they can also display vector-based data.
For example, shapes (in Photoshop) and text layers are Vector based data.
Keyboard Shortcuts
Your key to complete your projects faster.
Studies have shown that the use of keyboard shortcuts can save you one hour for every 8 hours worked!
What will you do with an extra hour per day?
Lightroom
Lightroom is an app primarily for editing RAW files. There are three levels of Lightroom; Classic (pro, in my opinion), CC (desktop only), plus a Mobile version.
With Classic, you’ll have a full-fledged system for cataloging, organizing, and editing your images.
The CC version does have some organizing features. However, it’s not as robust as Classic.
darktable
darktable is a free alternative to Lightroom.
Although you can organize your images, it is clunky at best.
Some photographers prefer the editing results of darktable compared to Lightroom.
The ease of use of Lightroom, for me, is the clear winner.
COMPOSITION
There are over 30 different types of Composition techniques + rules that can help you create better images.

Here is a list of a few and more are coming soon...
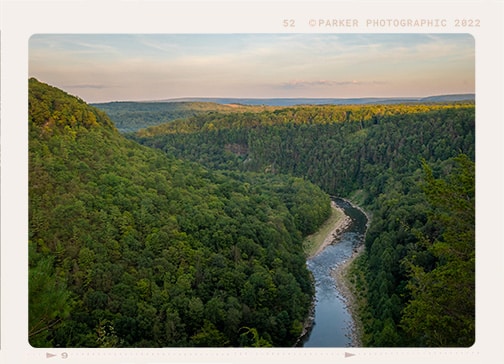
Composition
Composition is the placement or arrangement of visual elements in a work of art as distinct from the subject of work.
It can also be thought of as the organization of the elements of art according to the principles of art.
Texture
Textures in photography are the surface
qualities of 3D forms.
Leading Lines
A natural or man-made imaginary line, created by elements and or objects within a scene, that leads your viewer’s eye to a specific focal point that you want to highlight.
It can also engage your viewers by directing your viewer’s eye through your photograph.
Framing
Framing is the act of taking something from a scene and “framing” the primary subject.
Rule of Odds
Include an odd number of subjects in your composition vs. an even number.
Layering
Layers in photography are similar to their namesakes in editing software, like Photoshop and GIMP.
In essence, you stack or layer multiple elements throughout your scenes to enhance your composition.
Juxtaposition
The act of placing two or more elements side by side that are in contrast with each other.
Expressions
Expressions in your portraits represent the personalities of your subjects.
Although they can also represent an emotion, the person is experiencing at the time of capture.
Repetition + Patterns
Repetition is simply an element that is repeated throughout your composition. And repetition used for a decorative effect is a pattern.
Repetition of an element creates a pattern. This pattern grabs our viewer’s attention.
What's Next...
Please support this page by leaving a comment below!
Either to just say hi, provide feedback, or if you have any questions about these terms or any others that may not be listed here.
Thank you, and have an awesome day! Chris





24 Responses
Learning a lot….Thank You
Hello,
I was wondering if there is a way i can print out these so I can keep and put in a notebook and have them to study or look back on to help refresh my memory?
At this time I don’t have a PDF file. You should be able to print the page as is though.
Thank you. Very informative and great for a refresher.
You’re welcome Jeremy.
Thank you for the information!
Anytime Shruti
I have learnt a lot about Photography, Graphic design and Web design. Thanks!
You’re welcome.
when will you be ready with PDF?? I am old school in this as i prefer studying via hard copy instead of soft copy.
Sorry, not anytime soon.
Well explained and easy to understand but I suggest to include pictures to some inconceivable parts like in “examples”, for others to picture what is being said, especially for those beginners and & don’t have any idea yet. That’s all, but the overall text is very informative.
This is the best illustration of the photographic terms purely meant to be entirely understood and grasped by any novice. Thanks a lot Chris. Would be of great help if we could have a PDF version to download and refer. Best in class
Thanks for the valuable information. Really helpful, got here from the Udemy GIMP course.
learned so many things!!!
Thank you very much!
Very helpful reminder, thanks for making it easy to learn the basics.
Thank you very much ! ! !
Thank you for the great information and content you are sharing I found this course from your Gimp course love them both! I appreciate how you are always updating and sharing info and I like your teaching style it is easy to follow and understand.
Thanks a lot!!!
That’s really helpful, thanks!
Just getting started but I’m already quite impressed. I think this course is going to be very good.
Thouroughly enjoyed reading this prior to diving in the course. Explained some gray areas and will utilize as my knowledge base expands. The
This is good thank you so much